Weird title eh? I have so many box making videos that I have to try to identify them any way I can. I am NOT a writer and my titles are not very original but I am sure you will forgive me because this is a really cute gift box and it just so happens that it is the project I am sharing today. I hope you enjoy the video and have a good weekend. The details are after the video and supply list. Enjoy.
Hello and thanks for hanging out with me today. I have a really sweet little favor box for you today and it is a different build for me (in other words I almost doubted myself when I was demonstrating it thinking I had it wrong). Anyway, check it out and let me know what you think. The details and supply list are below.
The details:
Card stock 8 1/4 by 10 1/2 inches
Long side scoring at 2, 5, 7 and 10 inches.
Short side scoring at 1 1/4, 4 1/4 and 6 1/4.
Patterned Paper sizing:
2 pieces sized 2 7/8 by 1 7/8 inches (front and back)
2 pieces sized 2 7/8 by 2 7/8 inches (sides)
2 peices sized 2 7/8 by 1 7/8 inches (for the lid top and front)
1 piece 1 7/8 by 1 7/8 (cut diagonally in half for the lid side)
Hi there. Thanks for joining me today. This is the project that I am sharing with you today. I managed not to eat all the chocolates in the pouch, can I hear an Amen!!! Chocolate is my favorite. Anyway, check it out!
Product List
The particulars:
Inside box:
Cardstock sizing:5 1/4 by 3 3/4 inches
Long side scoring: 1 1/2 and 3 3/4 inches
Short side scoring: 1 1/2 and 2 1/4 inches
Patterned Paper Sizing: 2 pieces sized 1 1/4 by 2 inches and 2 pieces sized 1/2 by 1 1/4 inches.
Outer Pouch
Cardstock sizing: 3 by 11 (or 12 inches)
Long side scoring: 4, 5 1/2 and 9 1/2 inches
Patterned Paper Sizing: 4 pieces sized 3 3/4 by 2 3/4, 1 piece sized at 1 1/4 by 2 3/4 and 2 pieces sized 1 1/4 by 2 3/4 (or if you are using the 12 inch card stock size these pieces are 2 1/4 by 2 3/4 inches). The white greeting piece is 3 1/2 by 2 1/2 inches.
Cardstock sizing: 8 1/2 by 11 inches
Long side scoring: 1/2, 2 1/2, 8 1/2 and 10 1/2 inches
Short side scoring:2, 4, 6, and 8 inches
Patterned Paper Sizing: 4 pieces sized 5 3/4 by 1 3/4 and 1 piece 1 3/4 by 1 3/4 inches.
Hello there. I saw this demonstration from a lady in the Uk and I really liked the box but it was too big and it seemed to be quite complicated. So, in my usual fashion I dumbed it down so I could wrap my head around it and voila…a simple project appeared. 🙂 Check it out!
Box Cardstock sizing:10 1/2 by 4 3/4 inches
Long side scoring: 2 1/2, 5, 7 1/2 and 10 inches
Short side scoring: 3/4 inches
Patterned Paper Sizing: 3 pieces sized 2 1/4 by 3 and 2 pieces sized 2 1/4 by 2 1/4
Bottom Tray Cardstock sizing:5 3/4 by 4 1/2
Long side scoring: 1, 1 3/4, 2 1/2 and 5 inches
Short side scoring: 1 3 1/2
Lid Cardstock sizing: 4 1/16 by 4 1/16 inches, and score on all sides at 3/4 of an inch.
Hello there! Thanks for stopping by. I hope you are headed to having a wonderful weekend. For today’s project I am sharing what I am giving to my February customers who shopped in person or online with me this last month. If you are visiting and are considering purchasing Stampin’ Up! products I hope that you consider me as your demonstrator as I do like to give a gift of appreciation when you do shop. I try to keep the projects small so mailing them isn’t a super costly thing. This month I had to include chocolate because well, you know, it’s my favorite (if you have been following me for a while you probably know that already). Thanks to all who shopped with me and please know that I truly appreciate your business.
Hello and welcome. A little house keeping before I begin with my little demonstration on how to make this cute little chocolate book. Sale-a-bration (Stampin`Up!`s biggest annual sale) will be ending in 6 weeks. Last week the limited edition products that were in the the Sale-a-bration brochure (pages 16 thru 19) are no longer being offered. In their place there is 3 more items that have been launched for the last 6 weeks. If you look to your right you will see the brochure cover with the title Sale-a-bration 2nd Release, feel free to click on it to see the new awesome products that are offered. In order to get these exclusive products all you have to do is spend $60 with me and choose one! I hope you take advantage of this sale as once March 31 comes along, all those exclusive products are gone. 😦
Just a note here…while sale-a-bration ends March 31 the Occasions Catalog stays current until May 31 and then something wonderful happens…THE NEW ANNUAL CATALOG!!! New colours, new papers, new stamps…all very exciting with a bit of bittersweet goodbyes to our 2014-2016 In-Color inks and papers and embellishments. I do not know what will be retired out of the regular offerings but I do know for a fact that those colors are goners. Once they stop production those colors are hard to come by. In case you loved these colors I have complied a few links for easy shopping with me. I thank you again for choosing me as your demonstrator and look forward to doing my best for you.
Soon to be retired…stock up now before it`s too late!
Ok, on to the project for today. Can anyone say Chocolate!!! It`s my favorite. Here is a little book in which to put your chocolates (if you can control yourself and not eat them before you wrap them in the little book (it was a real problem). Anyway, check it out!
Cover Cardstock sizing:5 3/4 by 3 1/2 inches.
Long side scoring: 2 1/2 and 3 1/4
Patterned Paper Sizing: 2 pieces for the mat sized at 3 1/4 by 2 1/4 and 2 pieces sized 2 by 3 inches.
Inside packages (2) Cardstock sizing: 4 1/2 by 3 inches.
Long side scoring:3/8, 3/4/ 3 3/4 and 4 1/8 inches
Short side scoring: 2 and 2 3/8 inches
Hi and happy Friday. I hope you week was great. Today I have a cute project for you if you have children then this would be right up your alley. I hope you like it. Check it out.
Hi there and thanks for stopping by. As I state in the video this is a box for that super special card that you spent so much time to make. It will protect said card and be a gift on it’s own. Check out the pictures and make sure to say a big hello to my friend Karen who inspired me to make this for you.
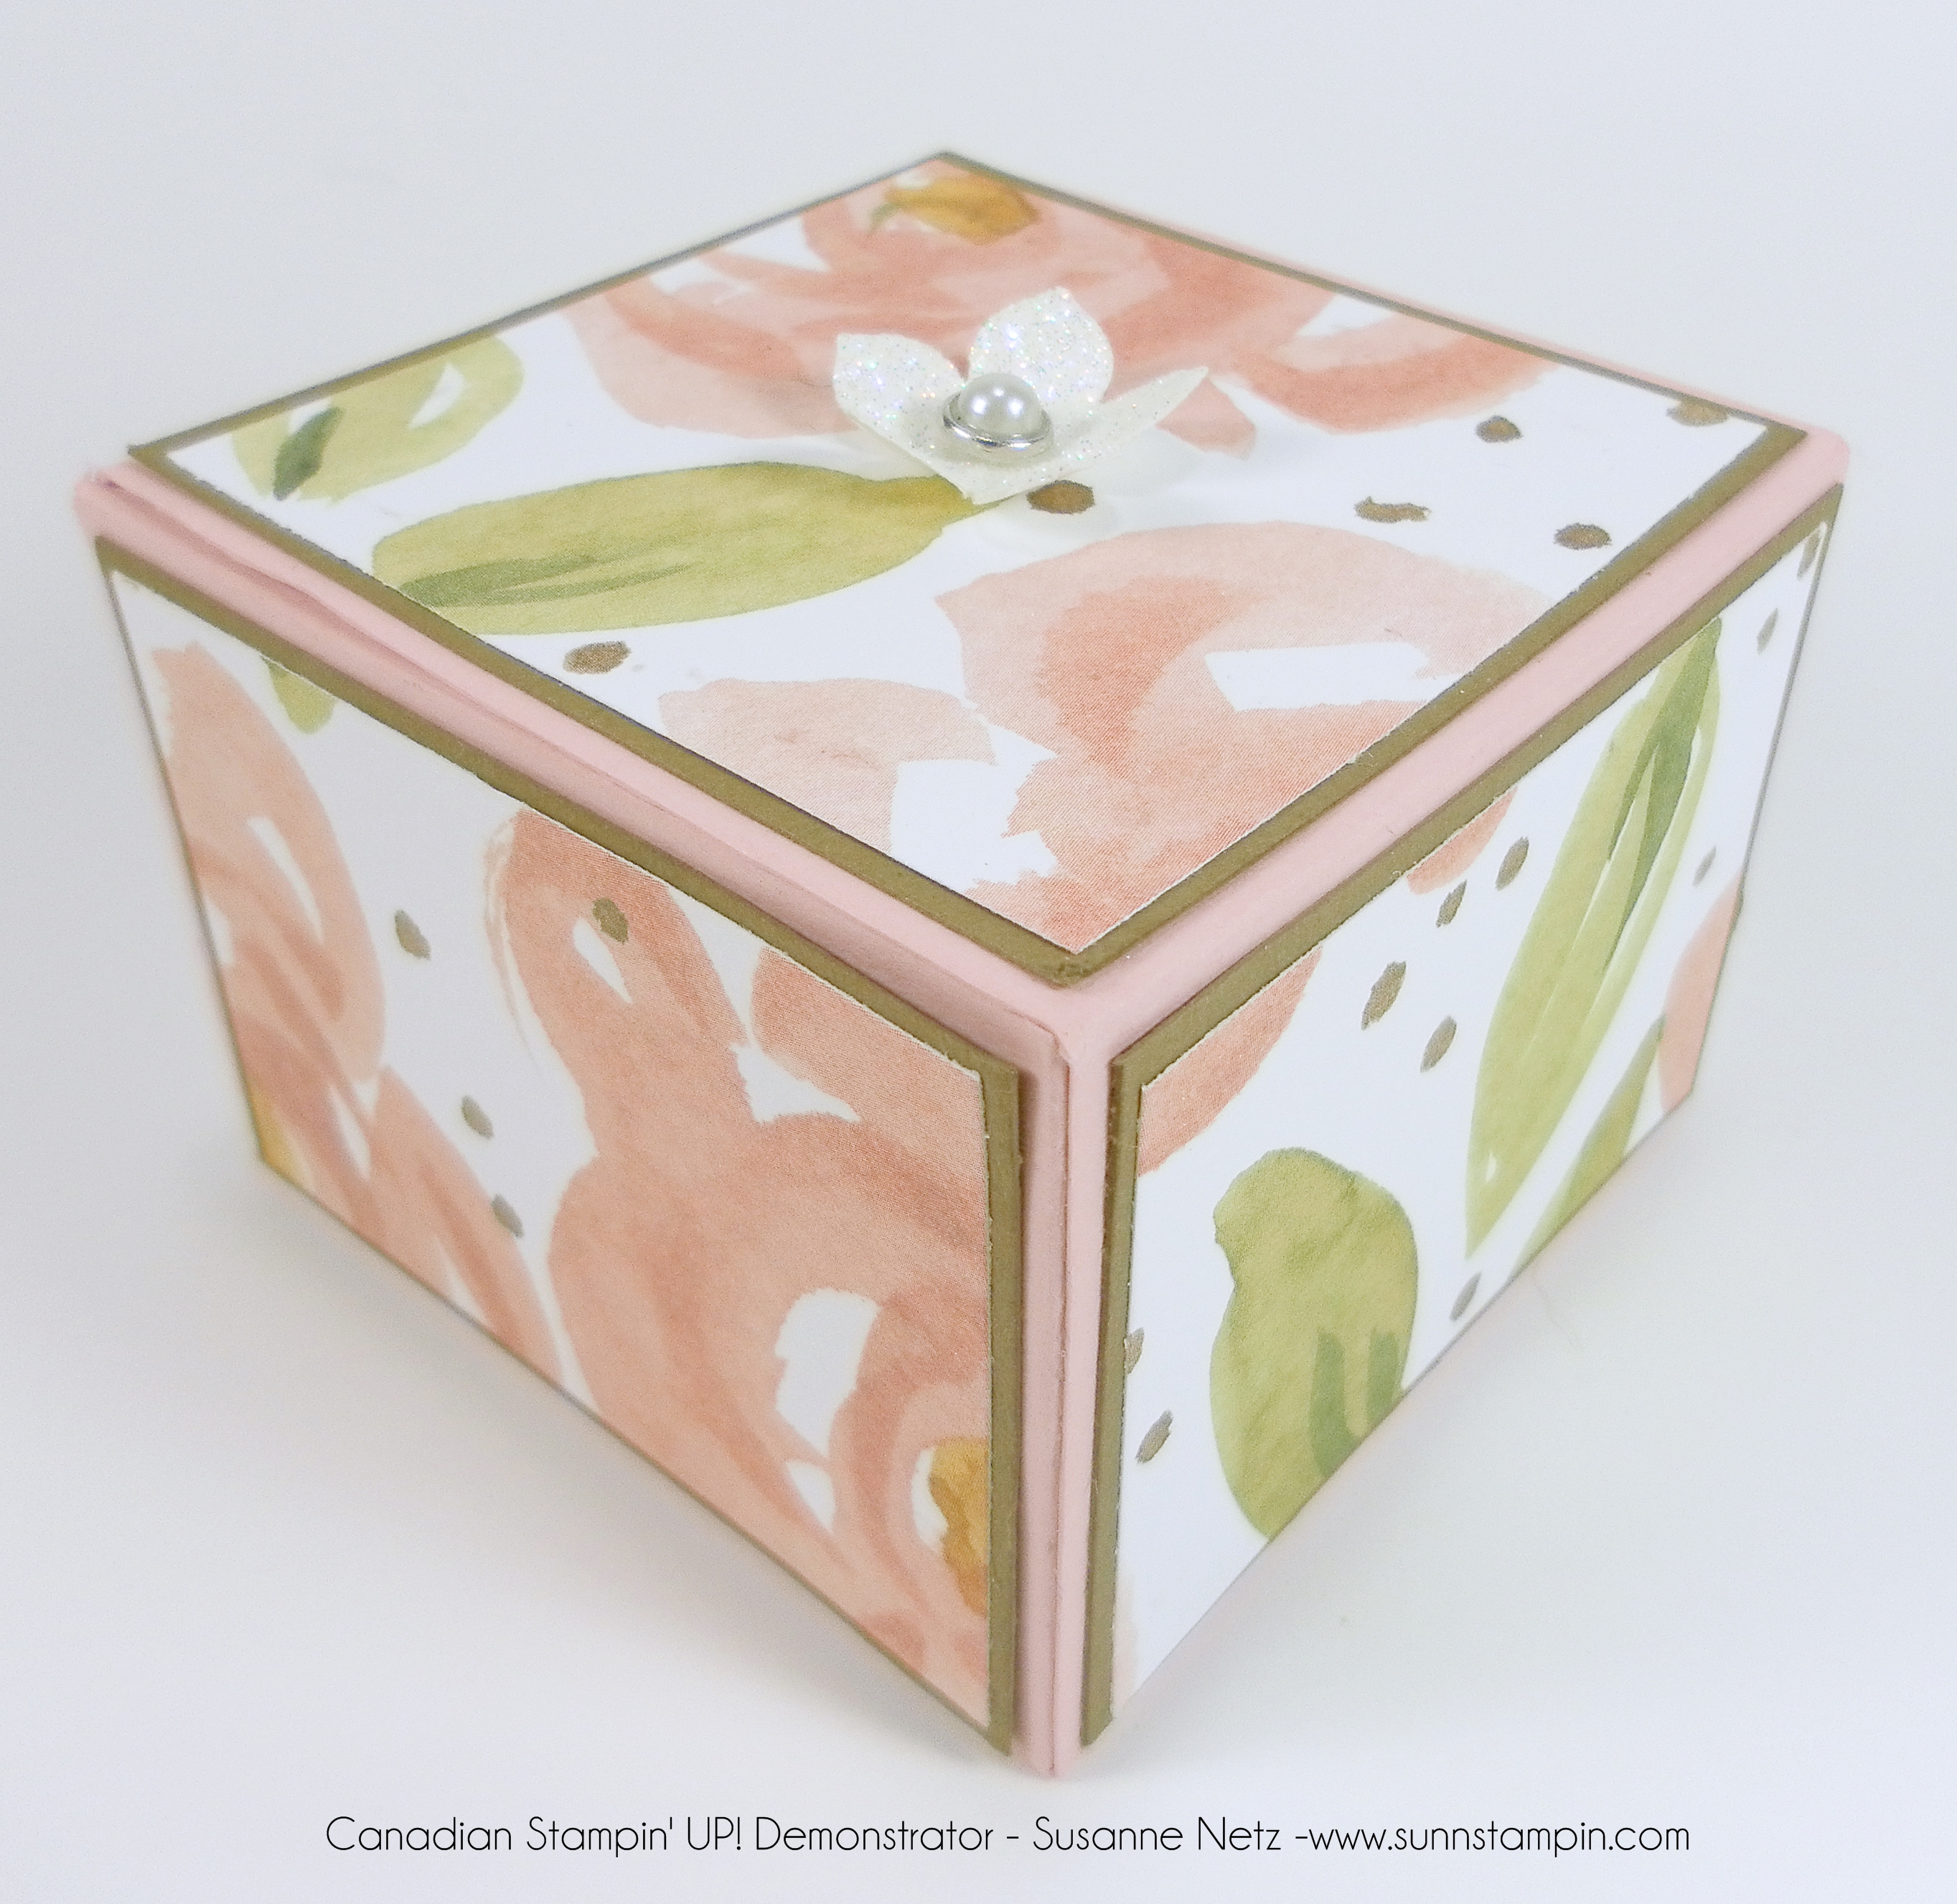
Hello and thank you for stopping by today. I have a very sweet project to share with you today. I hope you like it. Check it out! The particulars are after the video and of course the supply list is there too.
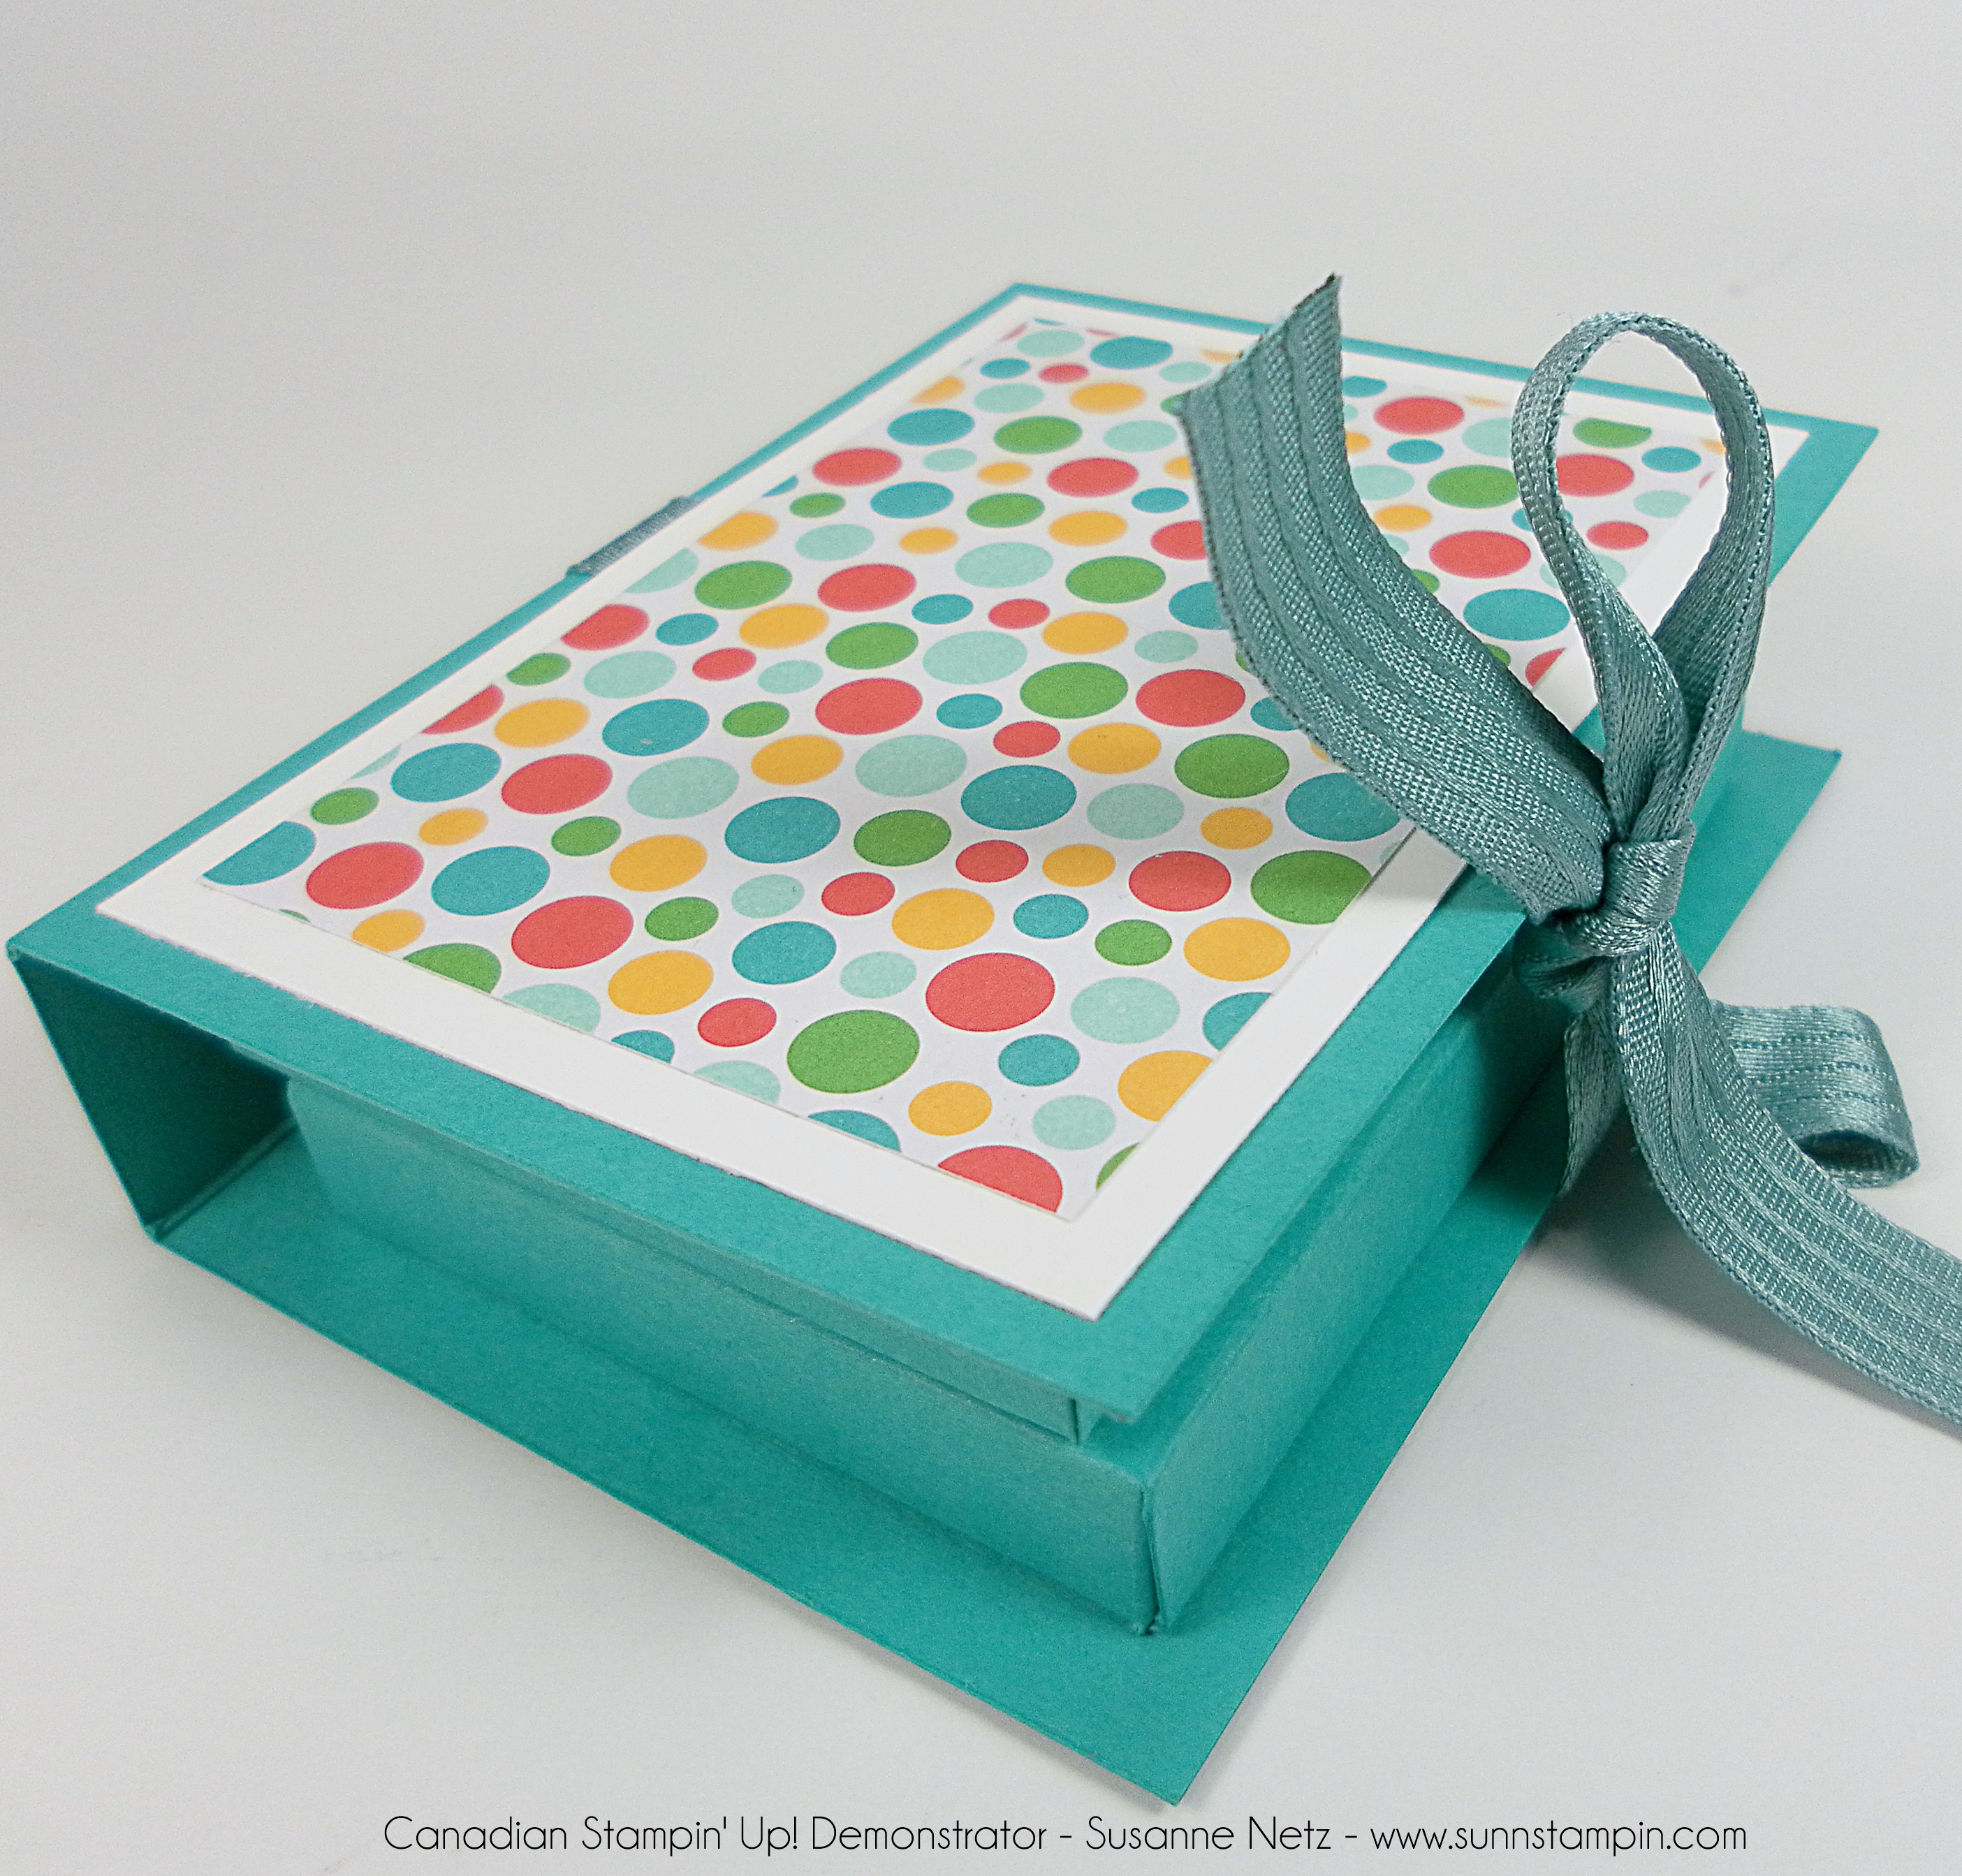
Oh, I love things that are sturdy and practical. I have made 6 of these boxes with drawers and am now storing my inking sponges in them. Best idea ever!!! Check it out!
Scoring on the long side at: 2 3/4, 5 1/2, 8 1/4 and 11 and on the short side at: 2 3/4, and 5 1/2.
Patterned Paper Sizing for inside box
1 pc 2 1/2 by 2 1/2
Notes: It helps to put on the patterned paper before you construct the box. Remember to put on the patterned paper BEFORE you thread the drawer pull (makes life easier…trust me).
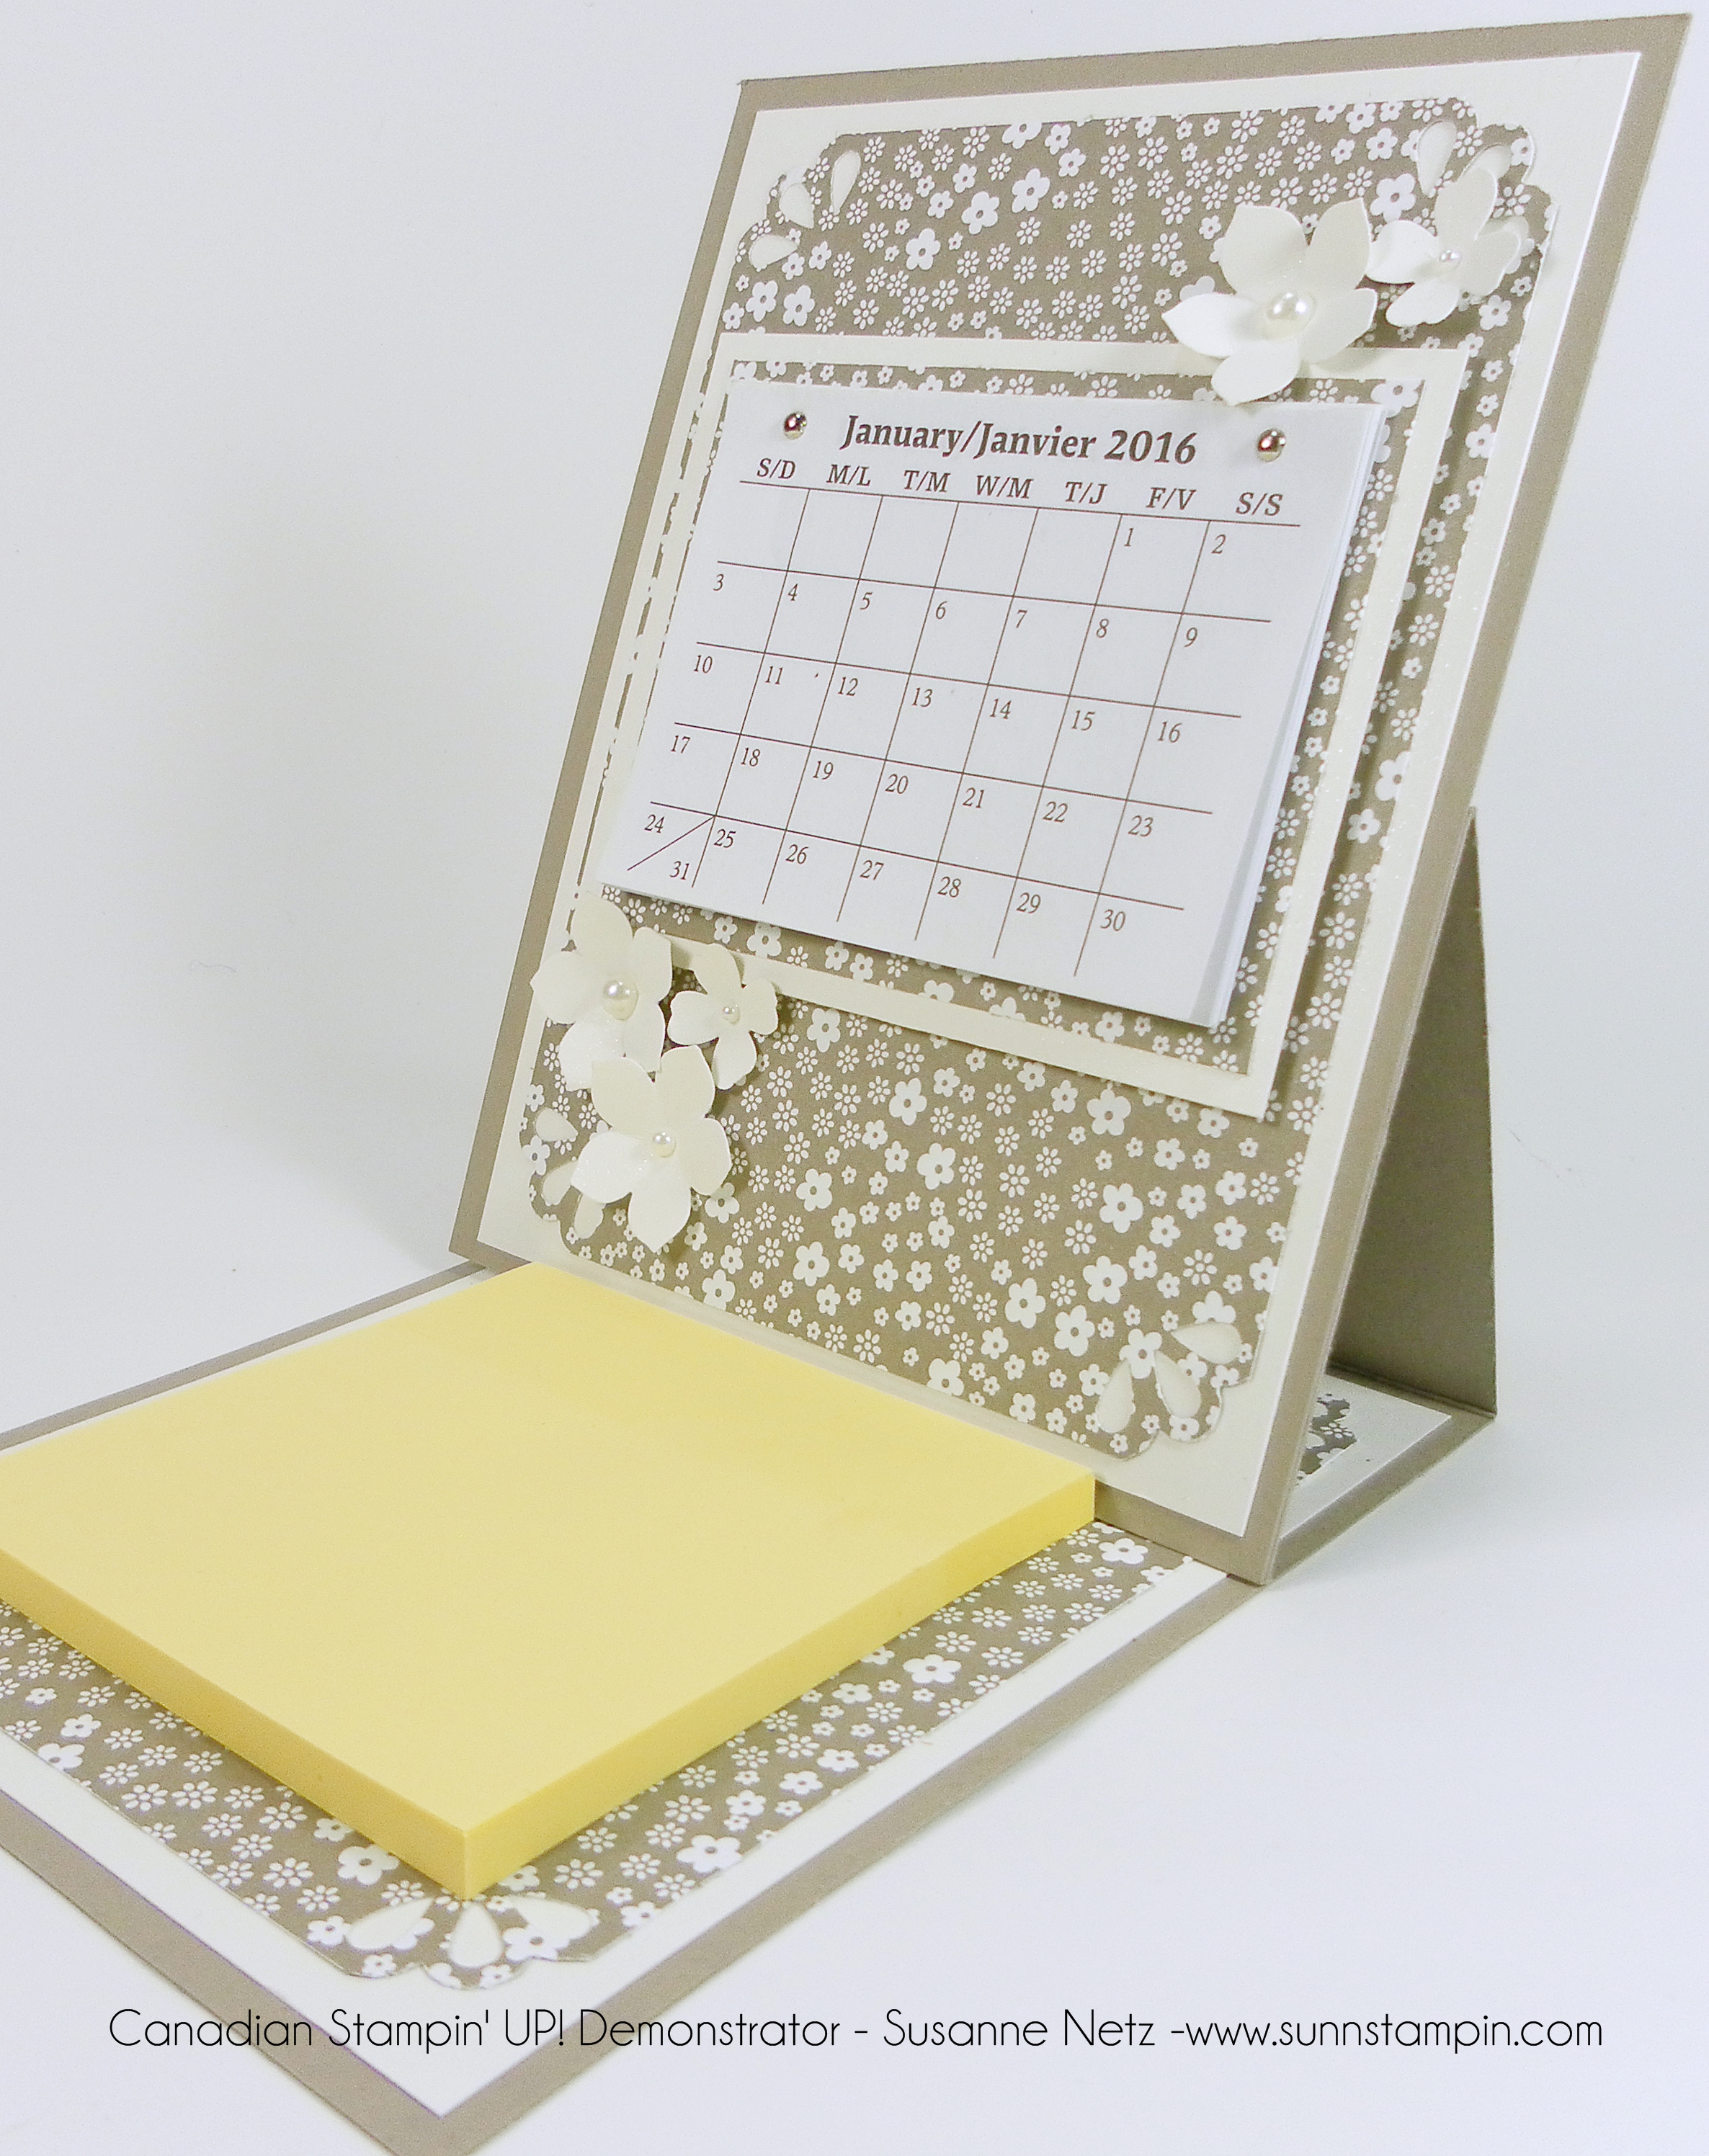
Hey everyone, I hope you had a good week. It’s halfway through the first month of the year and I am just getting these put together. Whoops, just a bit slow. These mini easel calendars are perfect for your crafty friends or co workers. I’m sending them to my customers who shopped with me in the month of January along with a little extra something. Check it out!
The particulars:
Easel Cardstock: 1 piece sized 4 1/4 by 11 scored at 2 3/4 and 5 1/2.
Easel Front Panel: 4 1/4 by 5 1/2
Mats for front panel and bottom base are exactly the same sized at 5 1/4 by 4 (white) and 5 by 3 3/4 (patterned paper).
My mini calendar measured 2 1/4 by 3 so my patterned paper mat for that was 2 1/2 by 3 1/4.
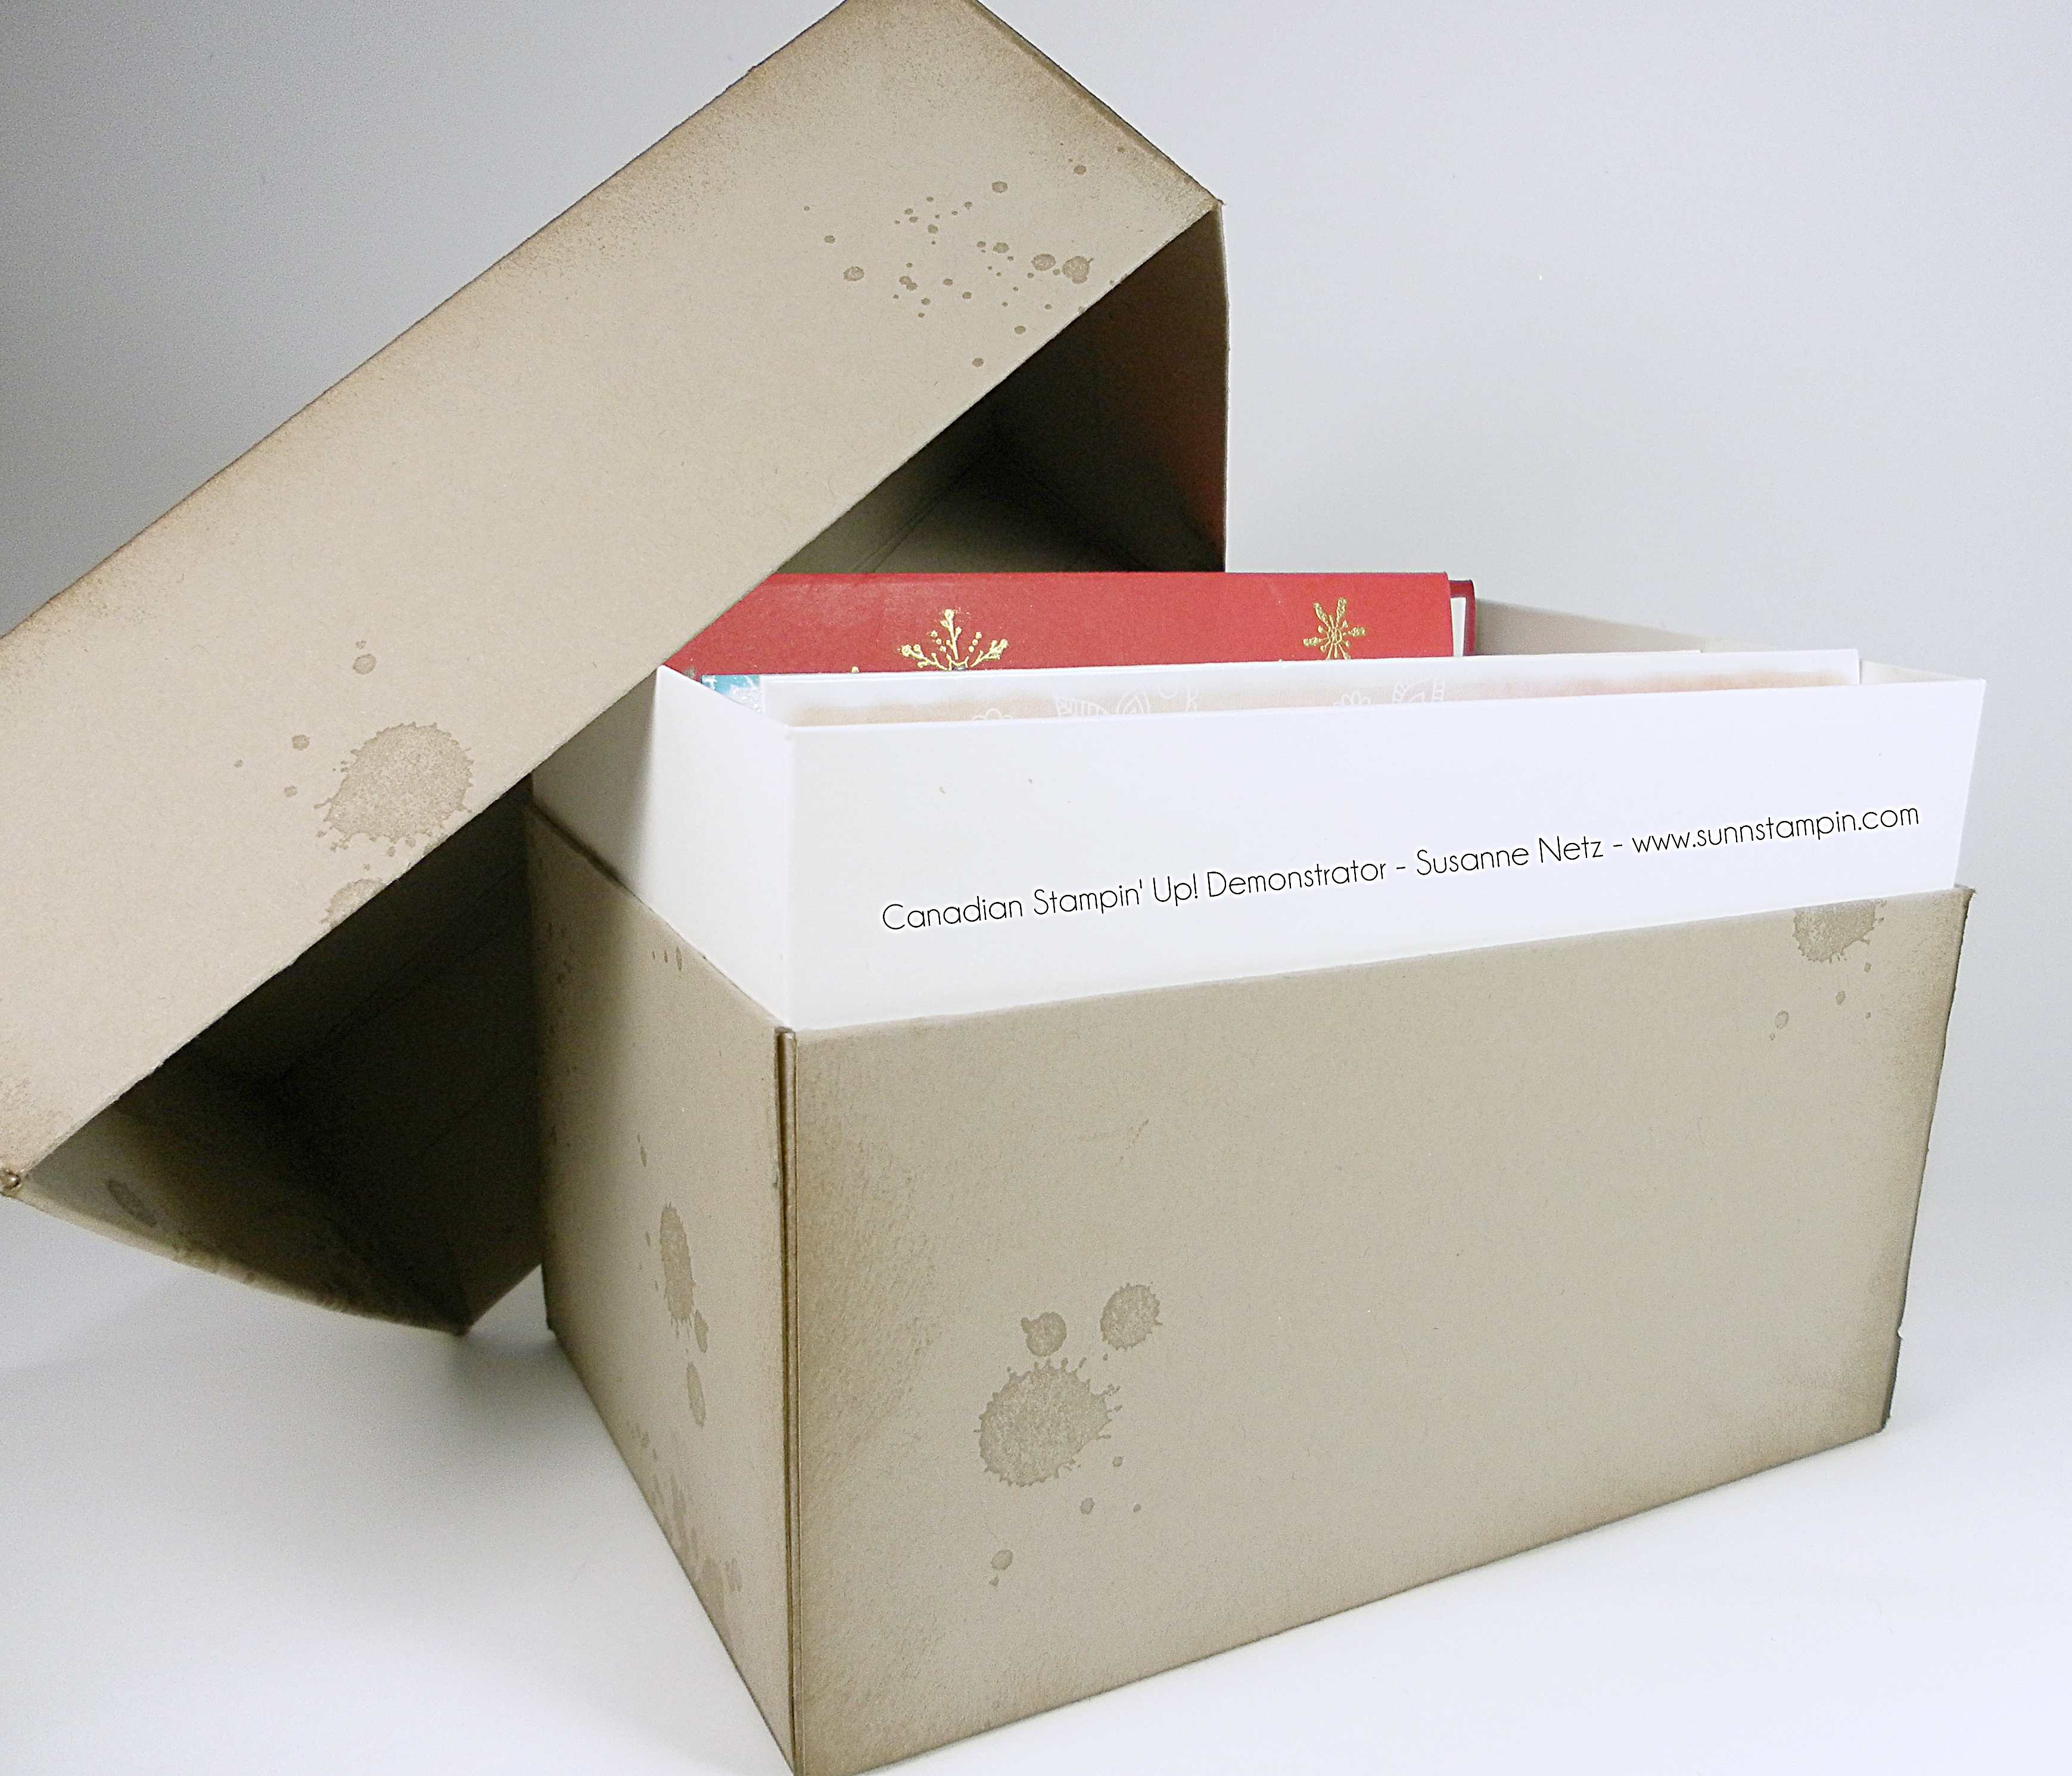
Hello friends. Every year I do like to give you a project that can house all the cards that you may make during the year. The first year I did a simple open top card holder, and last year I did a perpetual birthday card holder with a lid and a birthday booklet, and this year is a super strong, super big card box with double walls and an insert that will hold at least 20 cards plus envelopes. The video is long so I totally apologize. It’s not me chatting so much as there is many components to put together. I hope you stay tuned if you are interested. 🙂 Check it out!
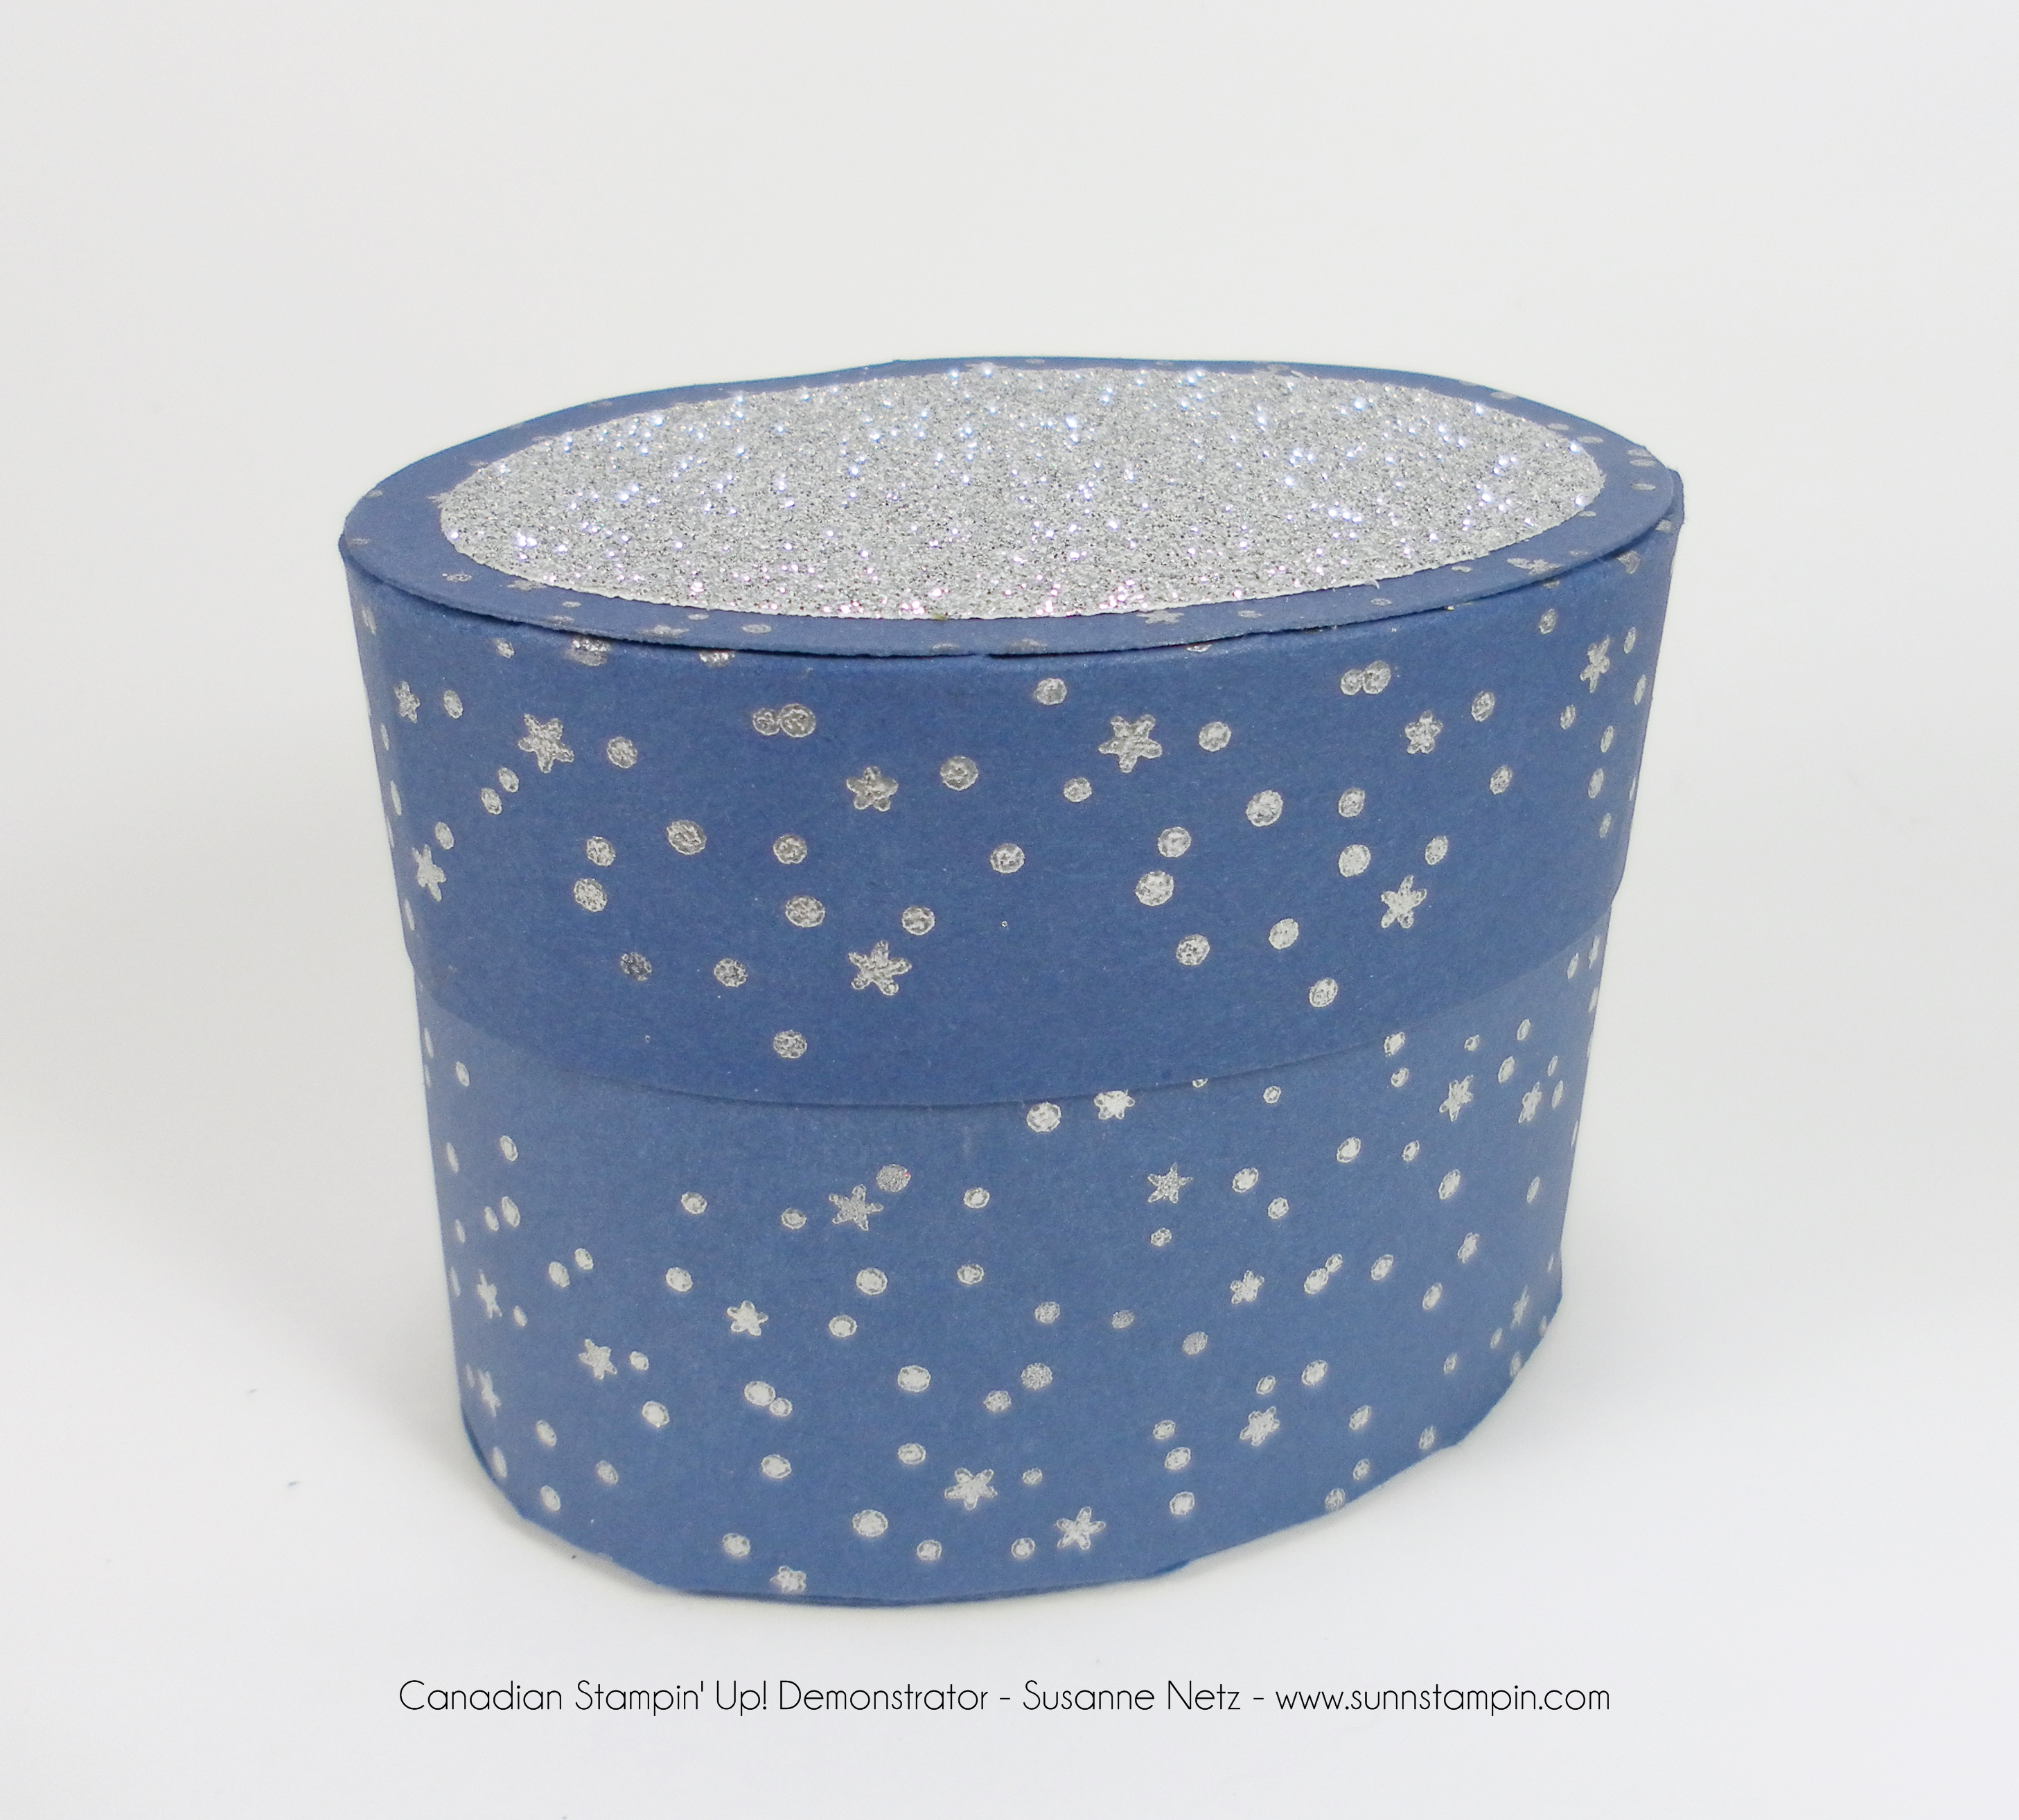
Could I chatter any more in this video? Good grief! Anyway, I hope you stick with me for this one. It is a simple box to make and I truly make it look difficult! Ha ha. I am hoping that the New Year will bring me more concise and less chatty abilities. Check out the picture, then the video and of course the details follow.
The Details:
Base Card stock 3 by 10 inches scored at 1/2 inch.
Lid Card stock 1 1/2 by 10 scored at 1/2 inch.
4 ovals (one for bottom, one for bottom inside covering, one for lid and one pretty one for the top)
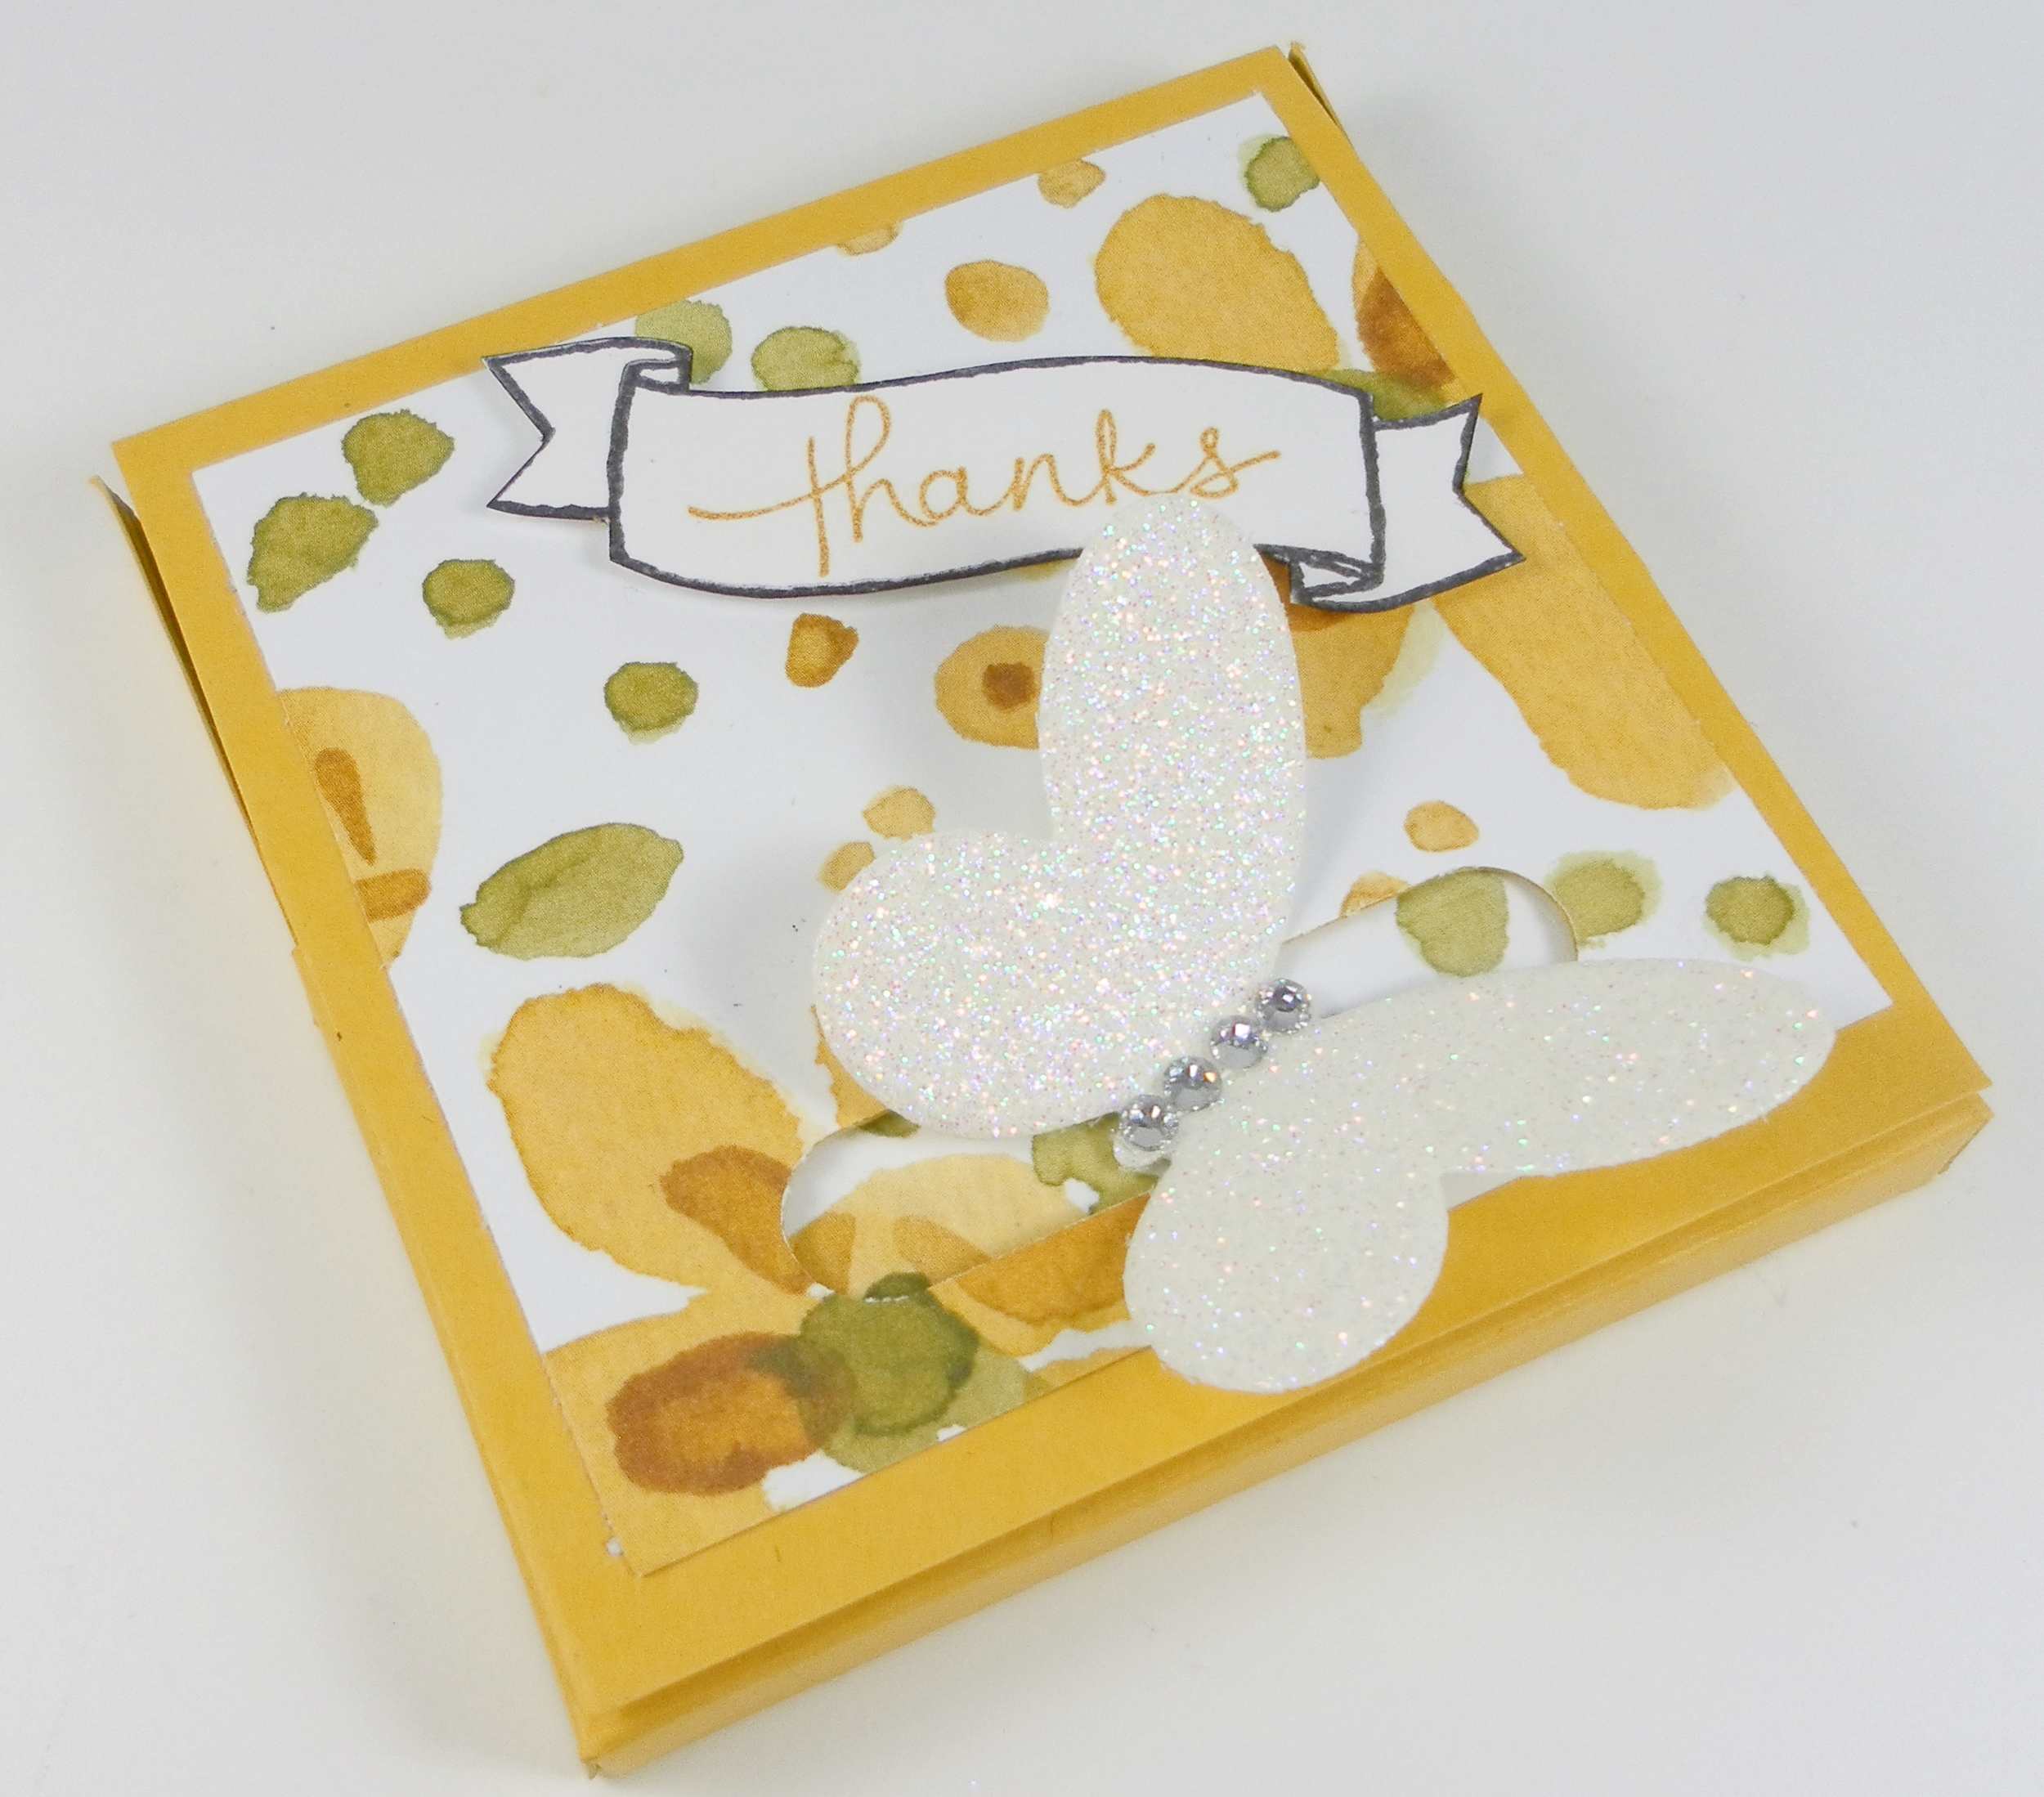
Hey, hope you are headed into a fun weekend. I have a very fun box to share with you today. I really liked the size of the box I made along with the embossing on the card stock first before putting things together. Check it out.
The details:
Card stock sizing: 9 by 9
Score at 3 and 6 inches with a notch at 4 1/2. Turn and score at 3 and 6 inches with a notch at 4 1/2. Turn and notch on the other 2 remaining sides at 4 1/2.
Using your ruler, score from the notch to the where your score lines meet and score diagonally. Do this for all sides making a triangle.
Hello and thank you for stopping by. I have worked really hard over the last month with the Christmas Crush and the Card holder series. I am actually sad to get back to normal broadcasting next week. In doing all this work I have met some wonderful people, gotten Christmas cards from all over the globe and have had a lot of fun chatting and reaching out to you personally. I feel very grateful to be apart of the paper crafting community and feel very lucky to be working with Stampin’ Up! for this wonderful opportunity. Yay, Stampin`Up!
If you are Canadian and in some way I have inspired you, then I would love the opportunity to earn your business by becoming your demonstrator (or if you too would like to become a demonstrator I would love to help you along with that goal too). You can email me if you have questions, or you can shop online right now by clicking any of the supply links below you will get to my online store. You don’t have to live near me. I can do my very best to support you from across our great nation. I am happy to send you your first Catalog with me, and if you continue to spend $60 or more in a 6 month period I will send you your next catalogs for free too (as soon as they get off the presses, right from head office). I really want the opportunity to earn your business so please tell me how I can improve your crafting life and I will do my very best to make it happen. 🙂
So the gift card holders I have made for today are more like cards. I made 3 today because I am an over achiever and because they were all kind of the same but different. Enough chatter, here is the video, pictures are below with details and a supply list below.
2 pcs of card stock (card 11 by 4 1/4 and insert 6 by 1 3/4)
Make a regular card base…then insert 2 5 by 5 squares into the inside of the card.
2 pieces of dsp sized 5 by 5 and scored exactly the same way at 1 1/2, 2 1/4, 3 3/4 and 4 1/2 (notice the way you want your pattern to go and score that way)
Make a regular card base. Decorate it the way you wish. the pocket on the front is made with a 4 by 3 1/4 inch piece of card stock scored on the two long sides and one short side at 1/2 inch. Miter the corners and if you want a circle punched into it make sure to trim the inside flaps down.
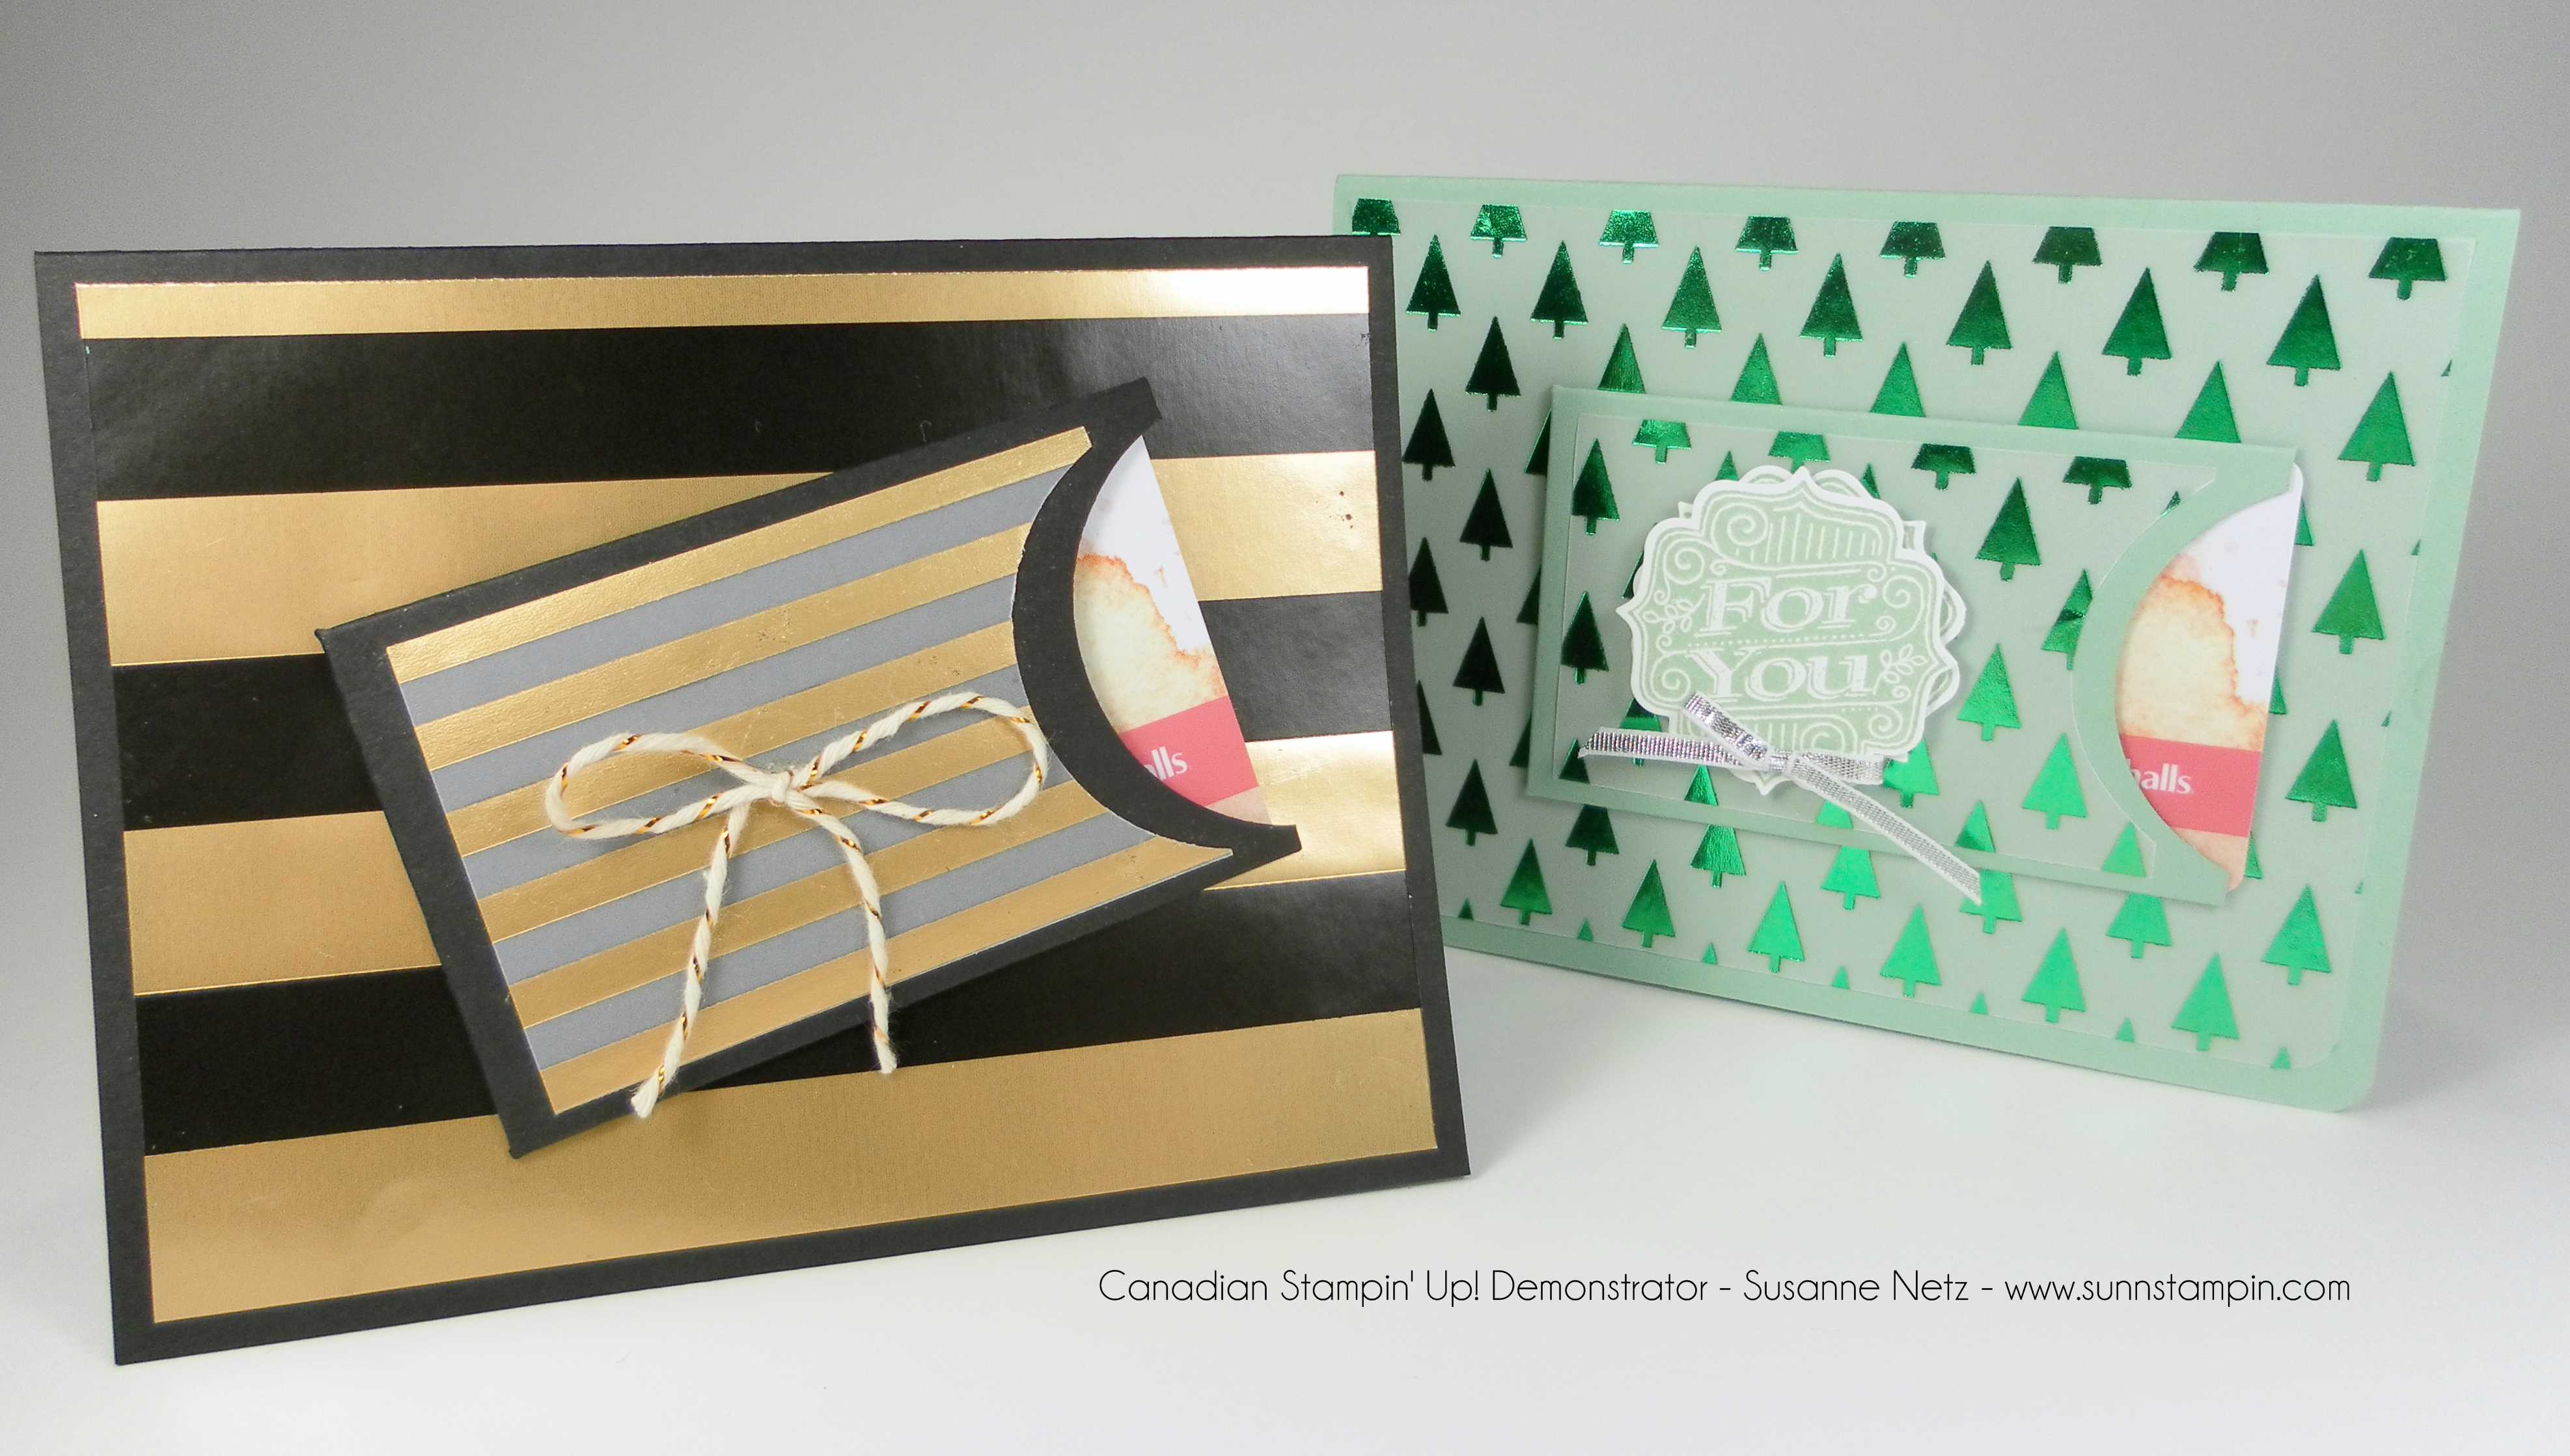
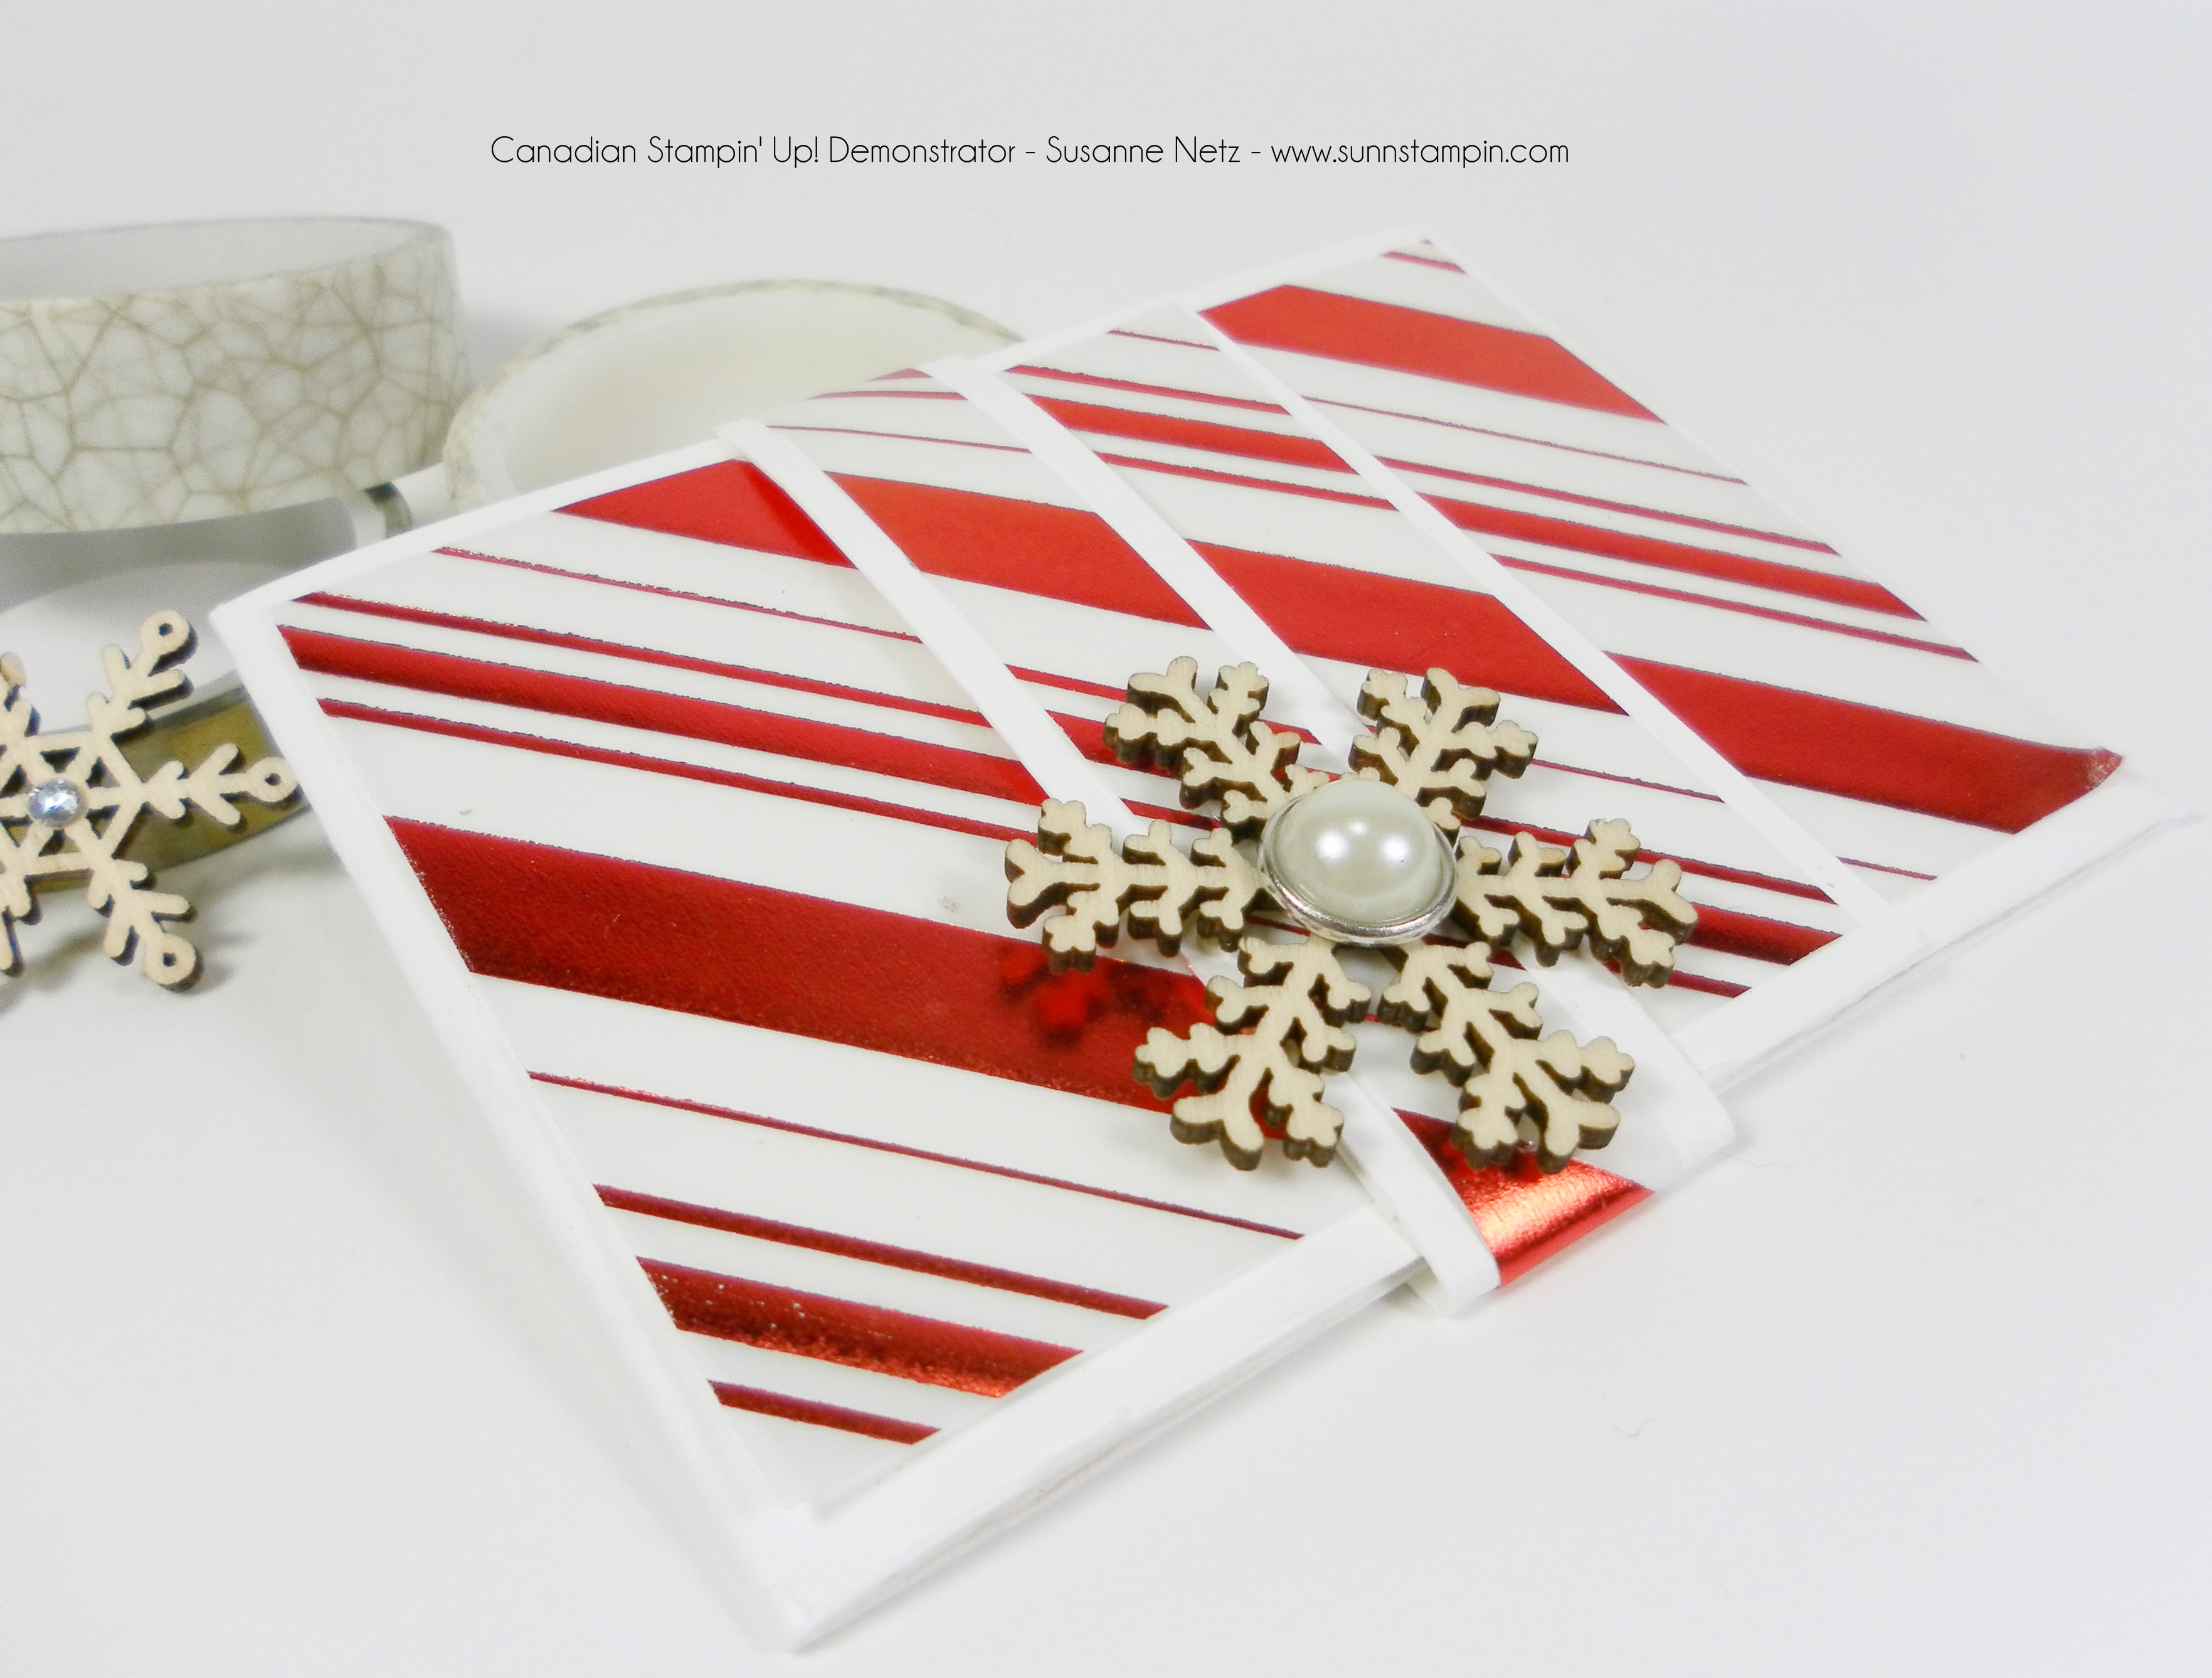
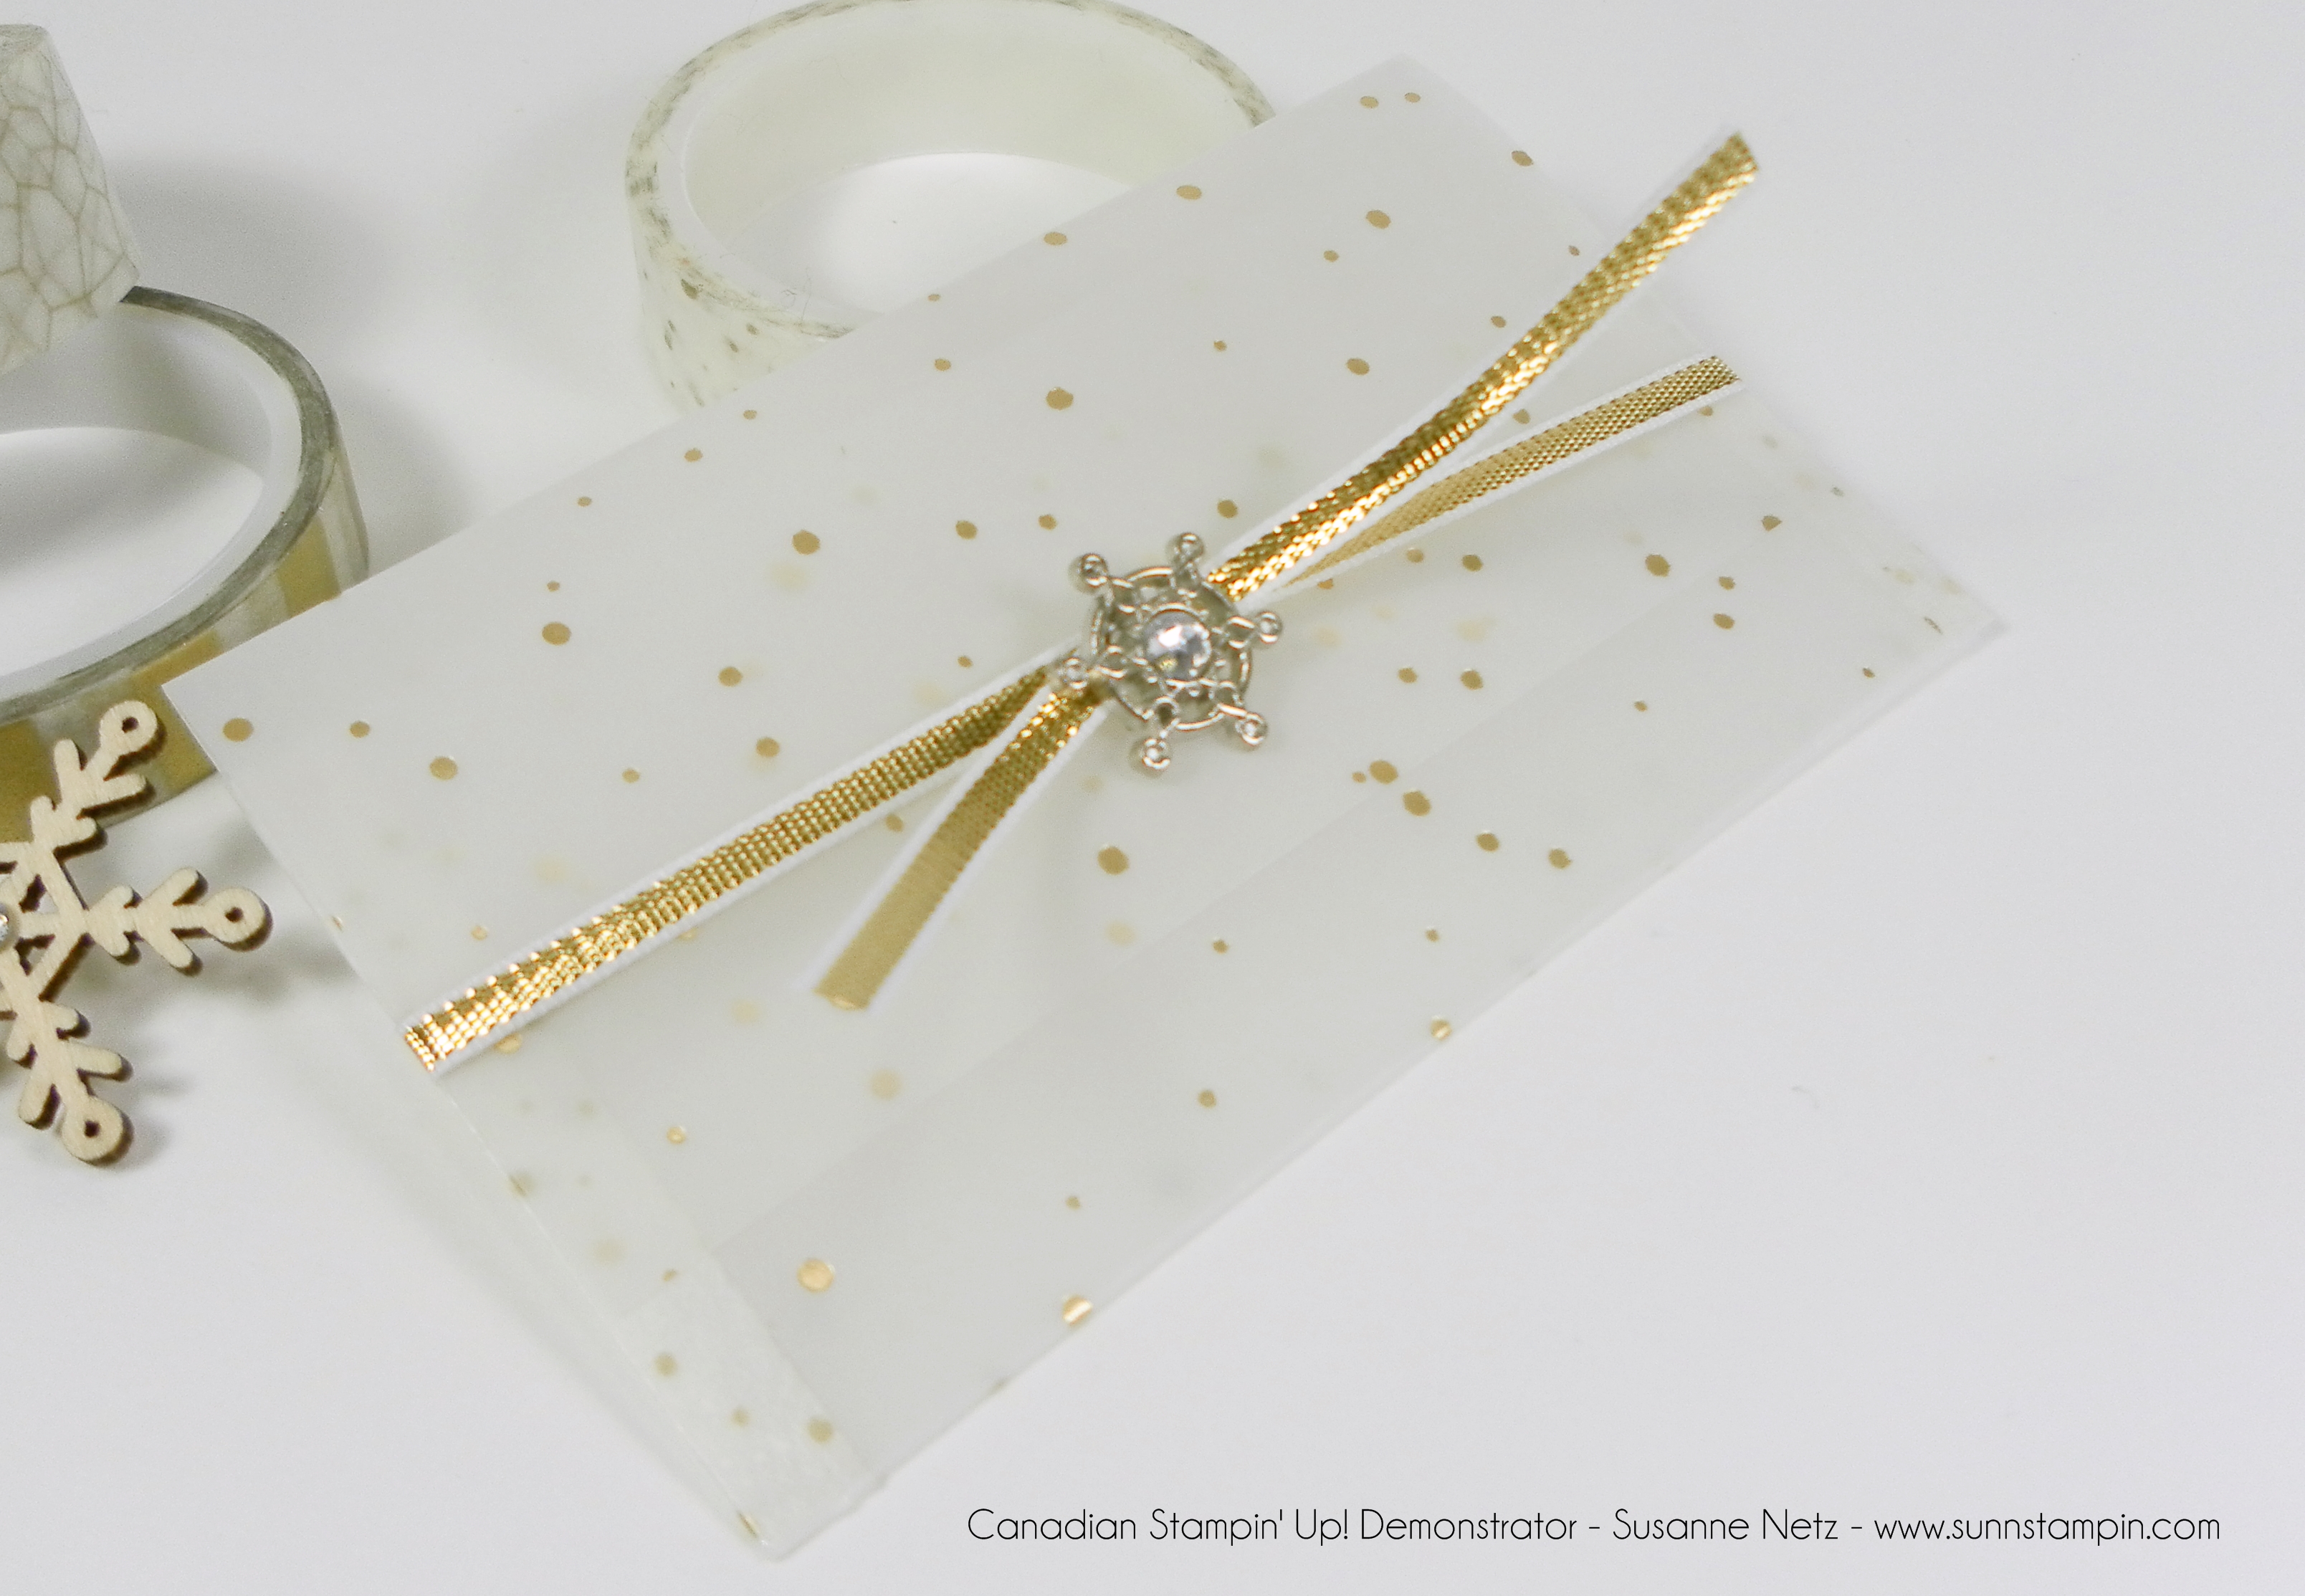
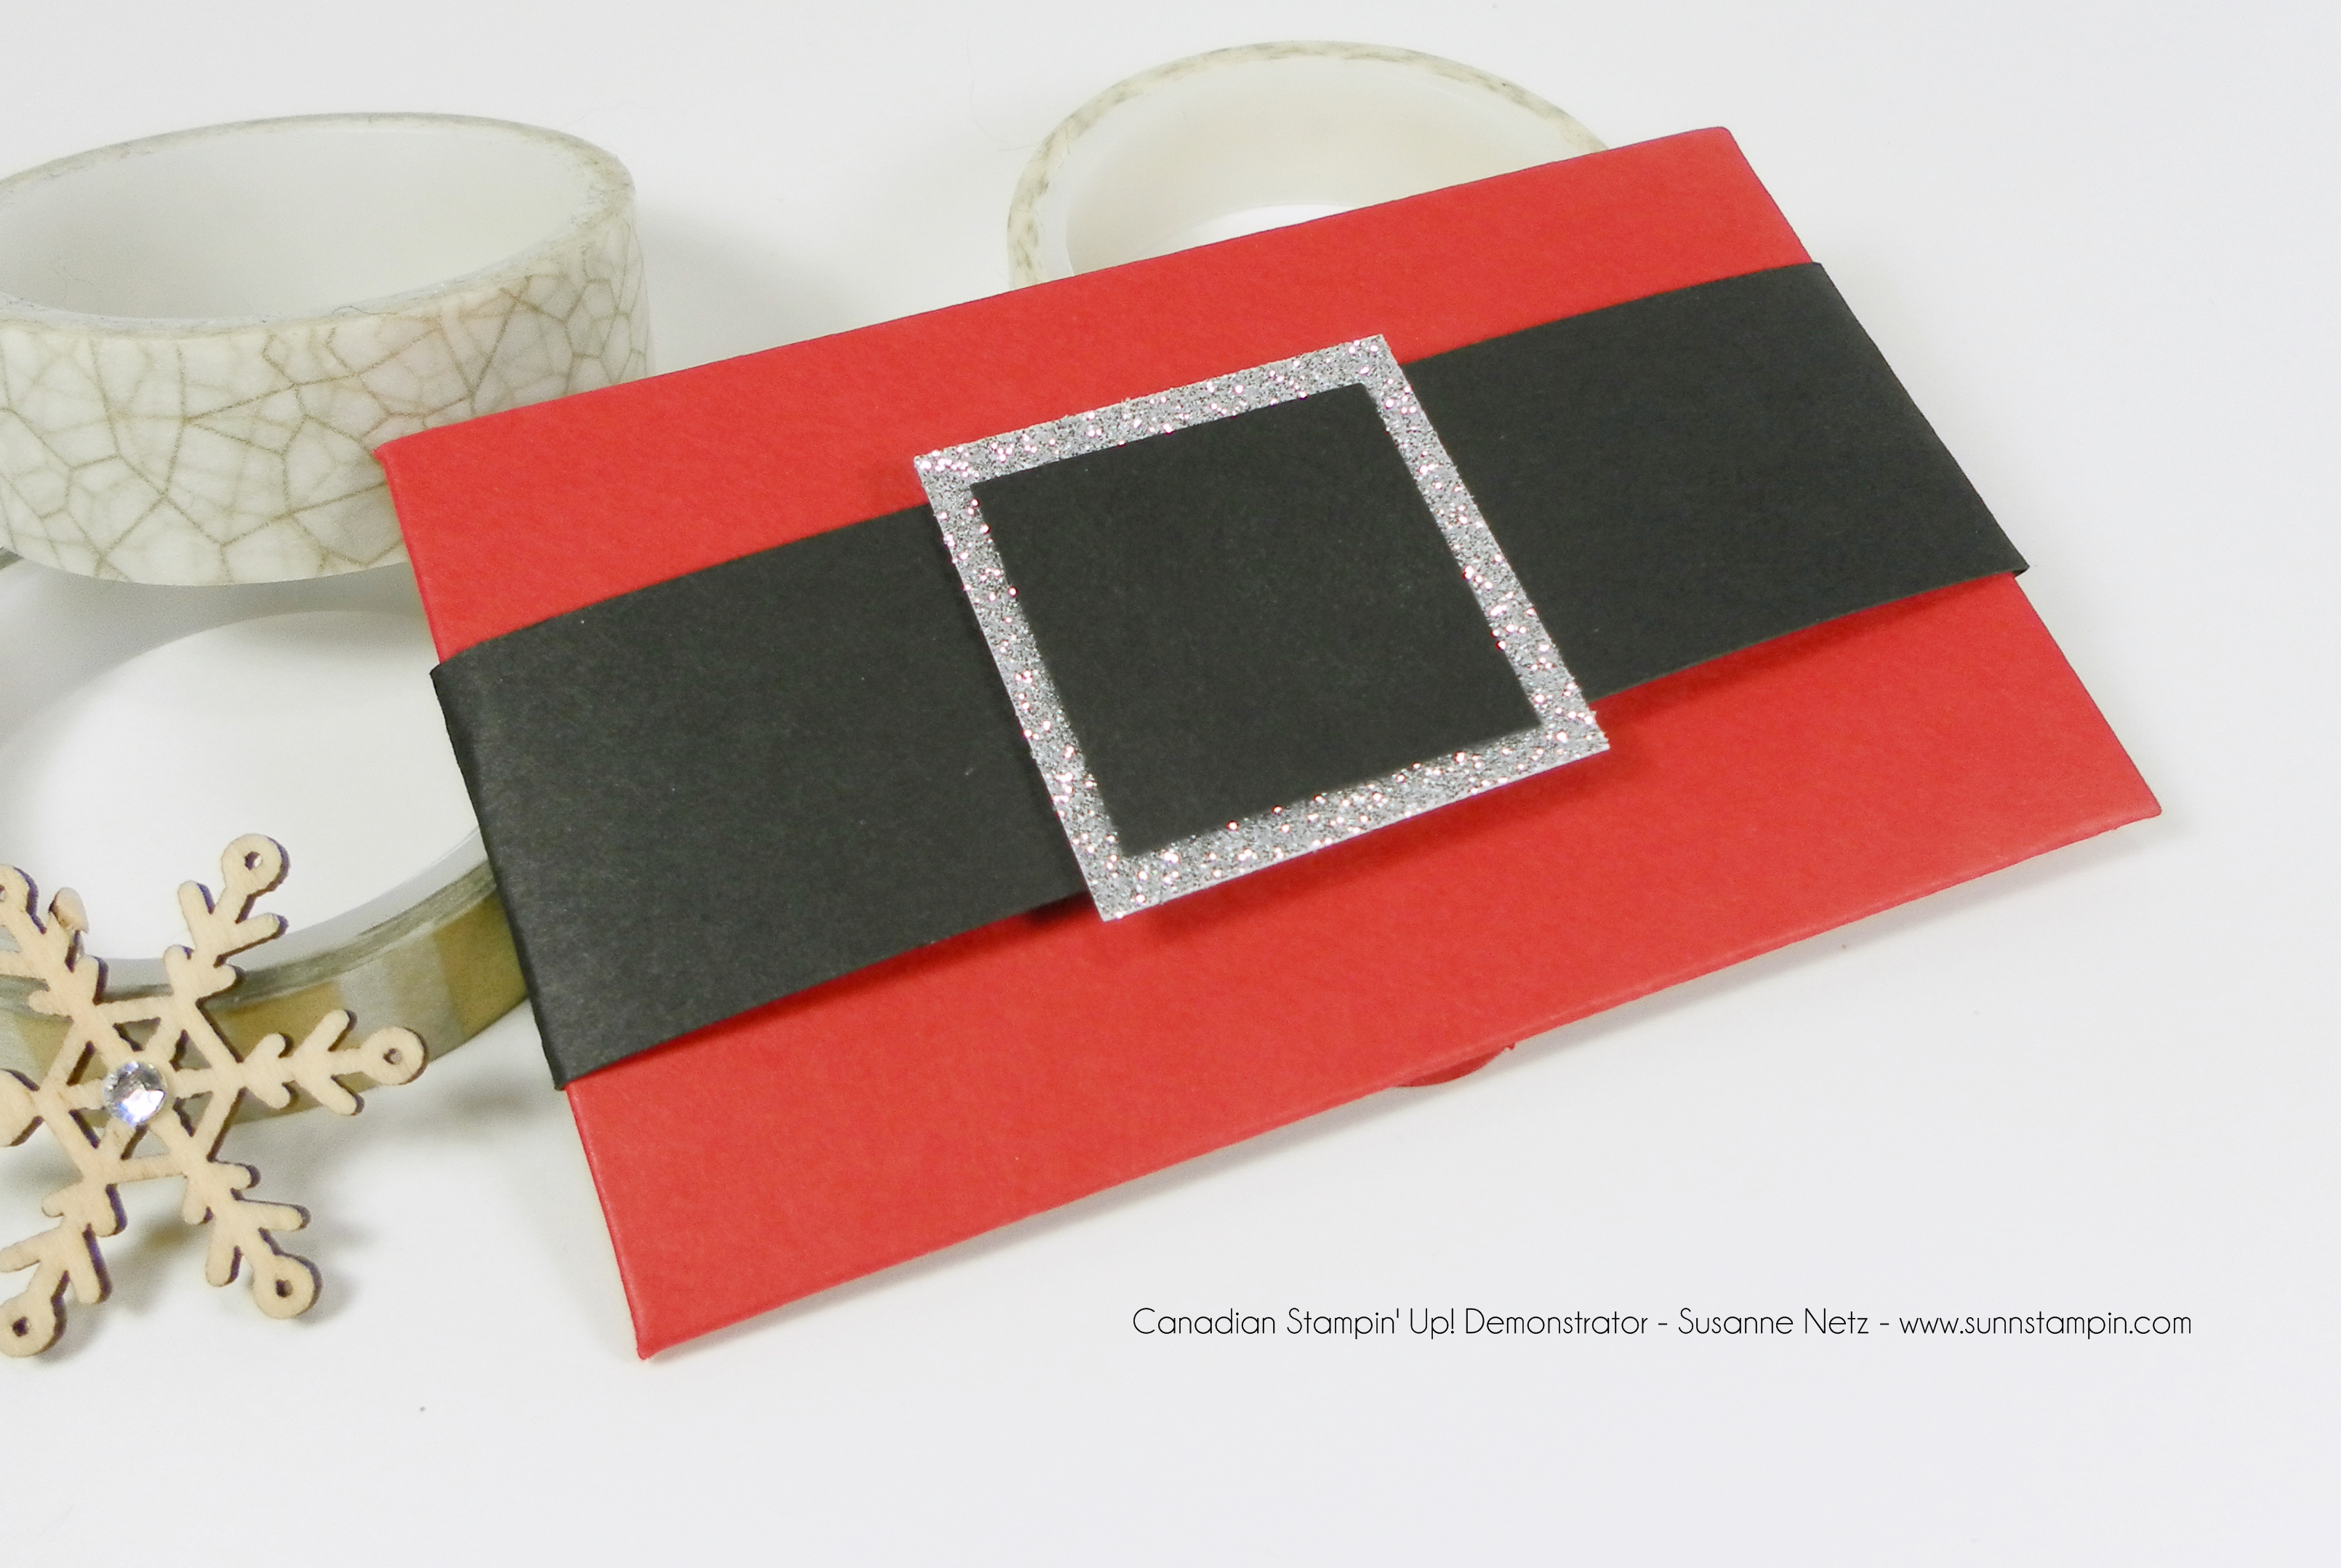
Hi everyone. I hope you are enjoying this series. I like having all the ways to dress up a gift card in one easy playlist to find. I choose to do 2 every day because there are so many ways to dress up a gift card and even though I did not design these I did some fun things with the decorating. To be fair I do not know who exactly designed them because when I did do a search on the internet I found hundreds of tutorials and I couldn’t be accurate with who came up with what first…Anyway, check out the video and of course the details are below the pictures.
Happy Wednesday! These 2 gift card holders are constructed the same but show very differently as one is using patterned paper (DSP) and one is using card stock embellished with patterned paper. Check out the video and of course the details are below the pictures.
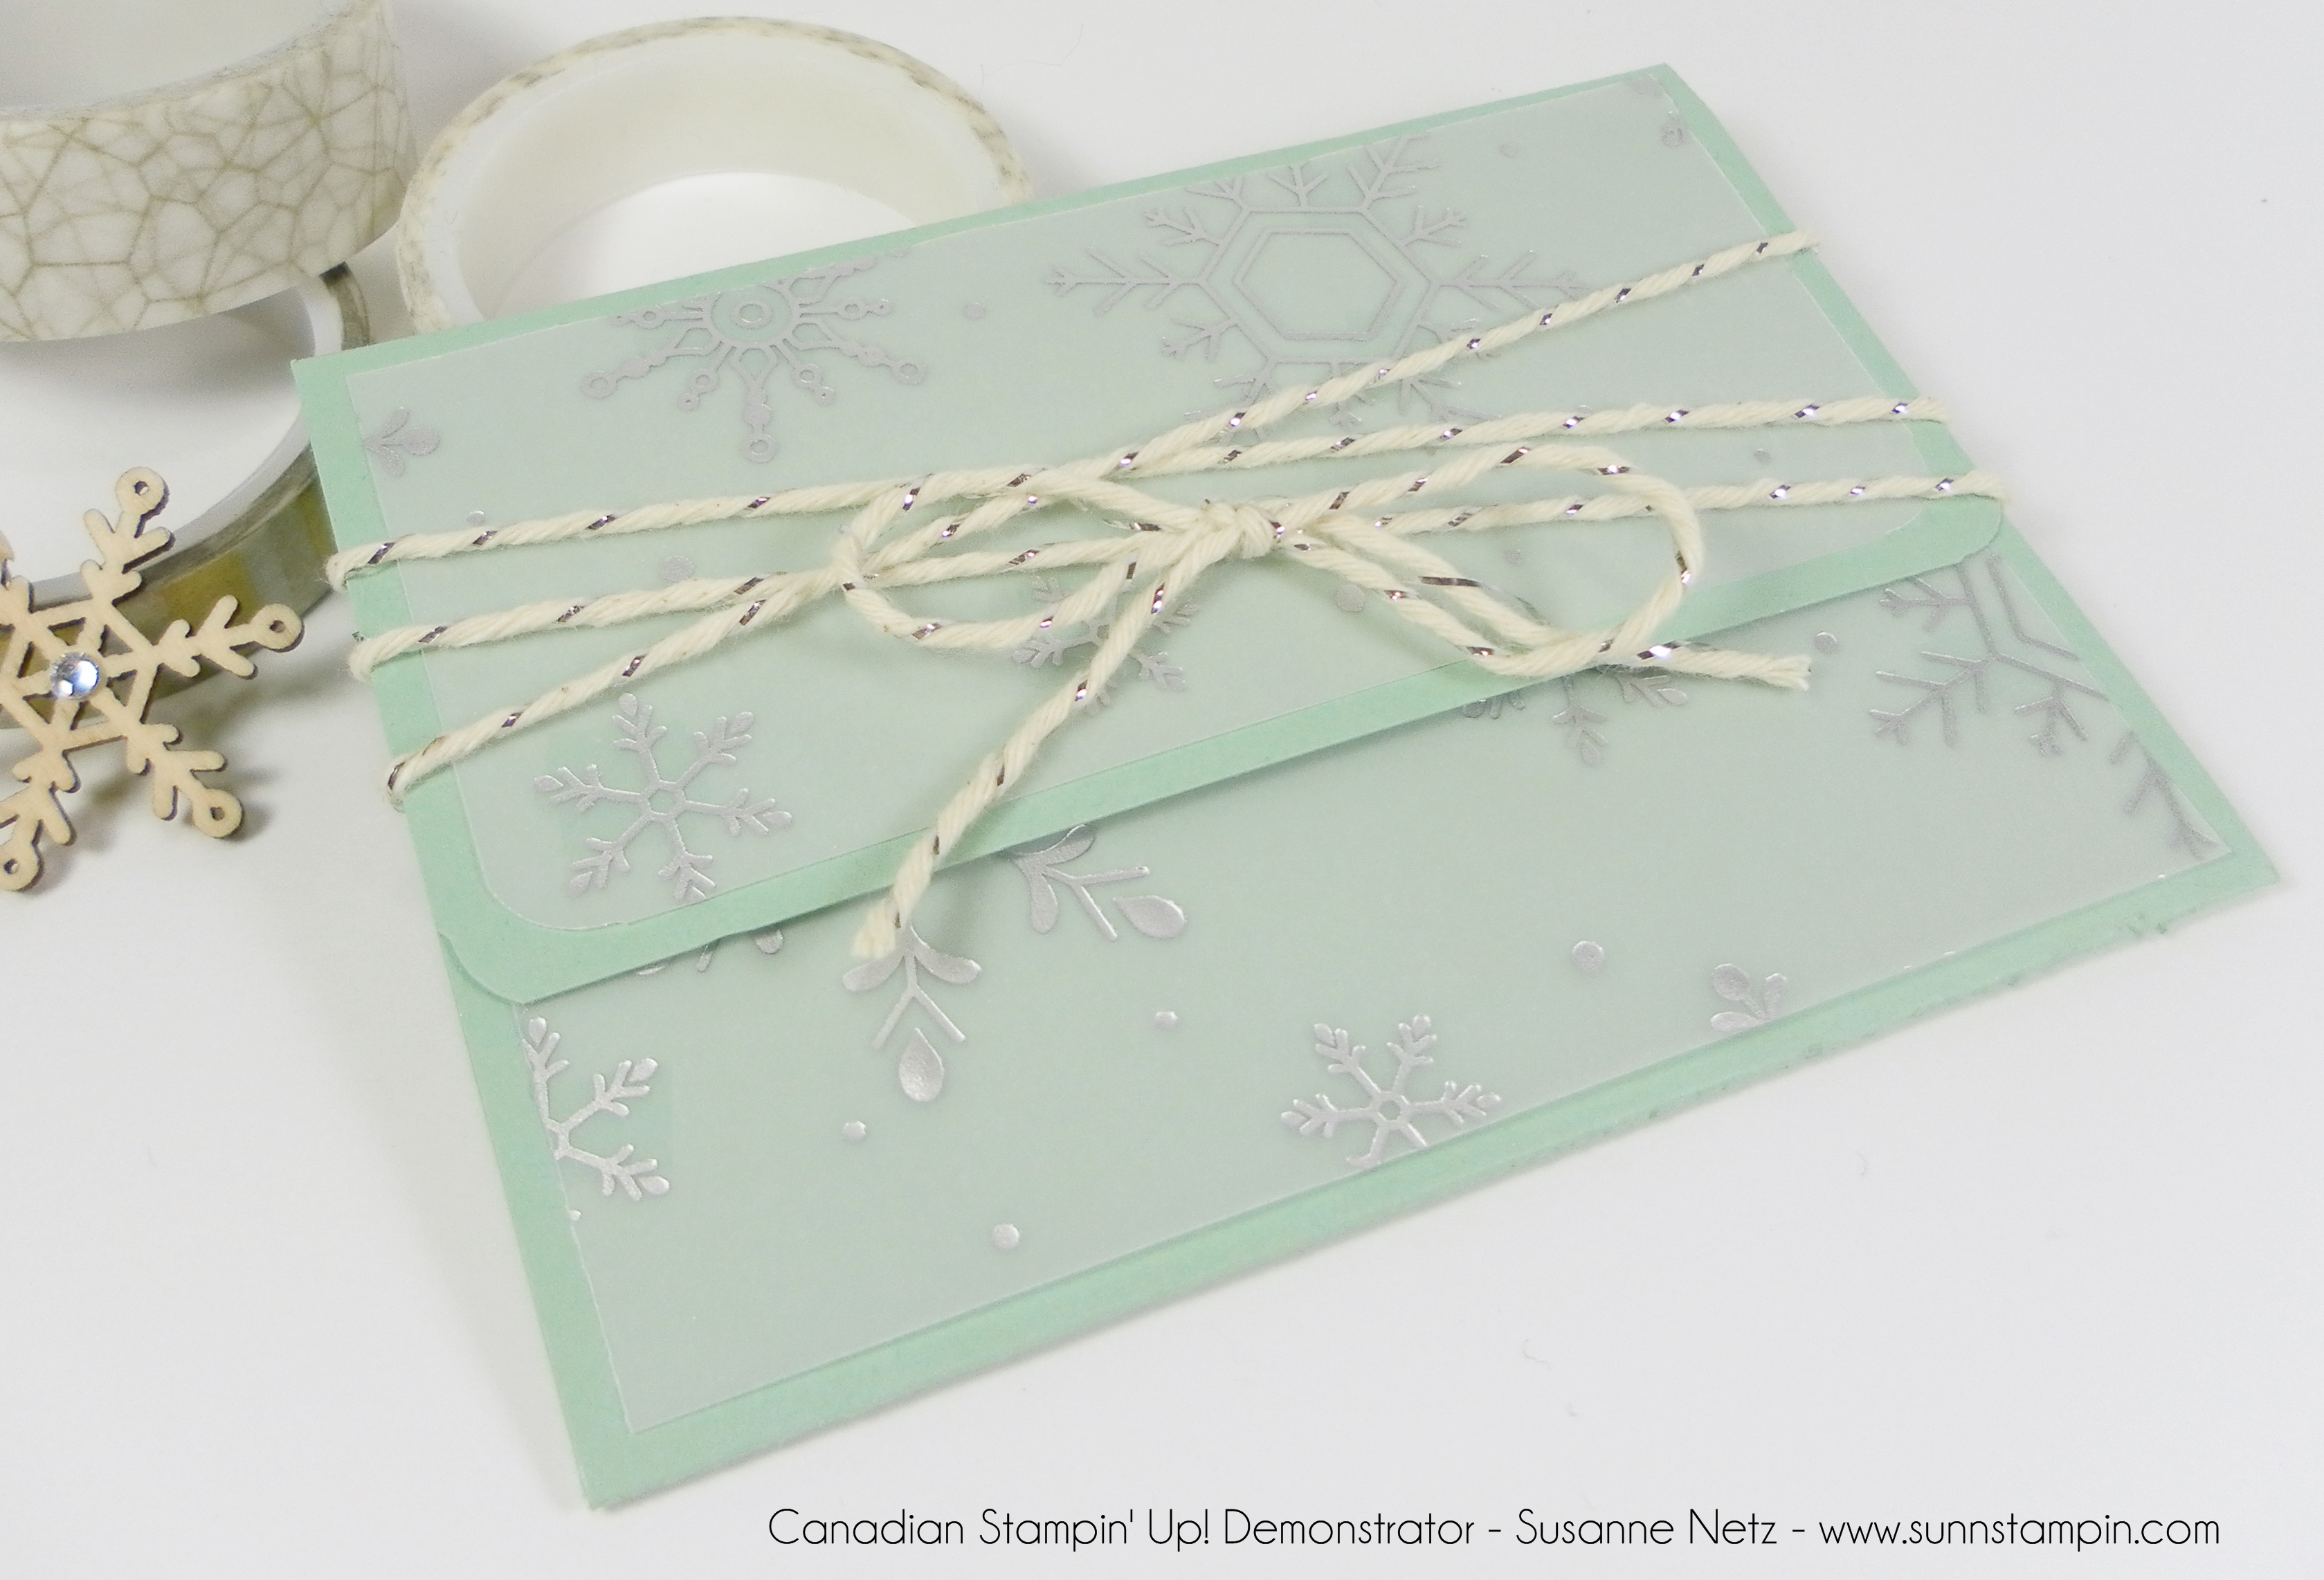
Vellum, vellum, vellum! Makes for a very pretty enclosure for those special gift cards! Check out the video and of course the details are below the pictures. Enjoy the show.
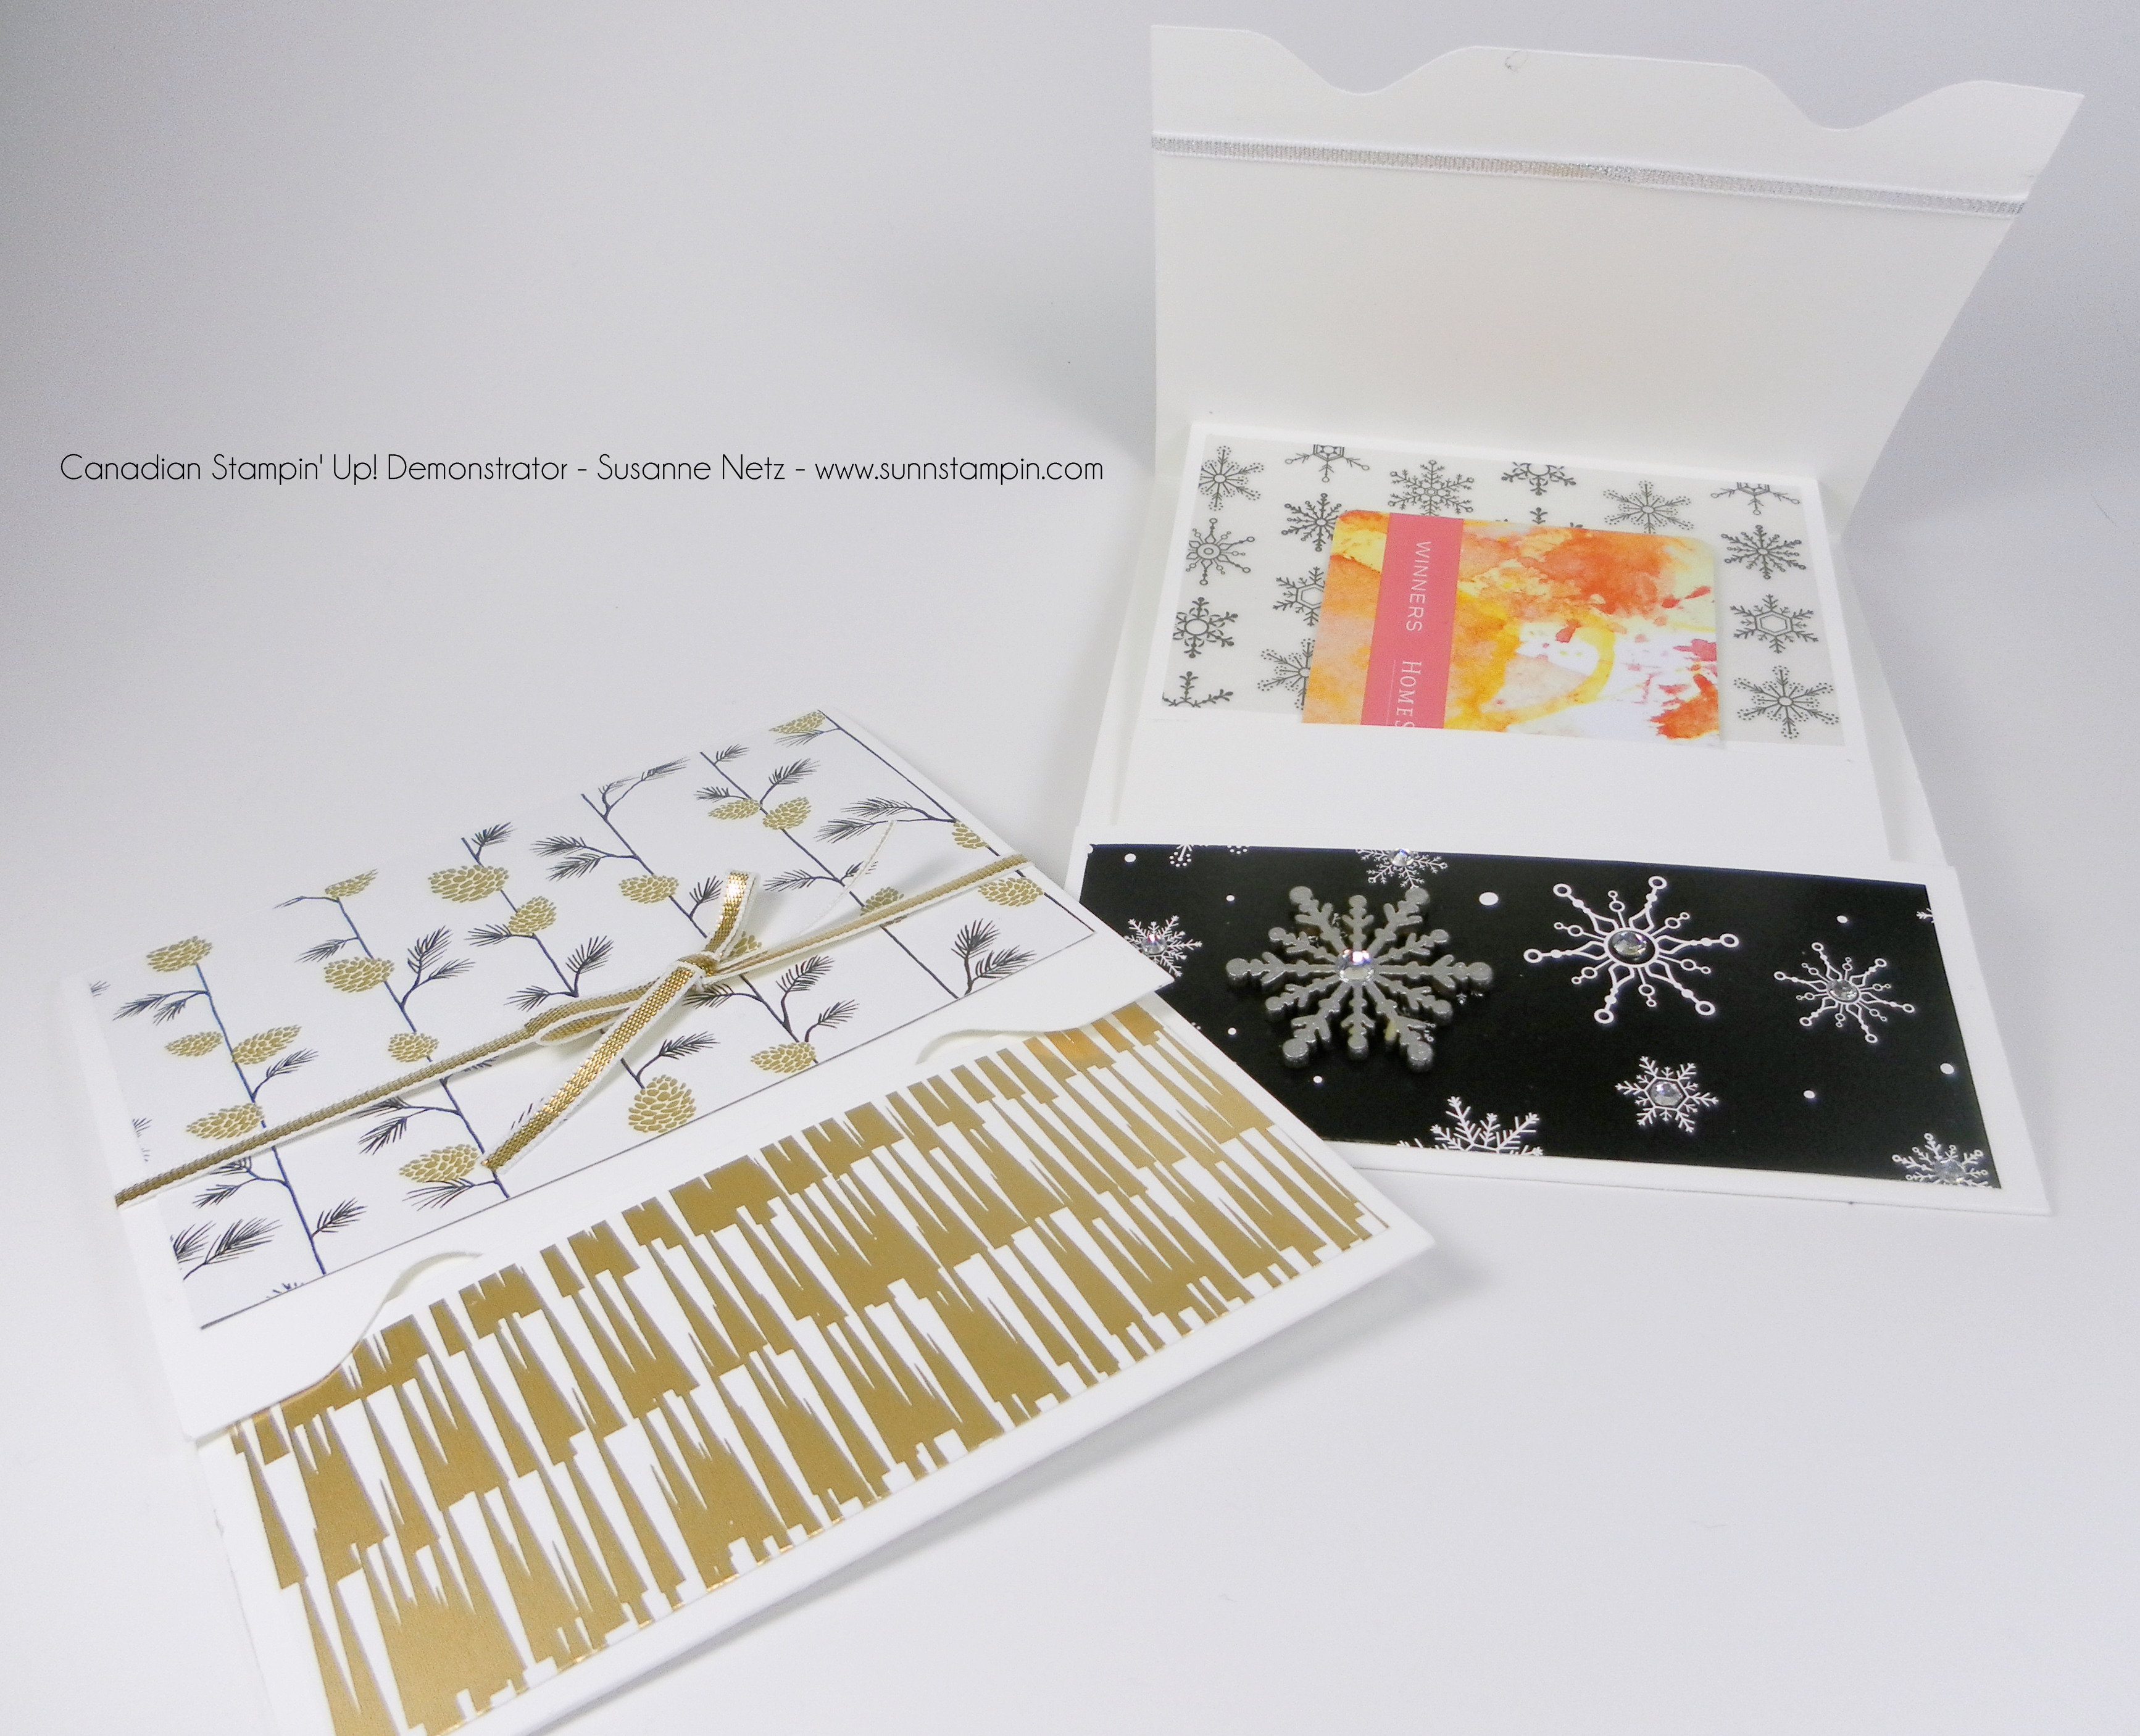
Hello my crafty friends. I have a mini series for you this week. I’m sharing how to make 2 gift card holders every day this week! So if you are one of those people who gives gift cards this series is for you. The 10 card holders I will be demonstrating this week are NOT my designs, but I did put my own spin on them. I hope you enjoy the fun way to give a gift card. 🙂 Enjoy the show. Details are under the pictures.
The Details:
Using the envelope punch board on a piece of card stock that is 5 by 5 inches punch and score at 2. Turn the paper a quarter and using your score guide line up with your previously scored score and punch an score. Repeat on all sides.
It’s Friday and Friday means that we get a 3D project! I’m pretty pleased with this little treat bag and I hope you like it too. It’s a very nice way to end my Christmas Crush series with something so cute and simple! Check it out.
The details:
Card stock 4 1/2 by 6 1/2
Scoring on the long side at 2, 3, 5, and 6 inches.
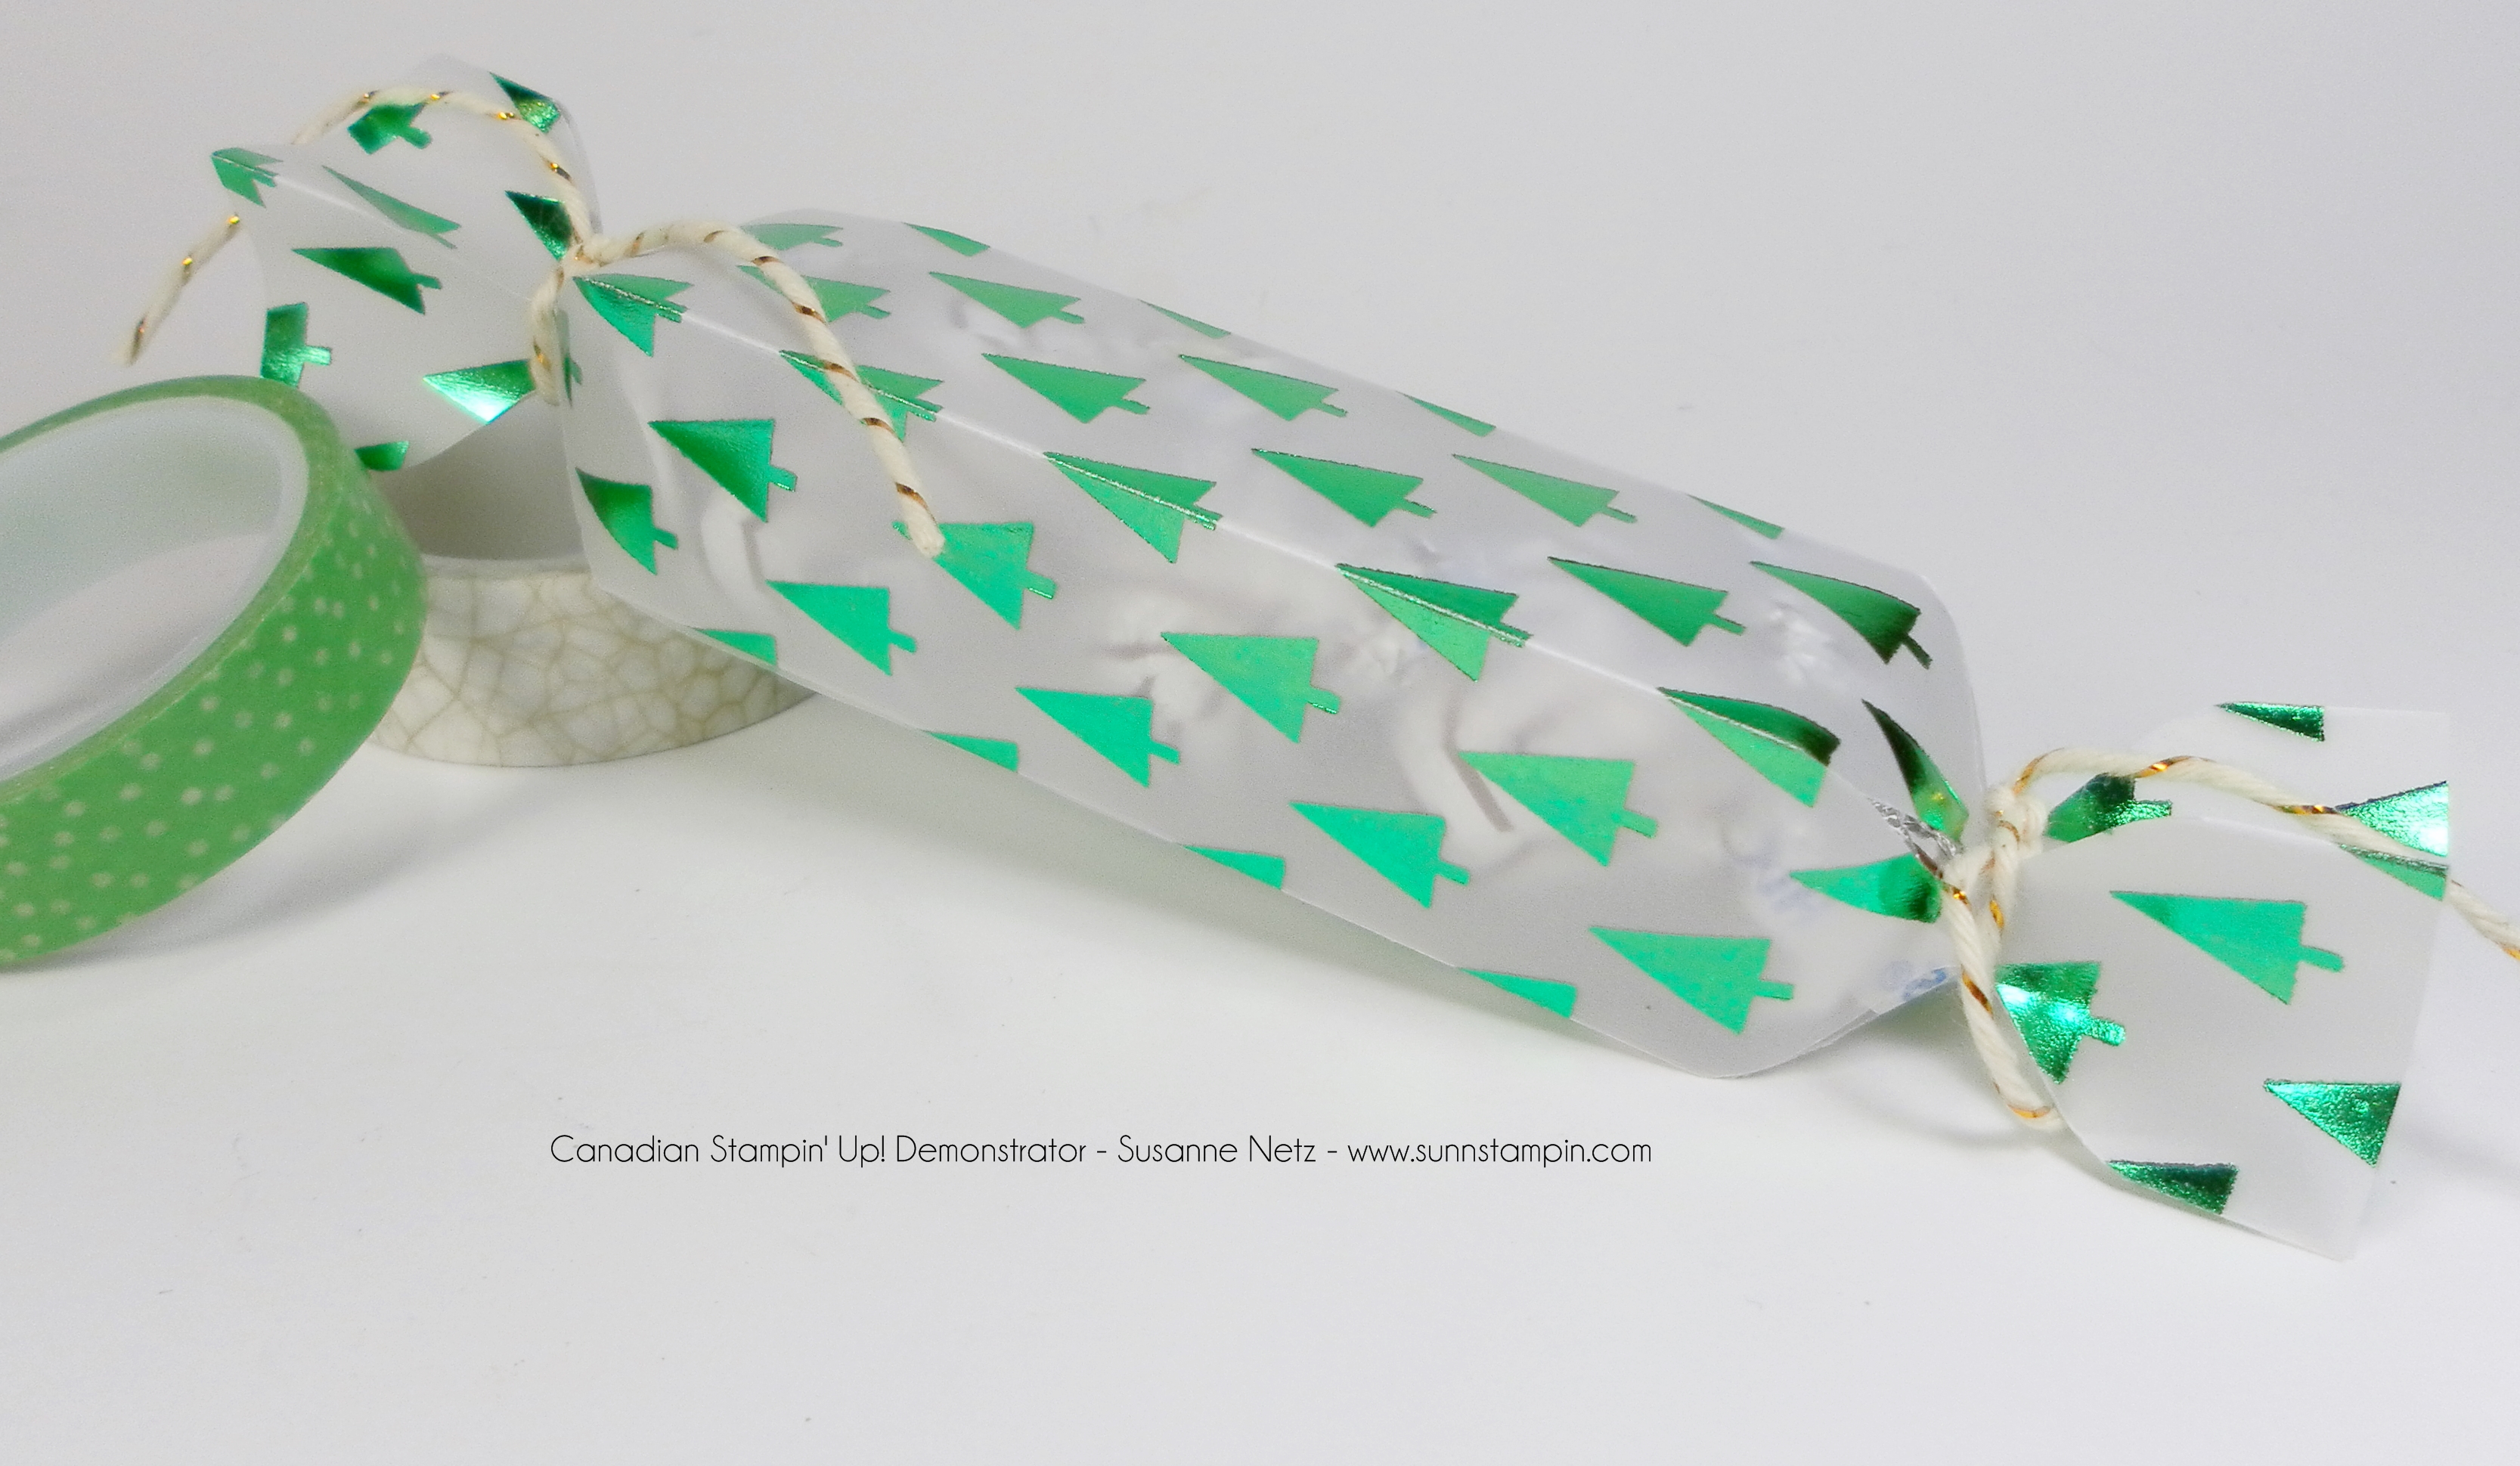
TGIF. I know many of you follow my blog for the boxes and 3D projects. I hope you stay tuned for December as I have a mini series regarding gift card holders. Let’s not jump ahead to December when we have an entire week of Christmas Crush to get through. Today’s project is a quick Christmas Cracker. Well, here in Canada that’s what we call them. Check today’s project out.
The details:
Cardstock 4 1/2 by 6 1/2
Scoring on the short side at 1, 2, 3, and 4 inches.
Fold.
Punch at 1 inch on the envelope punch board, fold a section down and repeat. Turn over and repeat on the other side. 5 punches on each side.
I will admit this project is a little fiddely. I wish I had time to do a do over. Although the project turned out great it wasn’t perfect. I do explain what I would have done differently in the video but I do like it.
The details
Card stock: 2 pieces 9 1/2 by 7 1/2
Scoring on the long side at 3, 8 1/2 inches.
Scoring on the short side of both pieces at 2, 4 3/4 and 6 1/4.
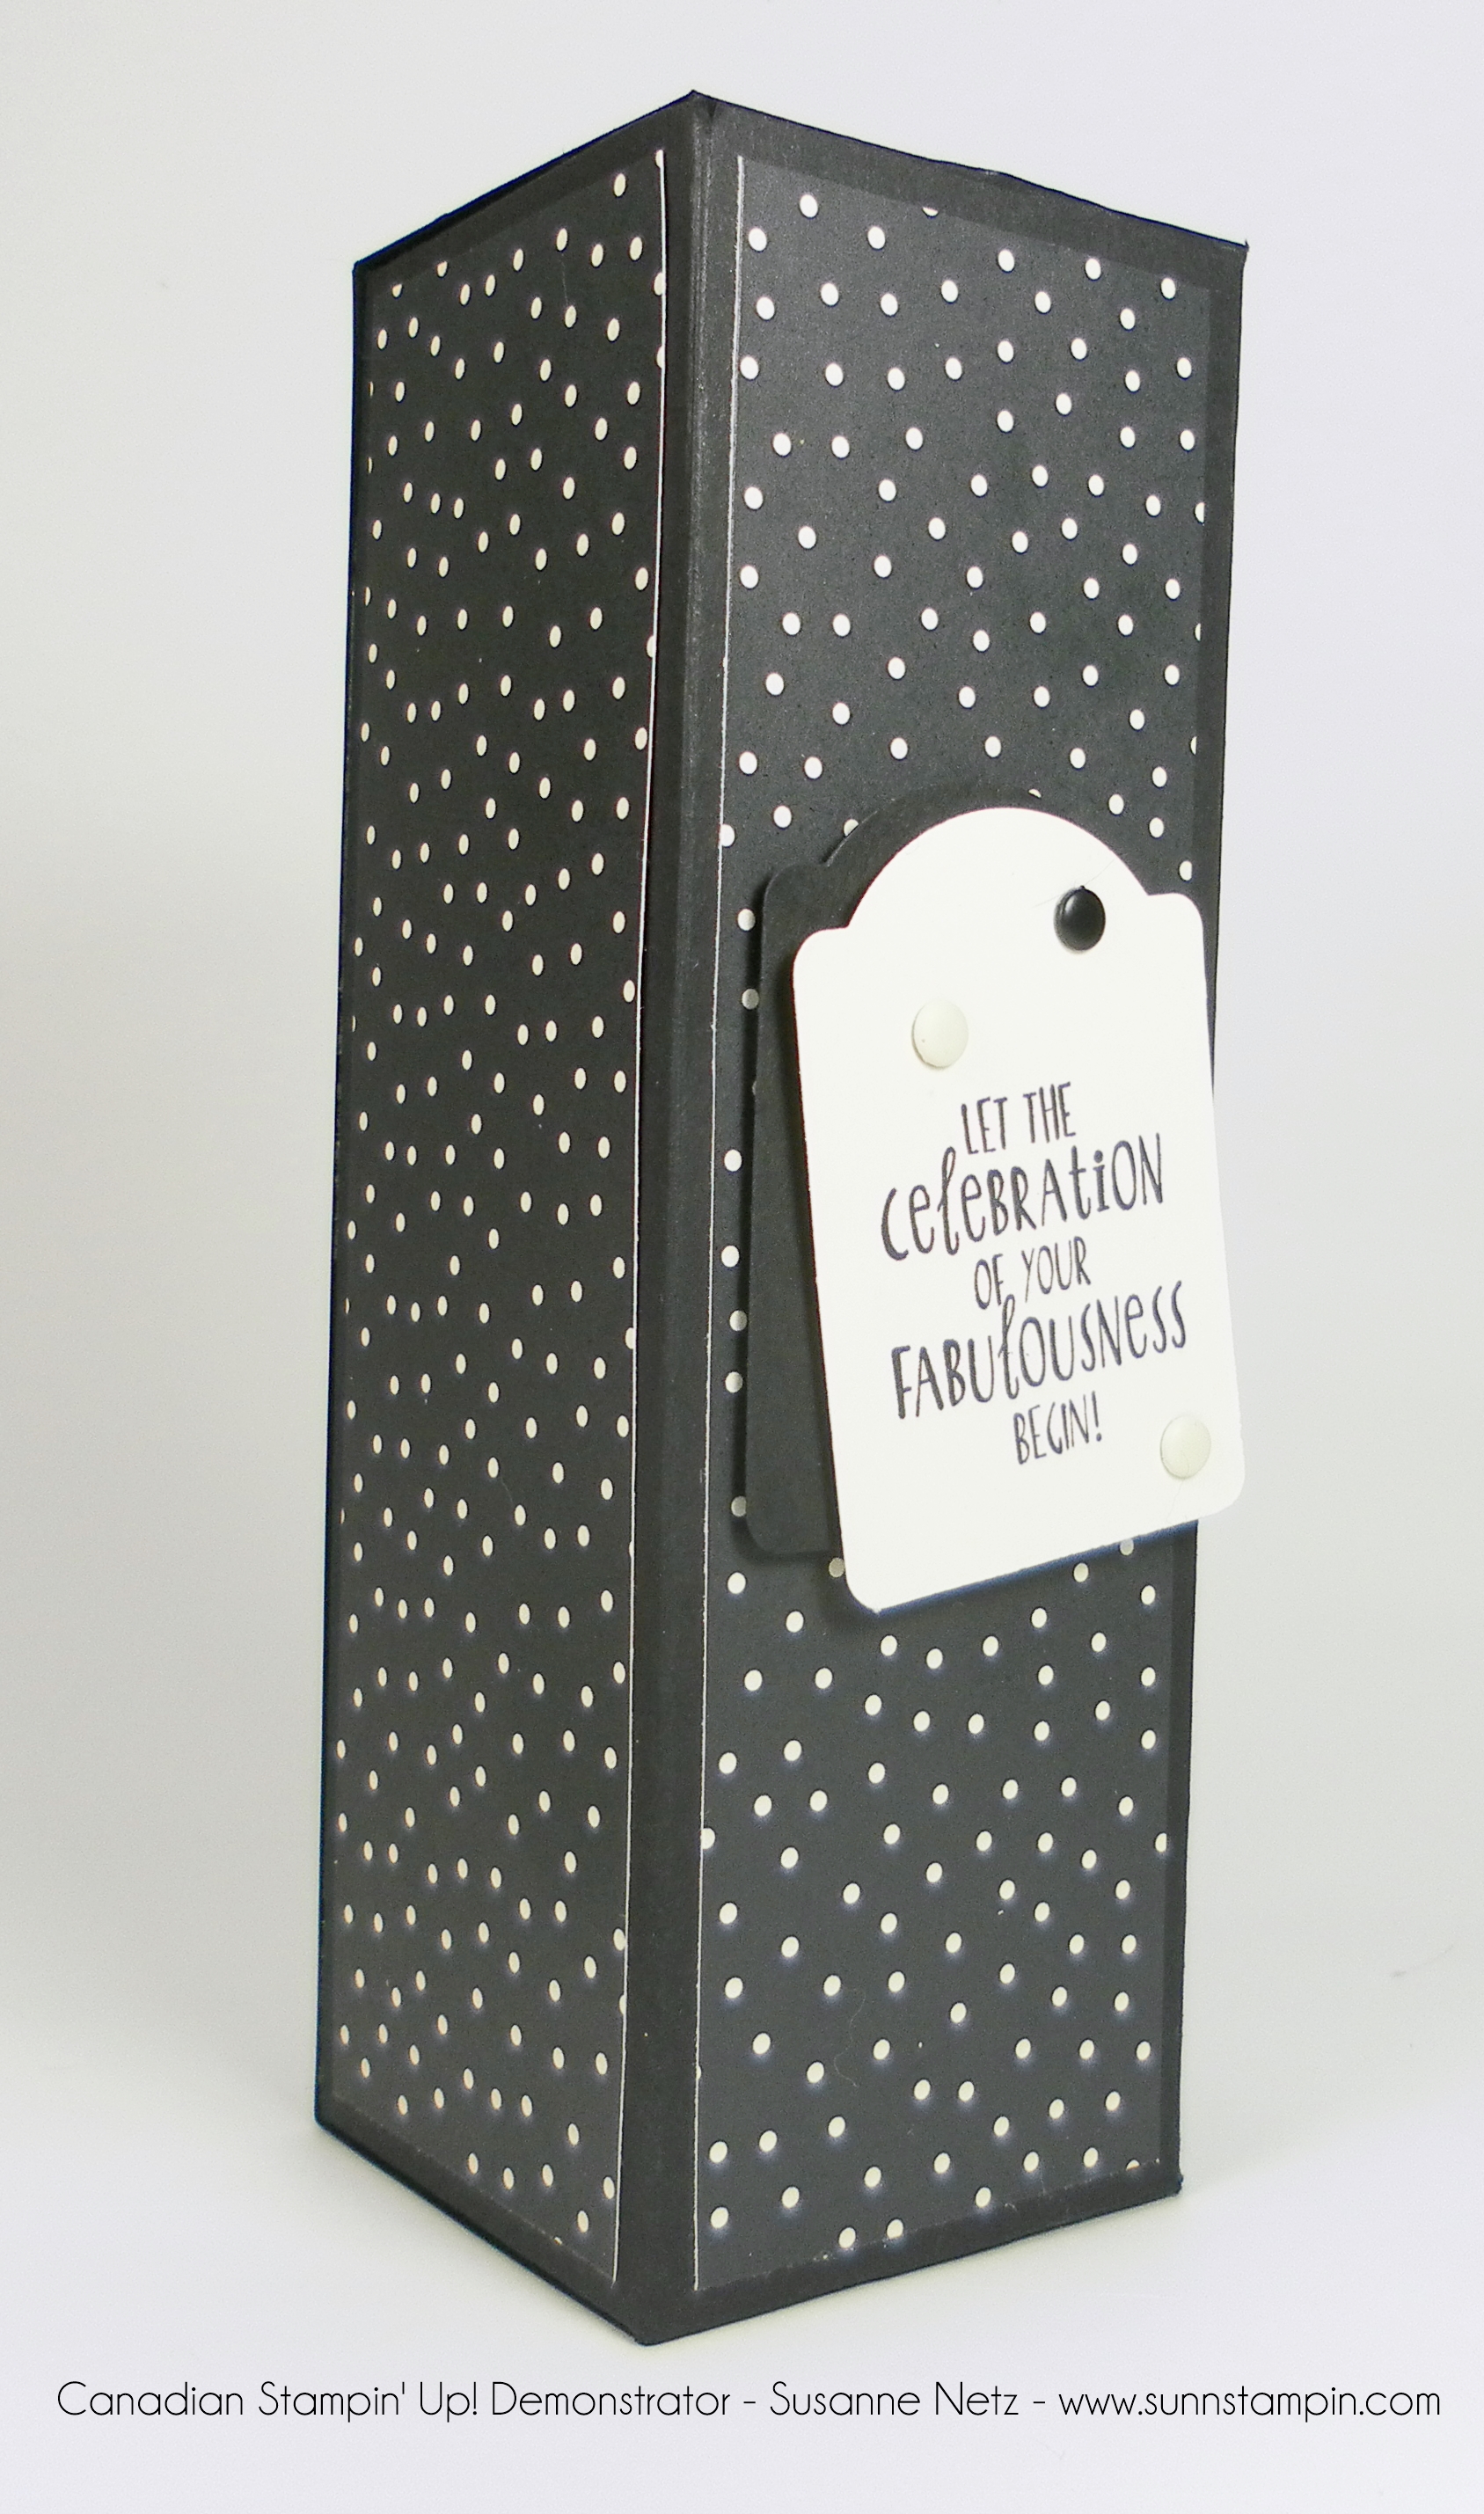
So it`s true, I`m not all about cards…it`s Friday and Friday gets a 3D project. Today is something that could be very useful as a gift wrapping…especially if you are heading to a friends house for dinner. I always try to bring a bottle of wine…and this year I have figured out how to wrap the bottle. I don`t know if you remember last year I tried to make a bottle wrap and came up with a triangle box instead. It did not fit the bottle. I was on the right track but now I really have figured it out, with the help of a mathematician I may add. Check it out.
Video here
The Details:
Cardstock 12 by 9 inches.
Scoring on the short side at 2 inches.
Scoring on the long side at 1 3/4, 3 1/2, 5 1/4, 7, 8 3/4 and 10 1/2 inches.