It’s the very last day of my Christmas Crush series. I want to thank you all for watching and I hope you had fun and enjoyed the content. Be sure to pop by Monday to see what I have up my sleeve. 🙂
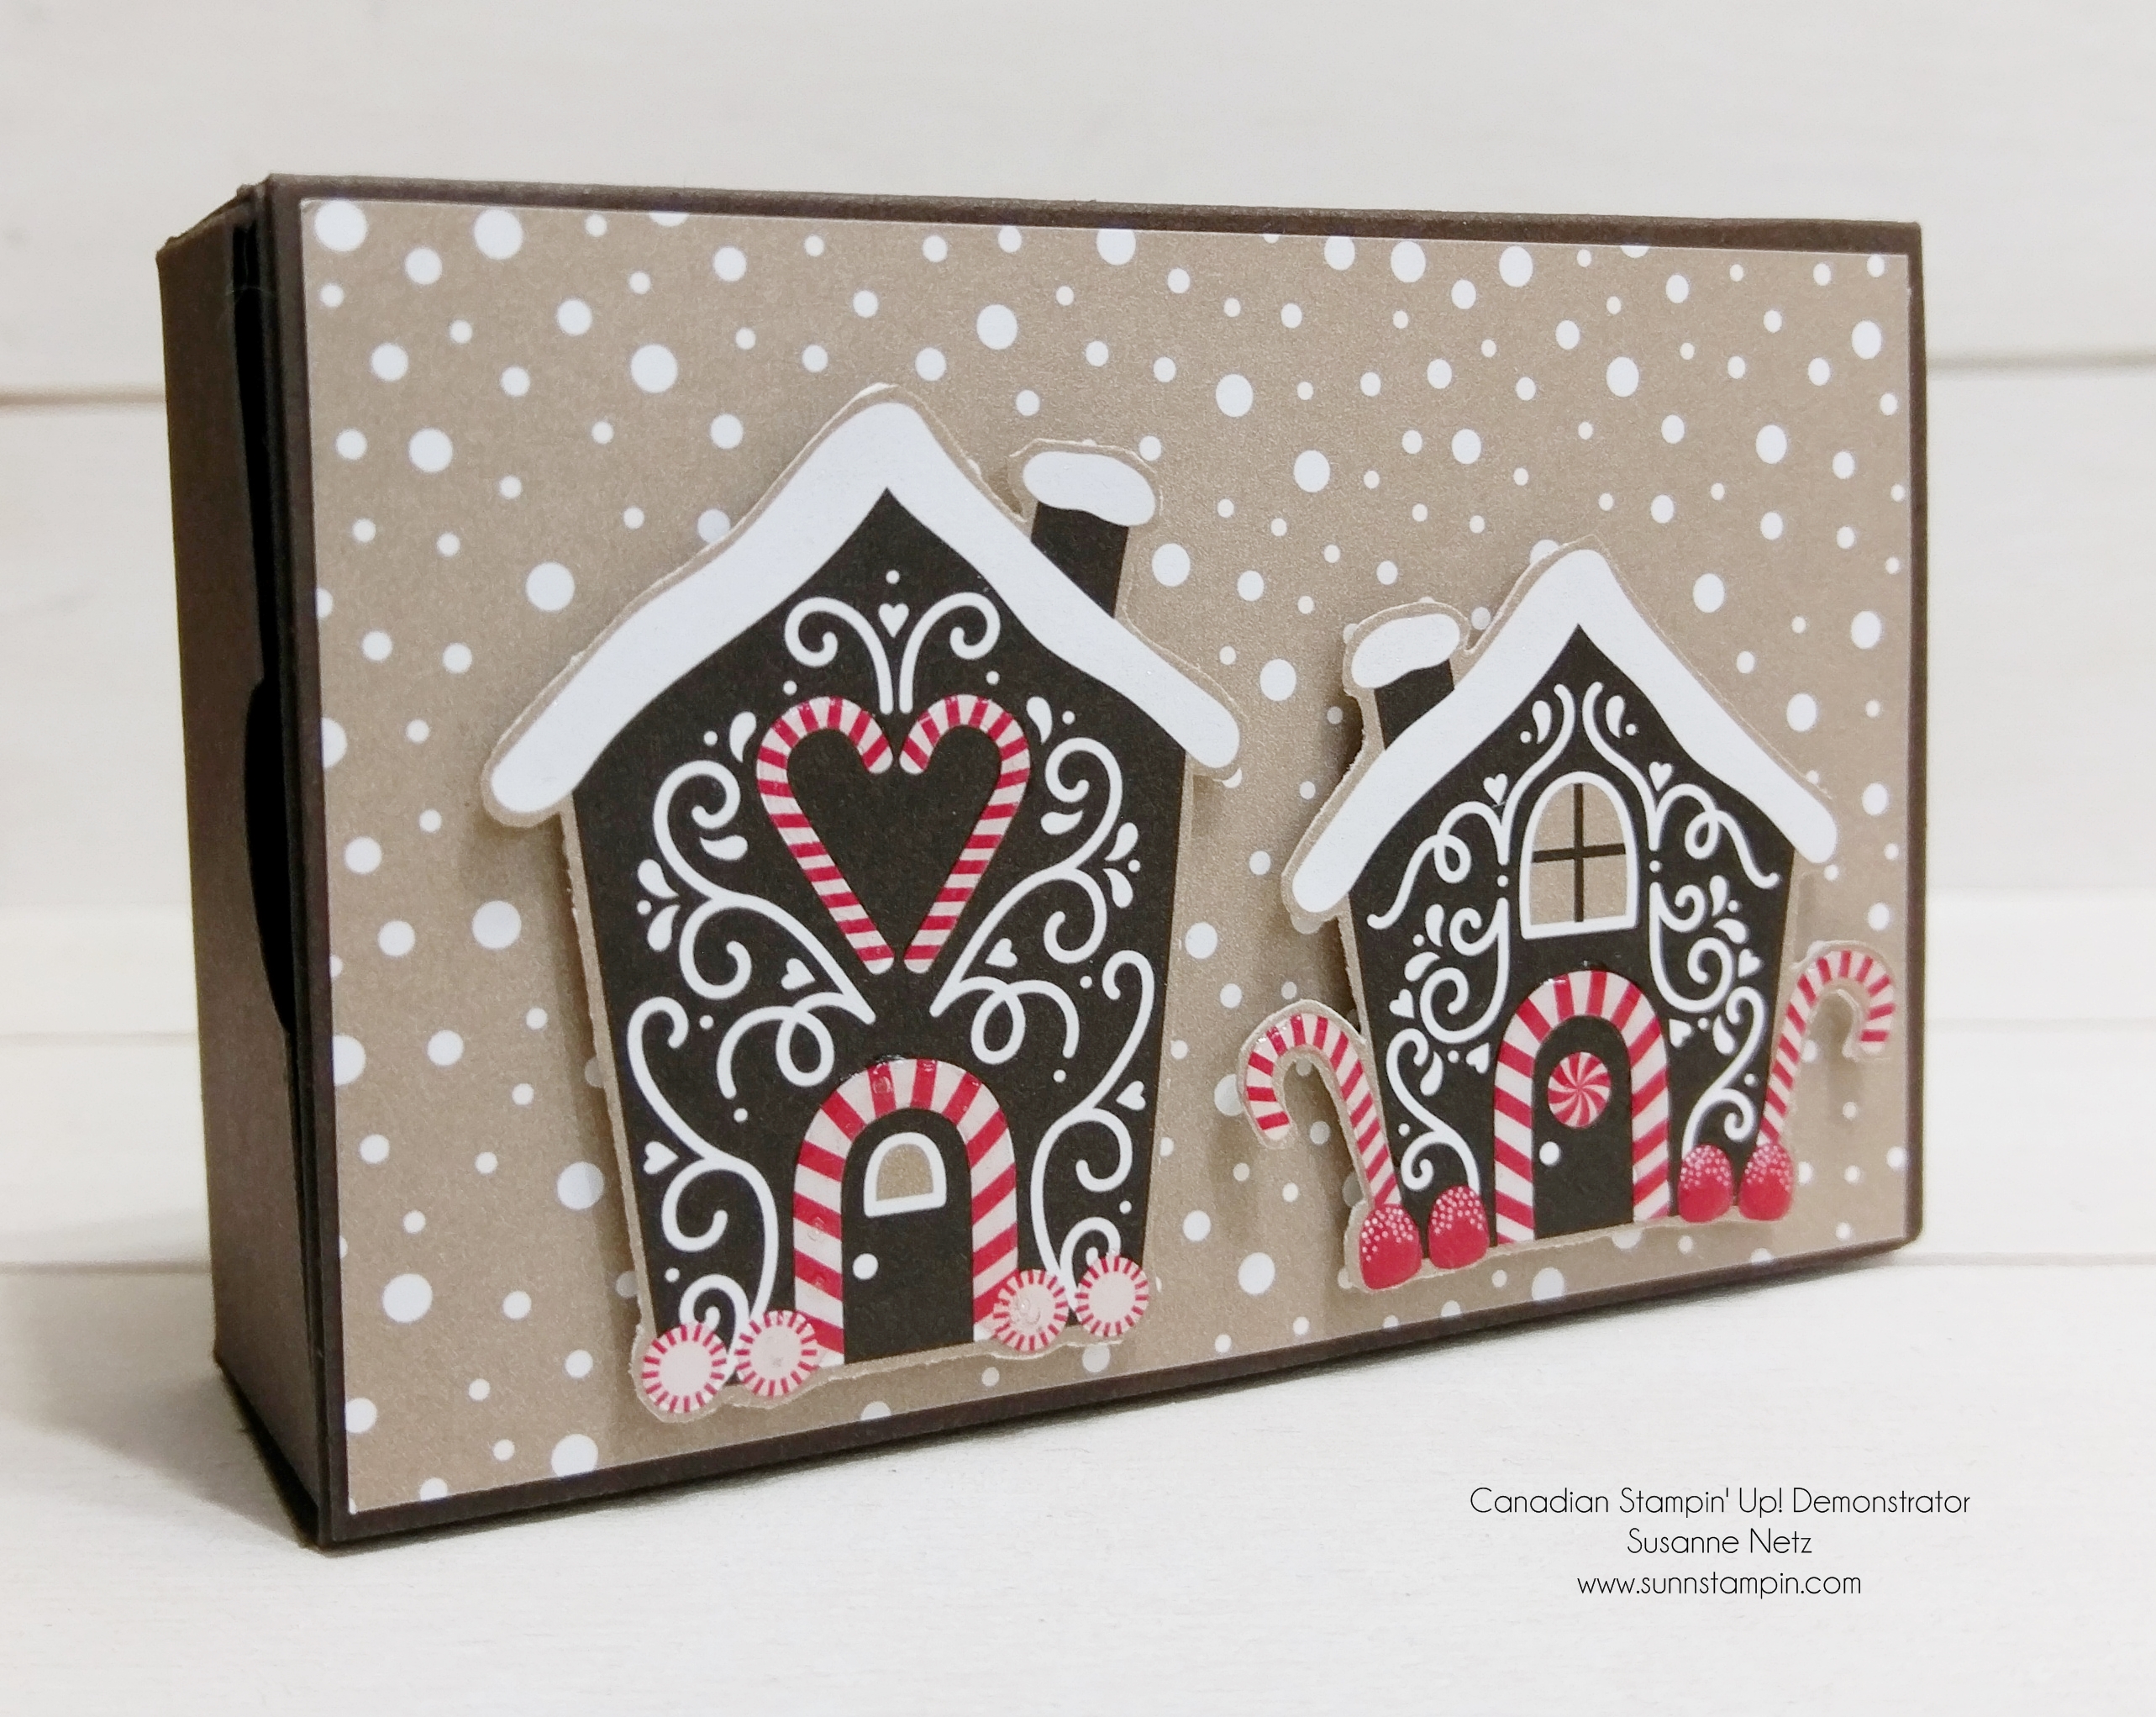
This project is again, no stamping but a lot of die cutting and boy is it worth it. So super cute! I am sure that anyone would be happy to receive a gift from you in this adorable box. Check it out.
Above is button to the entire online store. Below are the links to what I have used on today’s project. Please click on the picture to be taken to the online store. If you make a purchase after clicking on my link, I receive a small commission as your demonstrator with no extra cost to you. I truly appreciate your support when shopping with me. Please do not hesitate to ask me a question as I am here to help you.
Well TGIF I say. It’s been a long week and I get a 3 day weekend. I decided to take the day off tomorrow to observe Remembrance Day. We have ceremonies in the morning so it I feel it will be nice to pay my respects to those who have protected me in my amazing country. Of course we all will remember and reflect of the sacrifices that were made. I say to anyone who is in service now and who has made sacrifices for me, Thank you. I am humbled.
Today’s project would be an excellent one to give to someone special. A fancy lidded box with a little tip from the Amazing Connie Stewart who thought of an amazing simple tool to help with lidded boxes. Check out the video if you want to know more.
Above is button to the entire online store. Below are the links to what I have used on today’s project. Please click on the picture to be taken to the online store. If you make a purchase after clicking on my link, I receive a small commission as your demonstrator with no extra cost to you. I truly appreciate your support when shopping with me. Please do not hesitate to ask me a question as I am here to help you.
Project day!!!! I have a super cute project to share with you today. I hope you like it.
Above is button to the entire online store. Below are the links to what I have used on today’s project. Please click on the picture to be taken to the online store. If you make a purchase after clicking on my link, I receive a small commission as your demonstrator with no extra cost to you. I truly appreciate your support when shopping with me. Please do not hesitate to ask me a question as I am here to help you.
Hi there. TGIF!!! I have a really cute box to share with you today. I am using my amazing new Specialty Designer Series Paper again. I seriously can’t get enough of this stuff. When I was editing the video I thought to myself that for the embellishment (bow) I could have used the new Year of Cheer Washi tape instead of the little strip of foil I used. You will see in the video but I wanted to state it here that there could be an alternative. Have you seen the new washi tapes yet? They are glorious and I highly recommend that you grab some before they retire at the end of December. I know, we all have too much washi tape but seriously…this stuff is beautiful.
I have been including a shopping link every post during this series because I have had a few people have trouble searching for my name in the online store. I hope that by placing a one stop shopping button front and center that it helps a few people with their trouble. Did you know that the online store is open 24/7? Yep, you can shop in your pajamas if you want. Click the button below to head to the online store.
Here is the project for today. I hope you give this one a try…it was a seriously quick project.
Here are the links to what I have used on today’s project. Please click on the picture to be taken to the online store. If you make a purchase after clicking on my link, I receive a small commission as your demonstrator with no extra cost to you. I truly appreciate your support when shopping with me. Please do not hesitate to ask me a question as I am here to help you.
It’s Friday!!!! The weekend is almost here and I so hope that you are getting your craft on. Here is a really cute project for all those great cookies and little gifties that you will inevitably make/buy for your loved ones.
Remember, if you need to browse the store click the button below but if you need more specific links, remember the product picture links before the video will take you right to the item if you want more information.
Here are the links to what I have used on today’s project. Please click on the picture to be taken to the online store. If you make a purchase after clicking on my link, I receive a small commission as your demonstrator with no extra cost to you. I truly appreciate your support when shopping with me. Please do not hesitate to ask me a question as I am here to help you.
Hello and thank you dear friend for making this series possible. I appreciate your comments and your support more than you know. It’s the last day of my Christmas Series and I hope you had fun and got inspired. I wish you a very happy time crafting and that you have a lovely, stress free December. I do not book classes or workshops during the month of December because my day job is so busy this time of year. However, I will still bring you content throughout the month of December so I will try to stay as a source of inspiration and fun for you. So the project I have to share with you today is a great one, I loved it and may try to do different sizes as I really liked the out come. 🙂 Enough chatter and enjoy the last day of my Christmas Crush Series.
Product List
The Details:
Cardstock sizing: Outer box 4 1/4″ by 11″.
Long side scoring: 2 3/4″, 4″, 6 3/4″ 8″, 10 3/4″
Short side scoring: none
Cardstock sizing for Drawer Box: 5 1/16″ by 6 5/8″.
Scoring: 1 3/16 on all four sides.
Patterned Paper sizing: 2 5/8″ by 4 1/8″ for the outside and for the inside card part the patterned paper and plain card sizing I used was 2 1/2″ b y 4″.
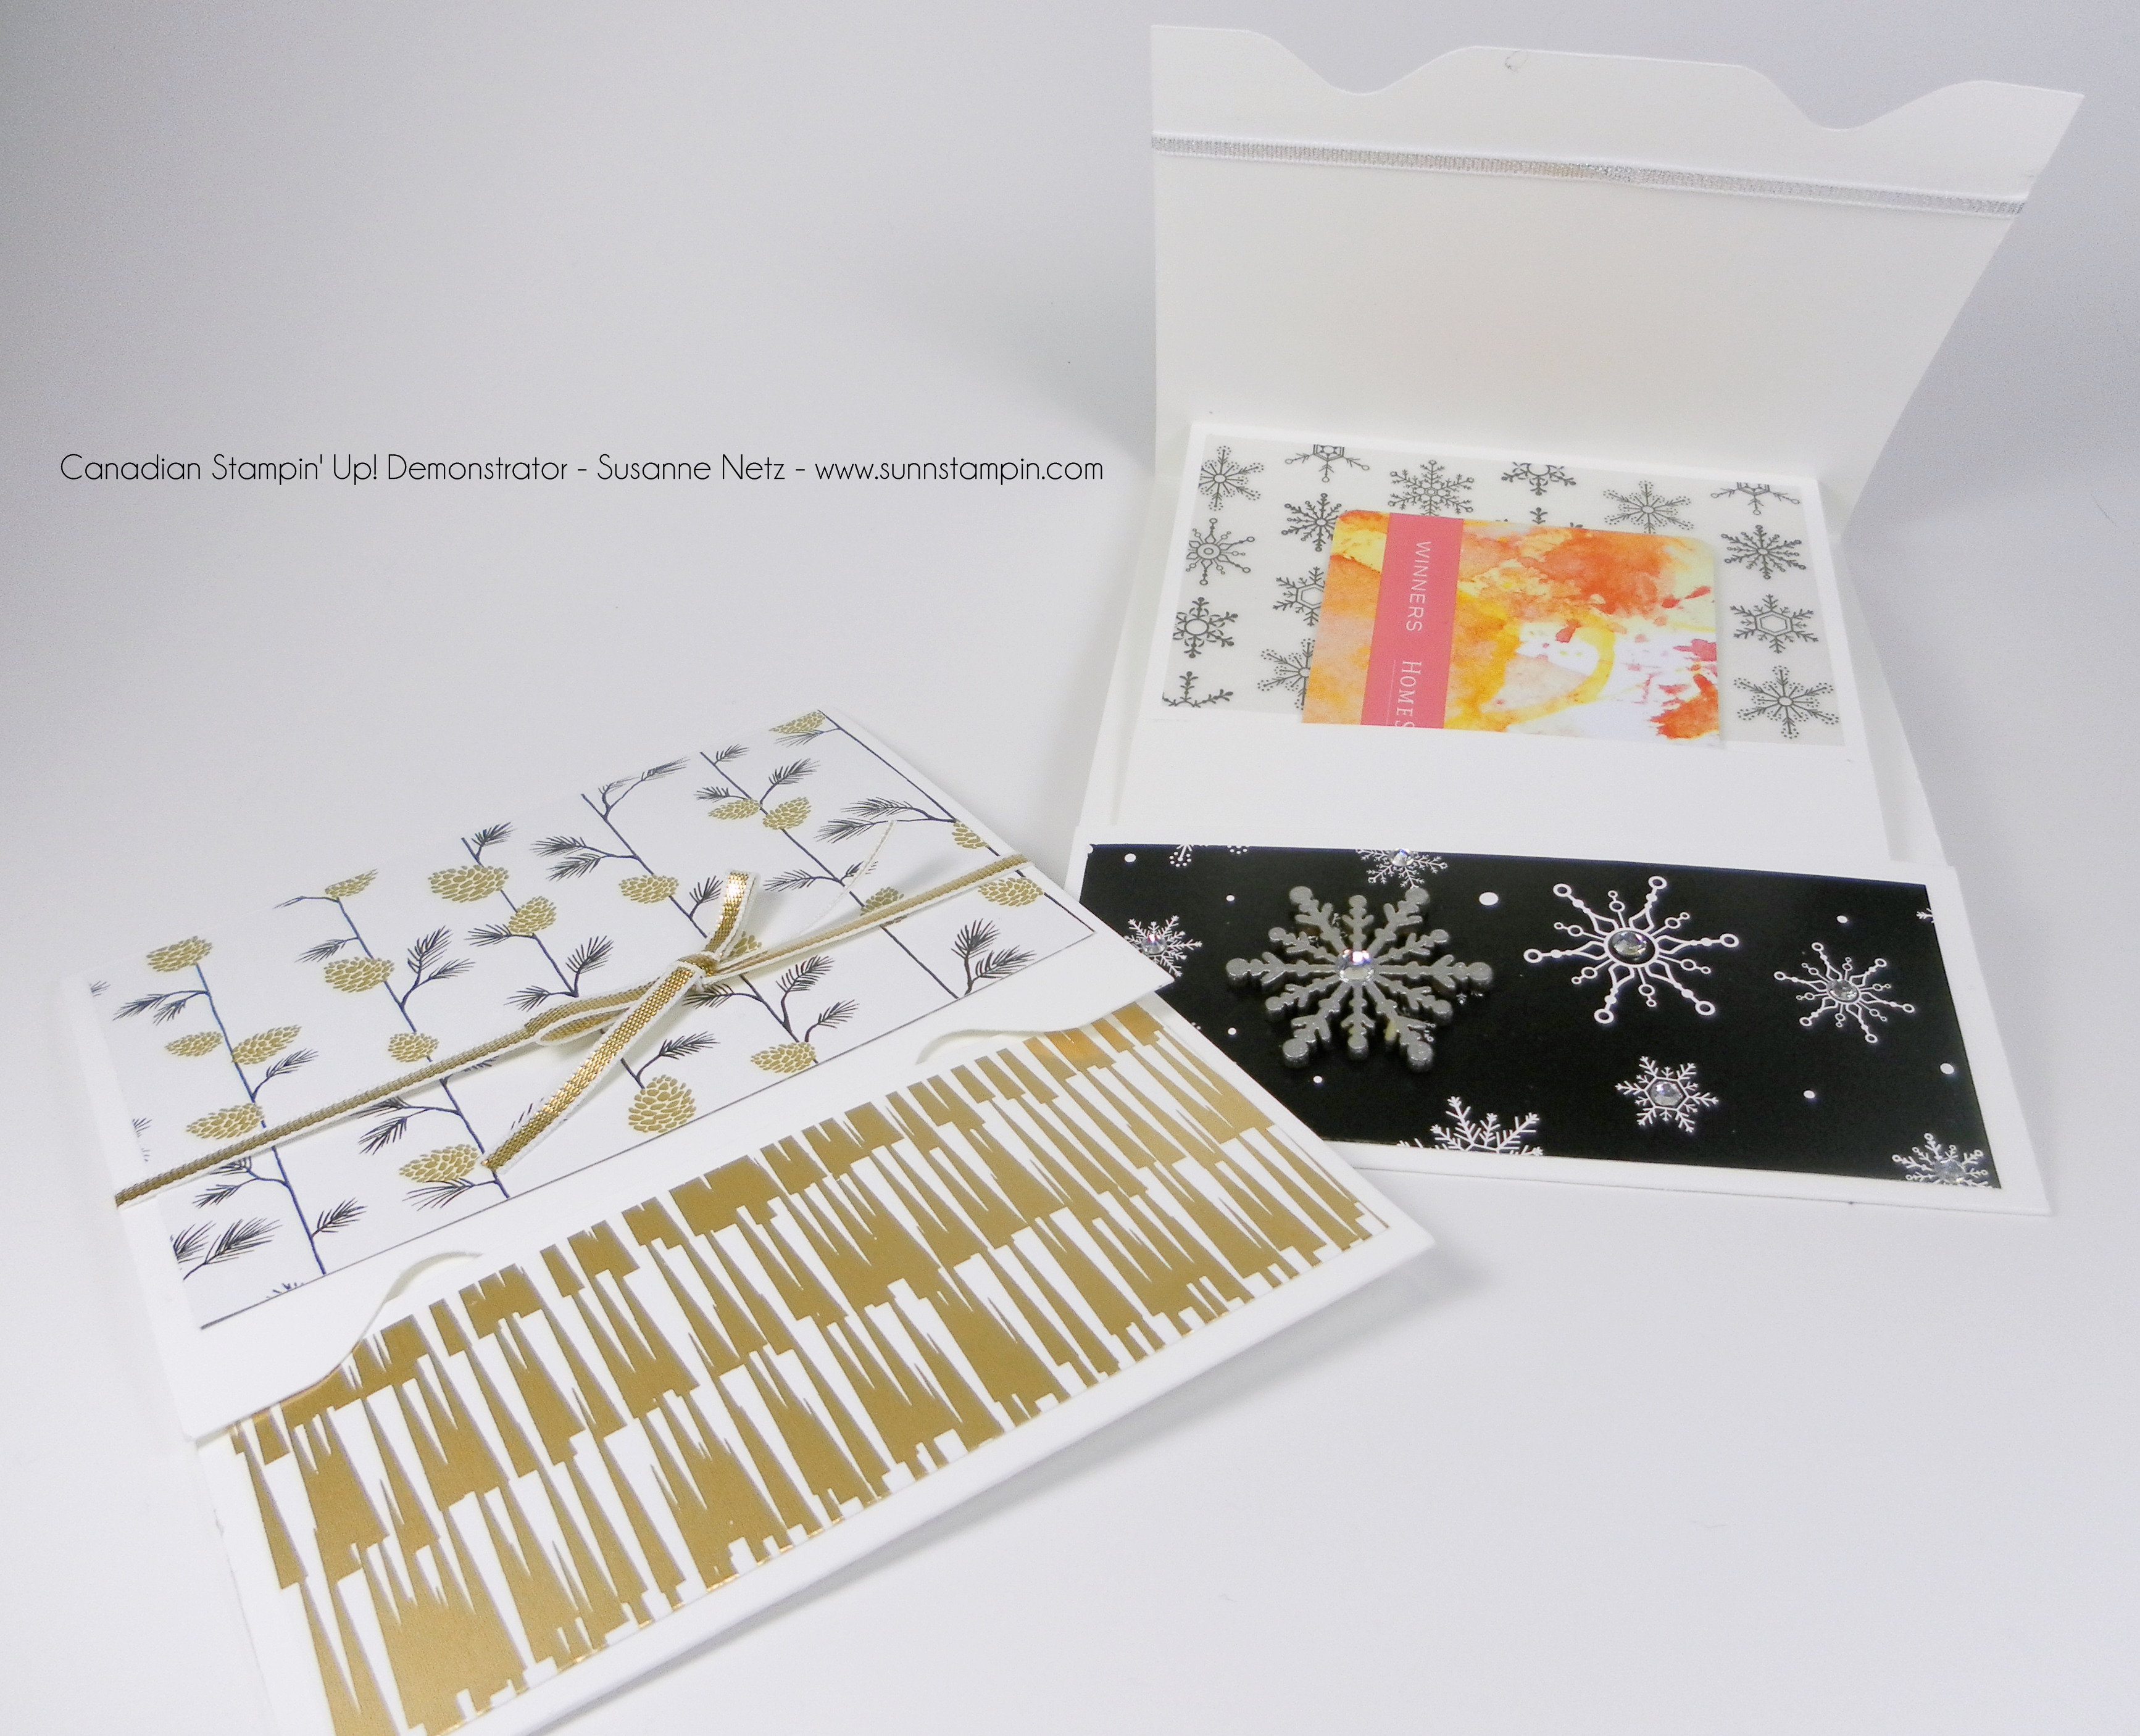
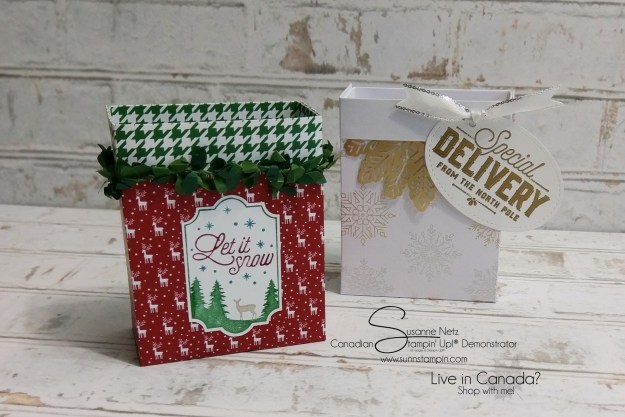
Hello and joyous noel to you. I hope you are finding some inspiration here on my blog. If you need more ideas please pop by my gallery page and look at some of the photos with videos there, as I did this series last year as well. Anyway, this is a wonderful little box to house a gift card in. Check it out.
Hi there. Hope you are happy and healthy. Today is a project using the Envelope Punch Board. I really love this tool and find that I make more projects with it than envelopes. However, that corner rounder serves wonderfully for card making as well. Most versatile tool? I would have to agree. So, let’s celebrate this tool with a project…yay!
Using the envelope punch board line up left side to the 3 1/2″ mark, punch score and scoot your paper to the left and punch at 4 3/8″ punch score and turn the paper 90 degrees.
Follow the rest of the scored lines by lining up your score guide to the score line and punch score and scoot.
When finished the bigger triangles you will cut off about 1 1/2″ and round the two small ones.
Layering pieces: Matt 4 1/4″ by 1 5/8″. Glimmer piece is 1 1/2″ by 4 1/8″.
Hello, it’s Friday and all is well with the world. Mainly because of brave men and women who fought for our freedoms and our way of life. It is Remembrance Day here in Canada and I do thank these brave soldiers who basically allowed me to grow up the way I did. With deepest respect I send my gratitude and thoughts to them.
I also want to check in with you all, are you enjoying all these Christmas Projects and are you getting inspired by them? I hope you are settling in to do a little crafting with me today. I have a really cute project to share with you today so let’s get on with it shall we?
Product List
The Details:
Cardstock sizing 6 1/2: by 6 1/2″
Scoring on the long side at: 1″, 5″, 6″, and 6 1/2″.
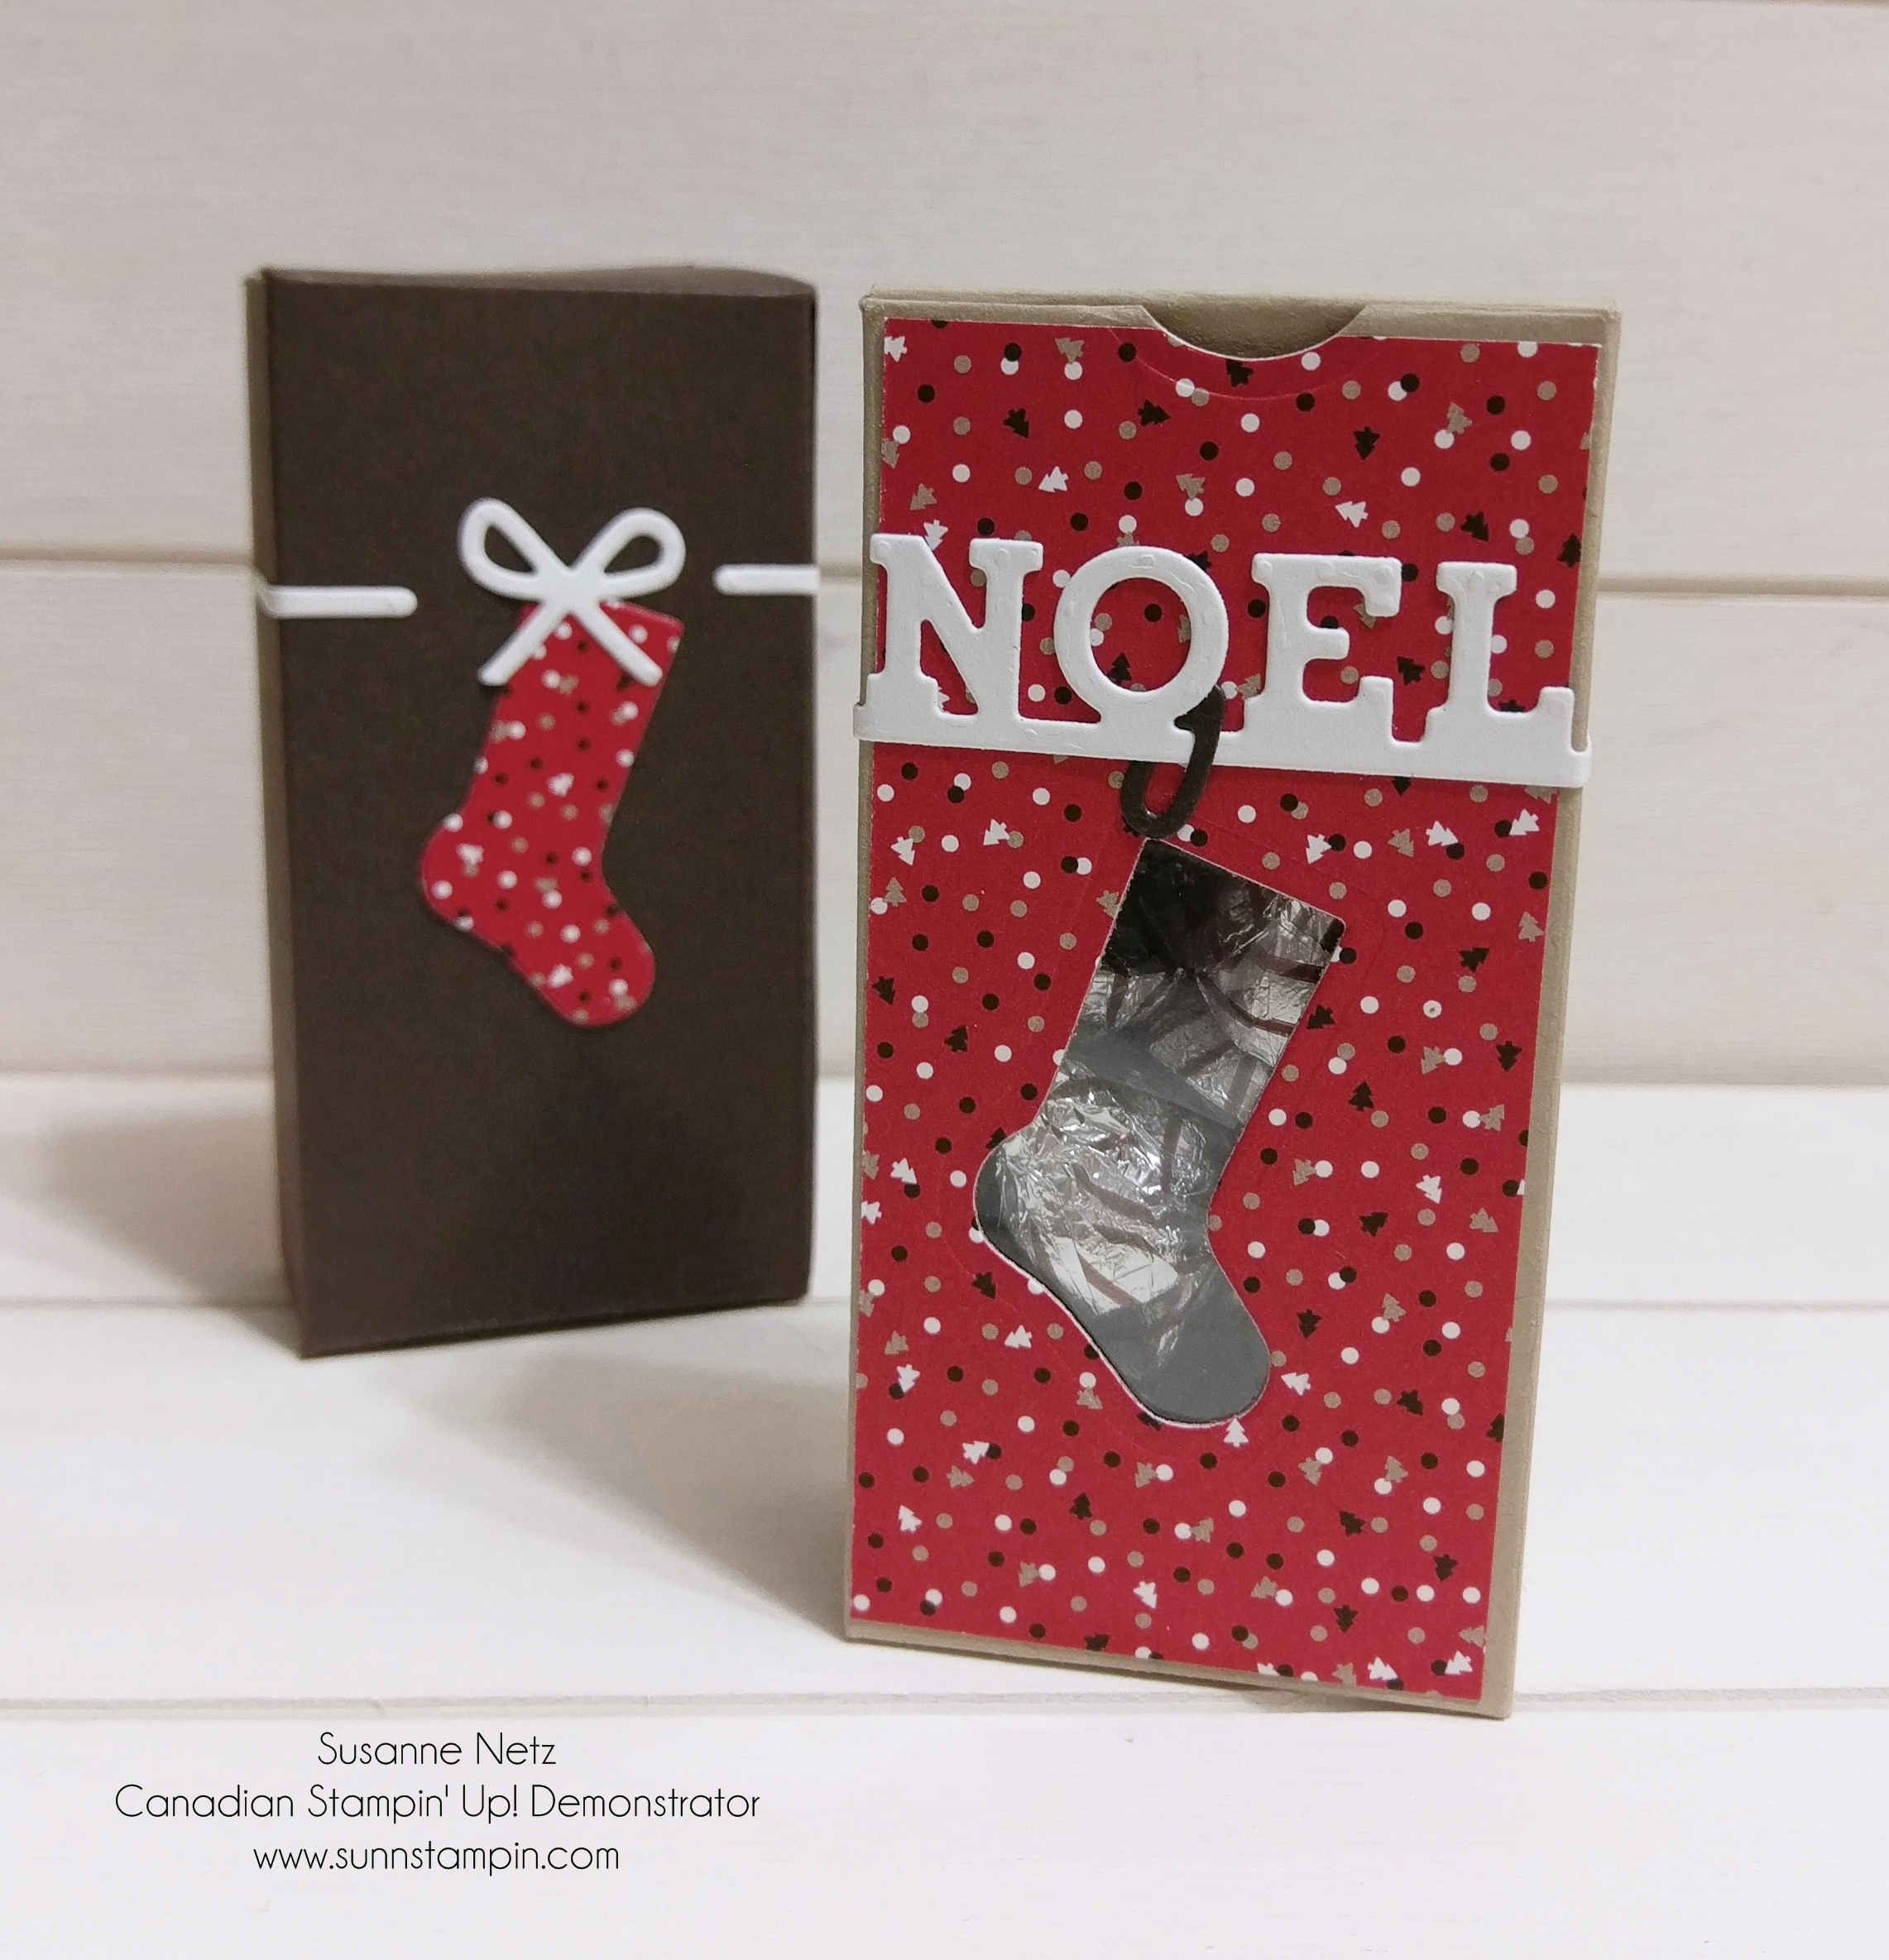
Hello, in keeping with my regular schedule…Fridays are always reserved for projects and today is no different. I am sharing a project that many people had used for post it notes and pencils…however, I made mine to house hot chocolate. Speaking of…I think I should go make myself one. No, I may spill it on the road…yes folks, as you read this I am traveling to Vancouver, BC for “ON STAGE LOCAL”. This is a convention type gathering for local Demonstrators go to get invigorated and rejuvenated. You can imagine how many hoops I had to jump through to get the first 2 weeks of Christmas Crush scheduled BEFORE I leave. Let me tell you, I love you guys so much that there was (more than a few) late nights doing all this blogging work. Anyway, enough gibber gabbing. On with the show….
Product List
The Details:
Cardstock sizing: 3 3/4″ by 11″
Long side scoring at 4 /1/4″, 8 1/2″, 9 1/2″ and 10 1/2″.
Pocket Cardstock sizing: 3″ 5 3/4″.
Score at 1/2″ and 1″ on 3 sides (2 short and one long).
Hello and thank you for stopping by. I have worked really hard over the last month with the Christmas Crush and the Card holder series. I am actually sad to get back to normal broadcasting next week. In doing all this work I have met some wonderful people, gotten Christmas cards from all over the globe and have had a lot of fun chatting and reaching out to you personally. I feel very grateful to be apart of the paper crafting community and feel very lucky to be working with Stampin’ Up! for this wonderful opportunity. Yay, Stampin`Up!
If you are Canadian and in some way I have inspired you, then I would love the opportunity to earn your business by becoming your demonstrator (or if you too would like to become a demonstrator I would love to help you along with that goal too). You can email me if you have questions, or you can shop online right now by clicking any of the supply links below you will get to my online store. You don’t have to live near me. I can do my very best to support you from across our great nation. I am happy to send you your first Catalog with me, and if you continue to spend $60 or more in a 6 month period I will send you your next catalogs for free too (as soon as they get off the presses, right from head office). I really want the opportunity to earn your business so please tell me how I can improve your crafting life and I will do my very best to make it happen. 🙂
So the gift card holders I have made for today are more like cards. I made 3 today because I am an over achiever and because they were all kind of the same but different. Enough chatter, here is the video, pictures are below with details and a supply list below.
2 pcs of card stock (card 11 by 4 1/4 and insert 6 by 1 3/4)
Make a regular card base…then insert 2 5 by 5 squares into the inside of the card.
2 pieces of dsp sized 5 by 5 and scored exactly the same way at 1 1/2, 2 1/4, 3 3/4 and 4 1/2 (notice the way you want your pattern to go and score that way)
Make a regular card base. Decorate it the way you wish. the pocket on the front is made with a 4 by 3 1/4 inch piece of card stock scored on the two long sides and one short side at 1/2 inch. Miter the corners and if you want a circle punched into it make sure to trim the inside flaps down.
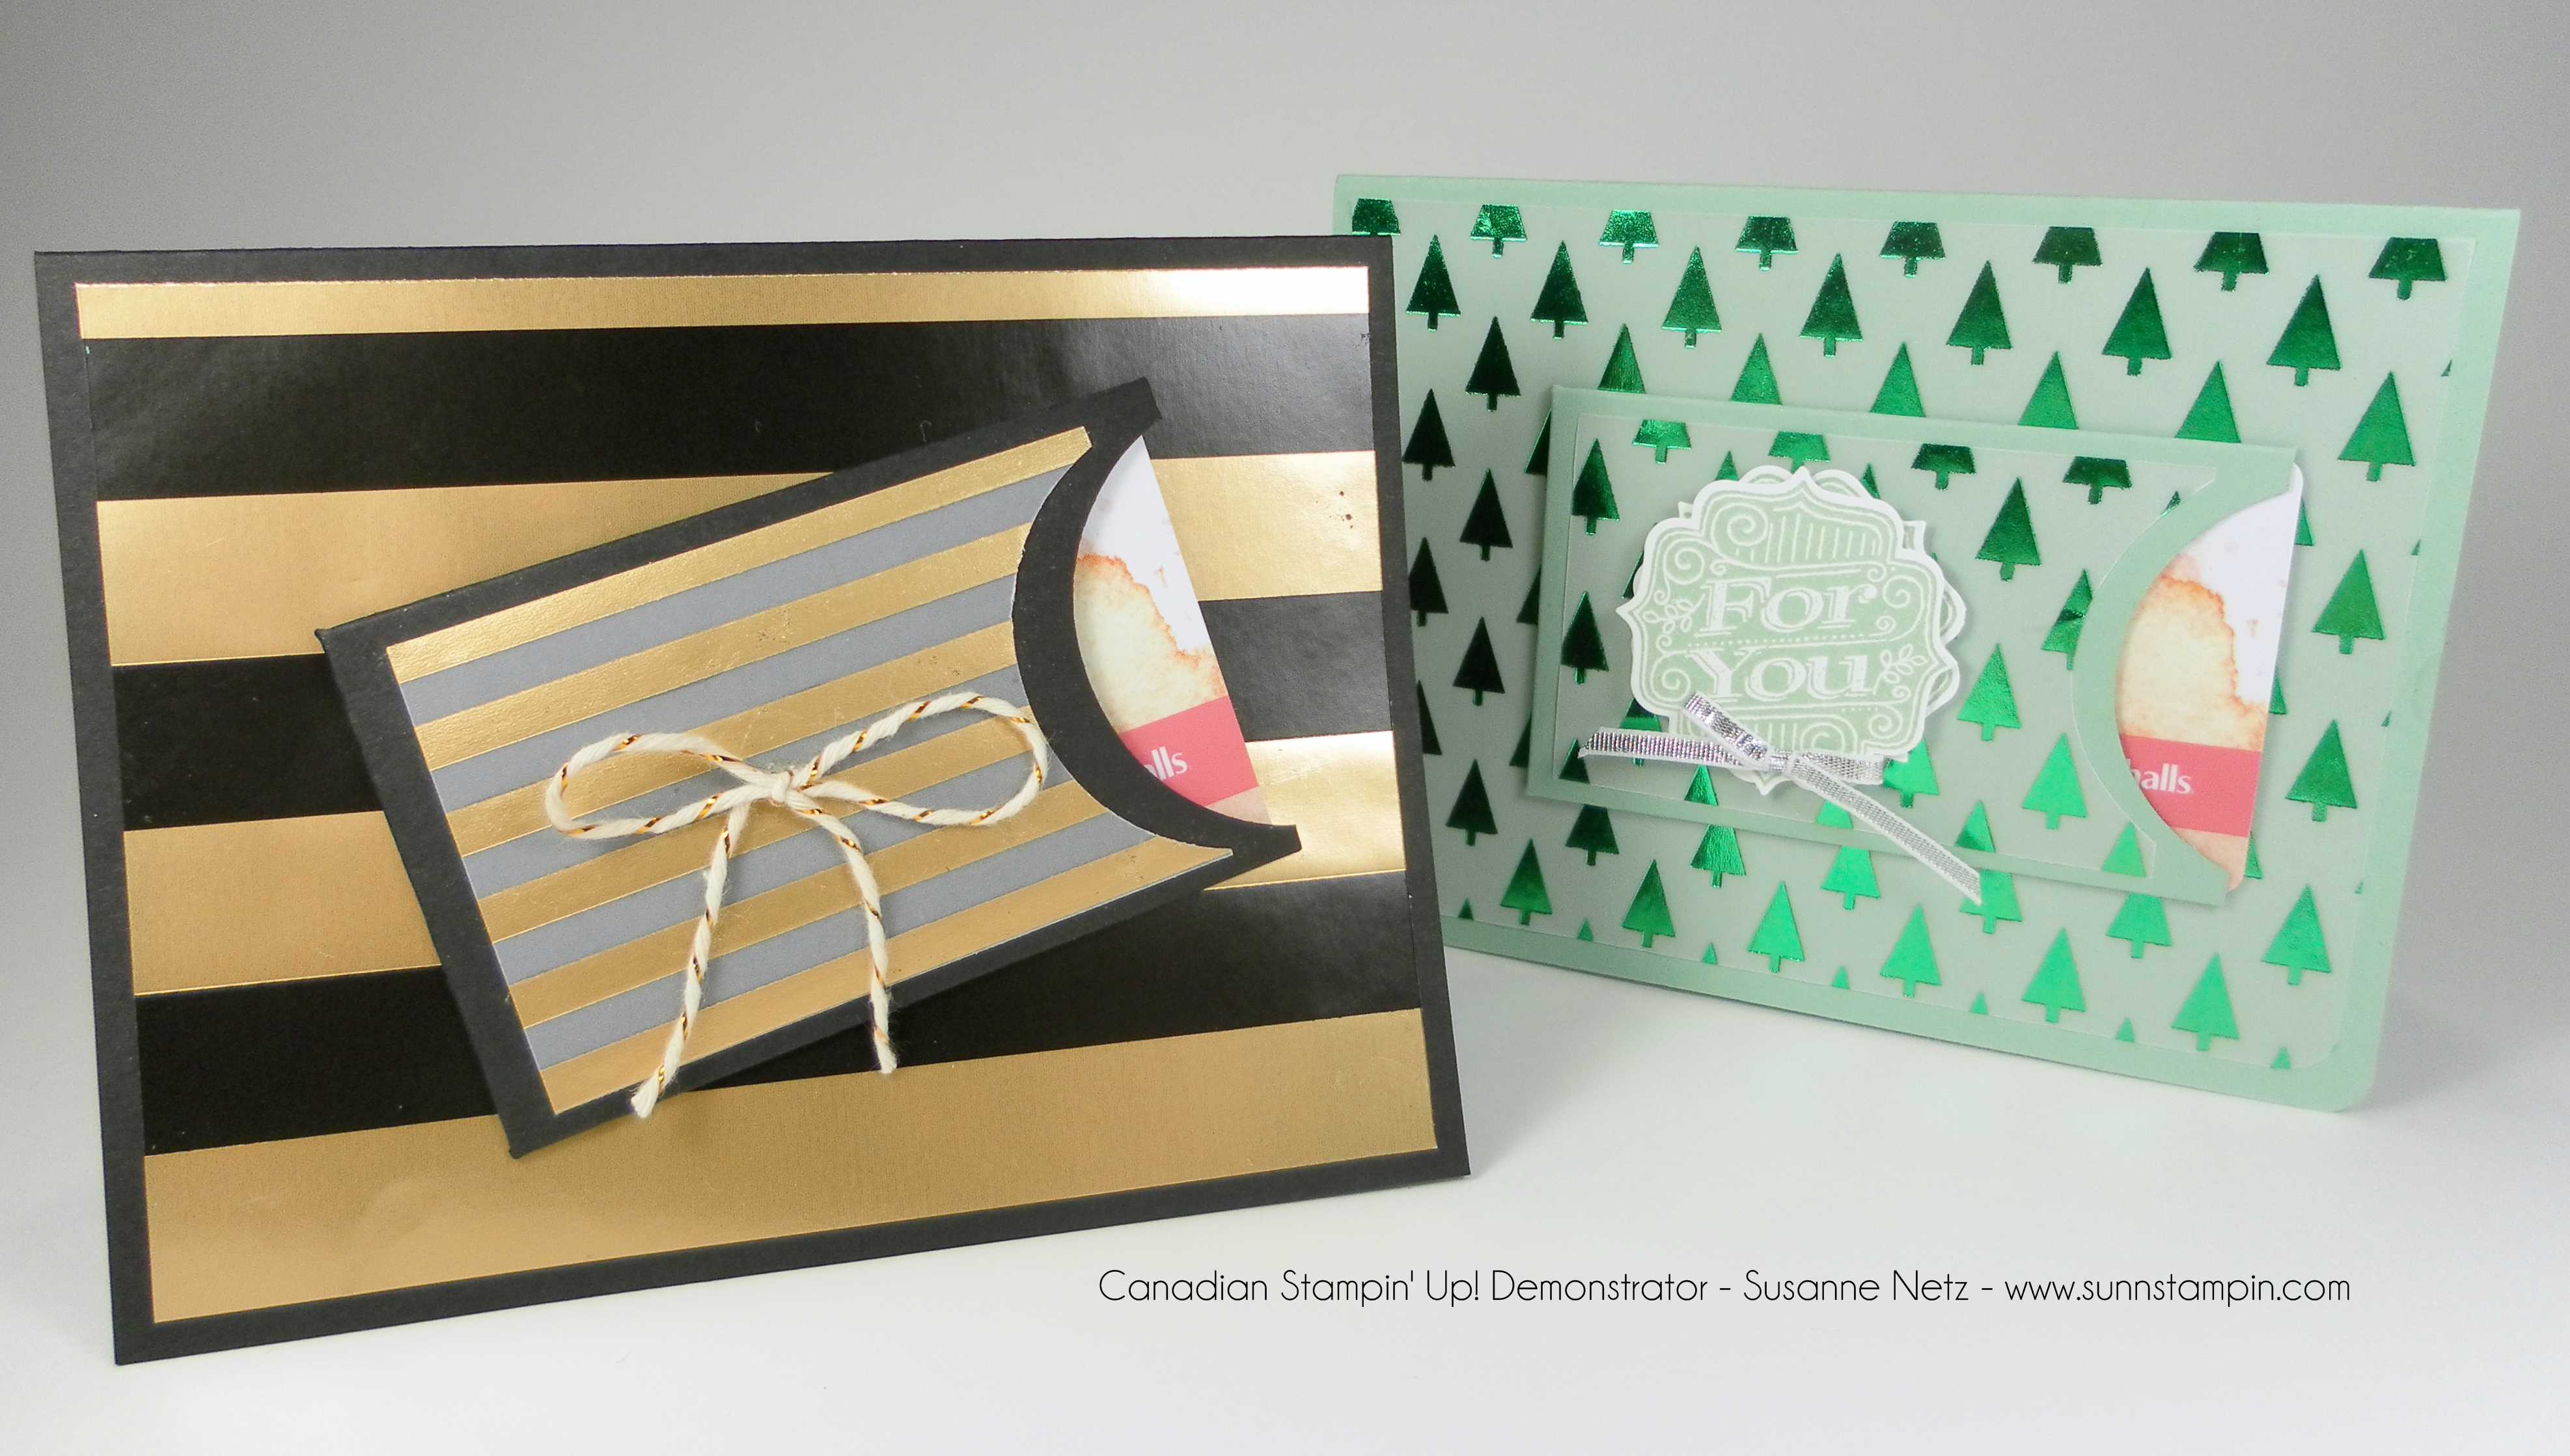
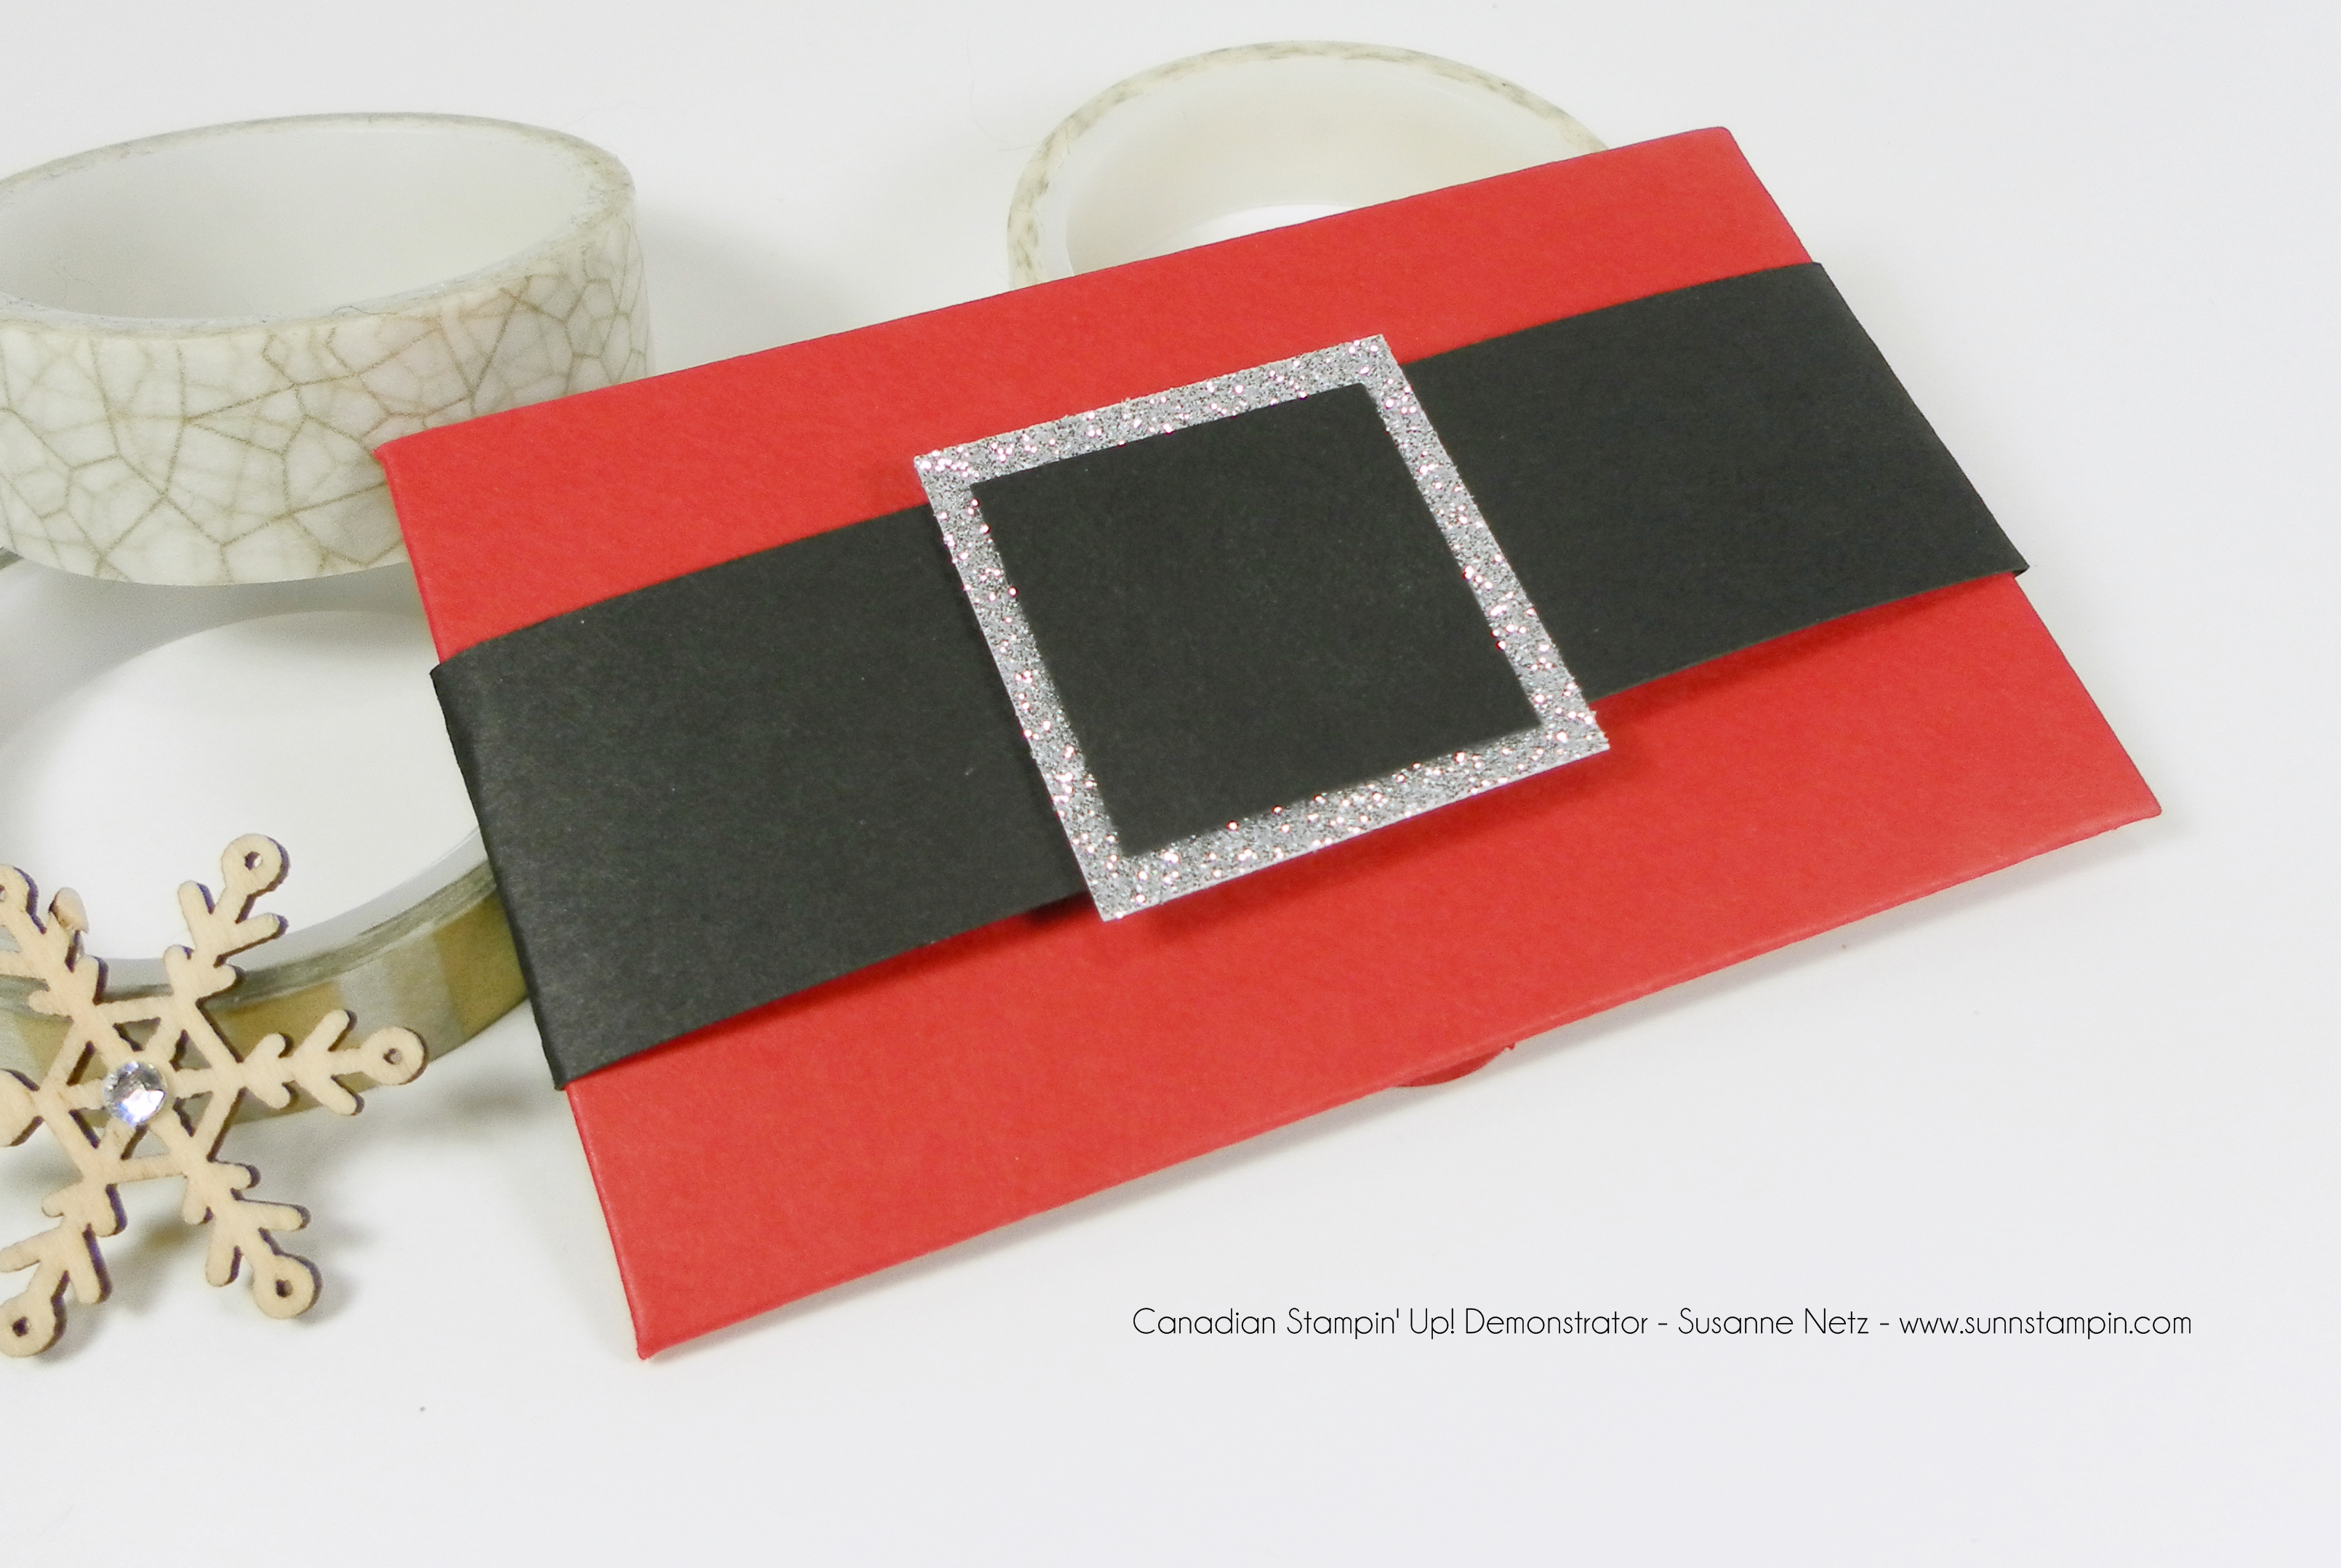
Hi everyone. I hope you are enjoying this series. I like having all the ways to dress up a gift card in one easy playlist to find. I choose to do 2 every day because there are so many ways to dress up a gift card and even though I did not design these I did some fun things with the decorating. To be fair I do not know who exactly designed them because when I did do a search on the internet I found hundreds of tutorials and I couldn’t be accurate with who came up with what first…Anyway, check out the video and of course the details are below the pictures.
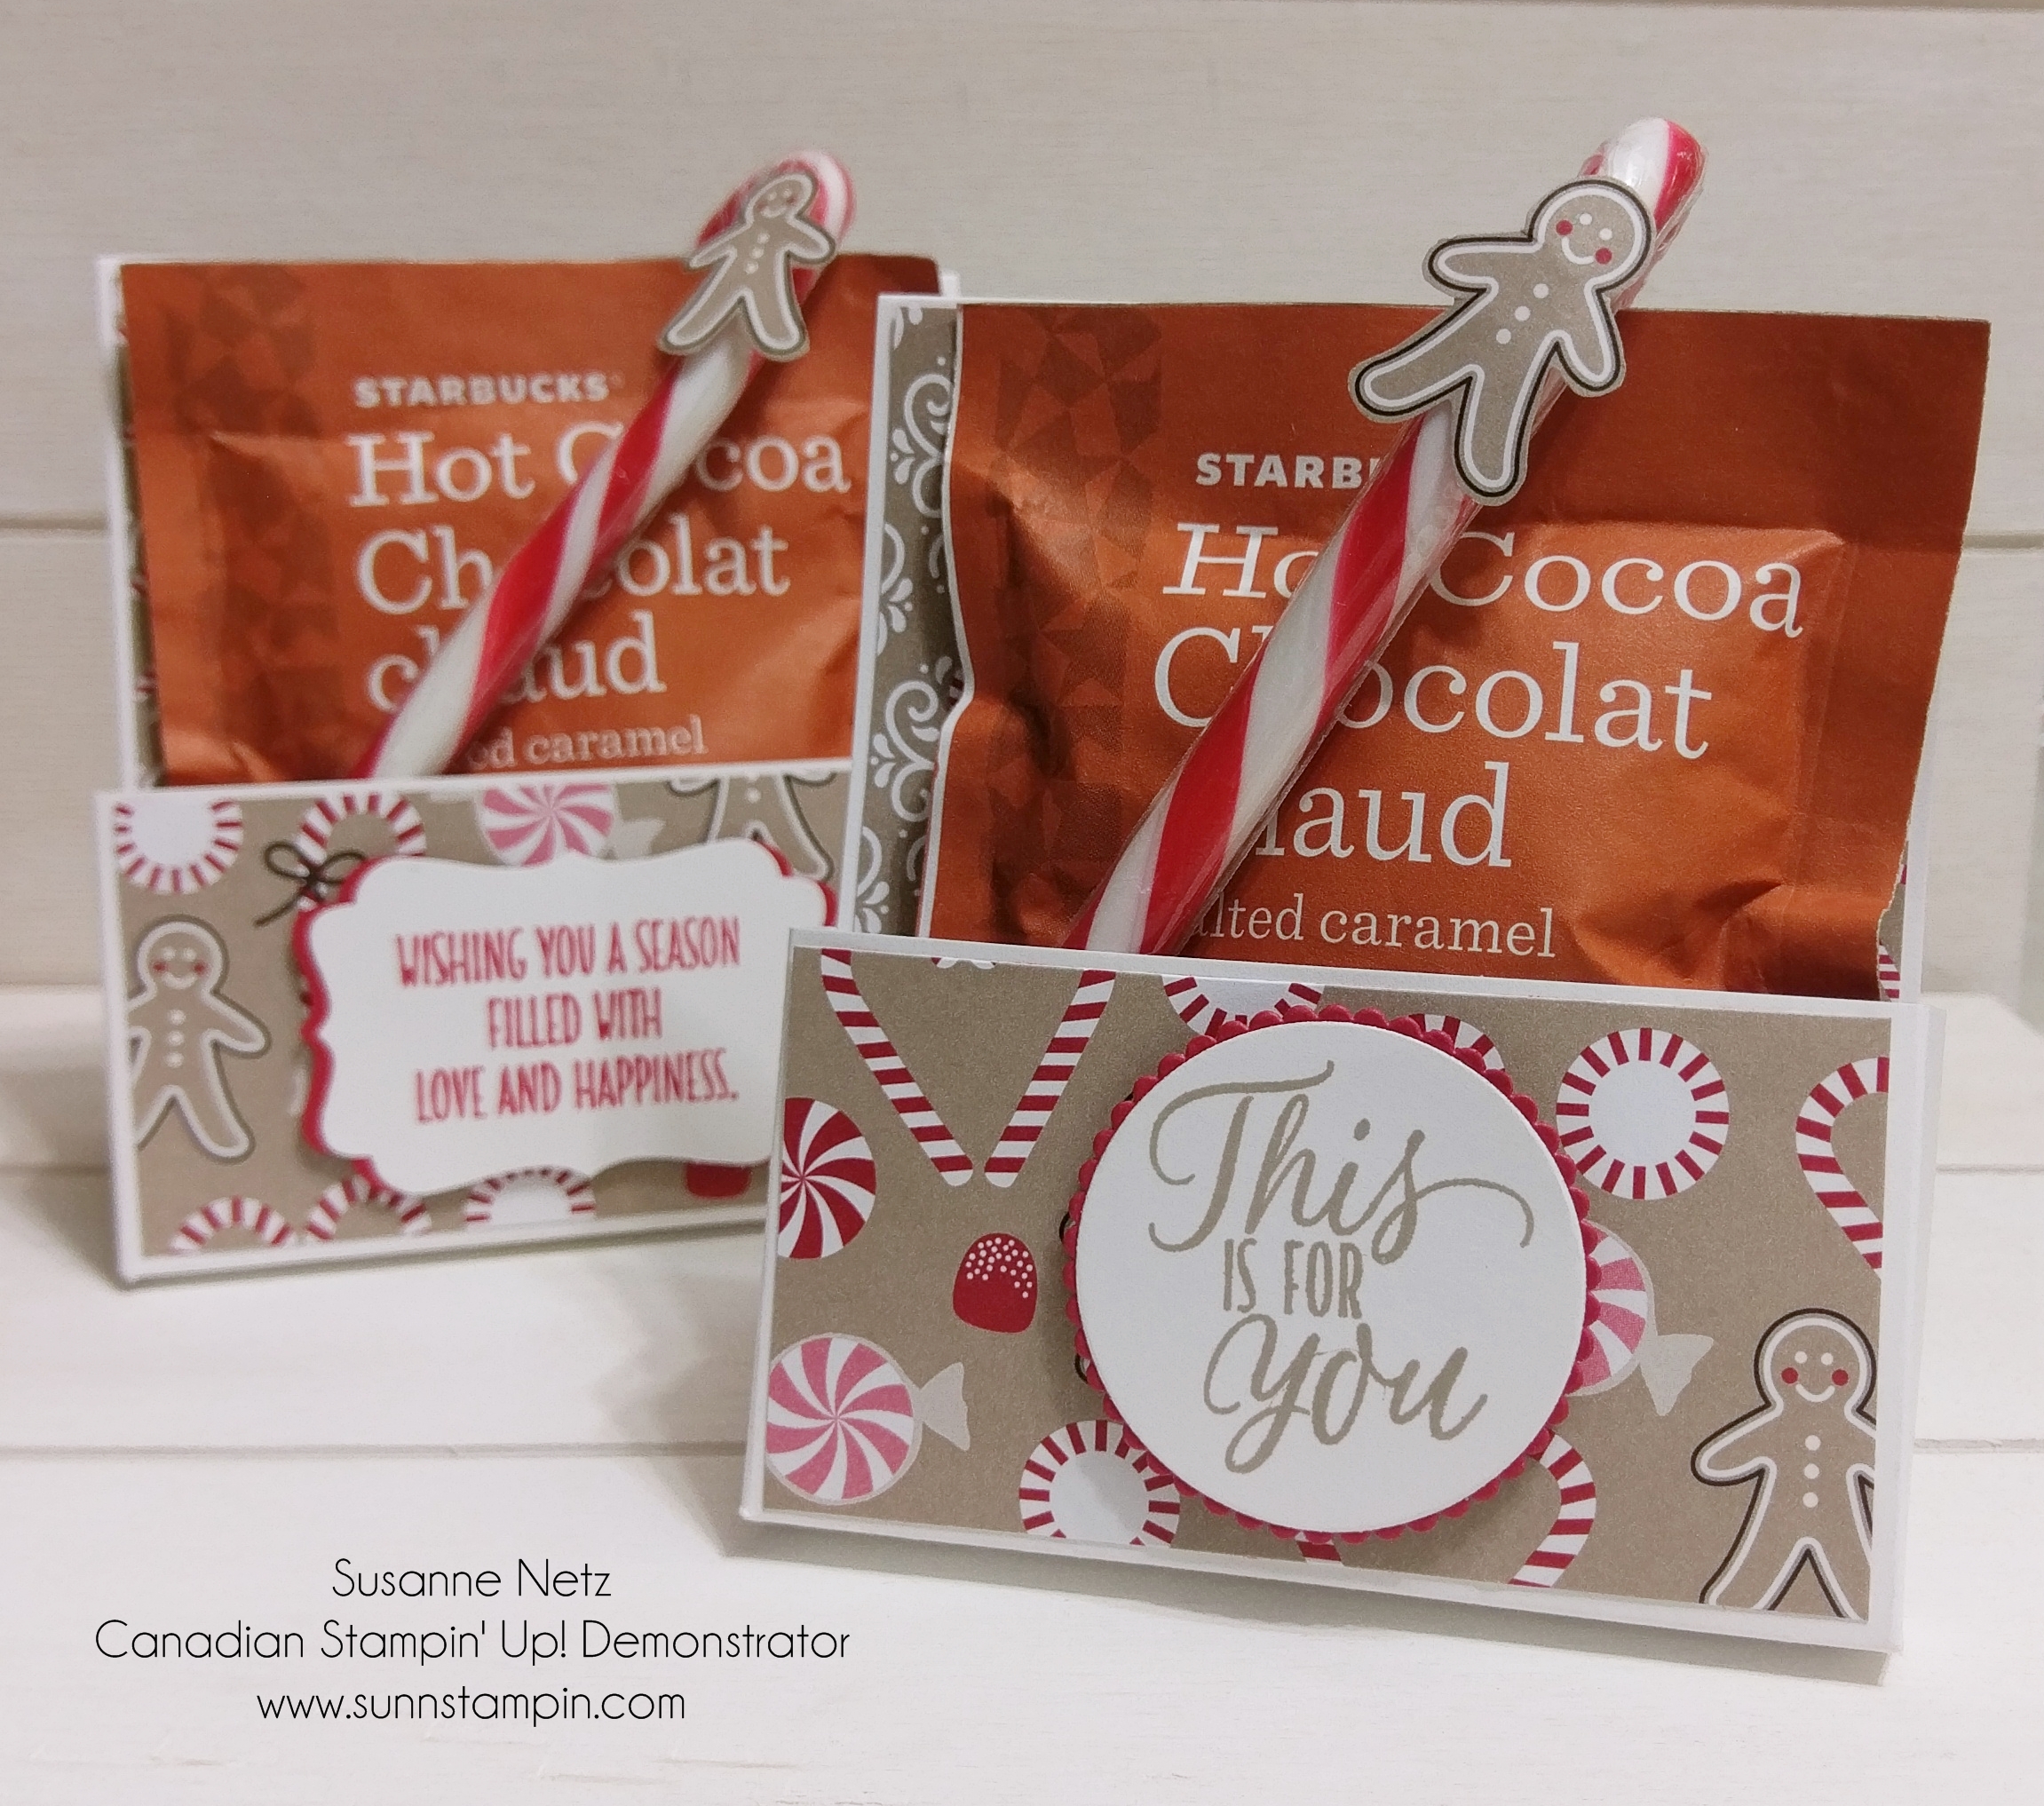
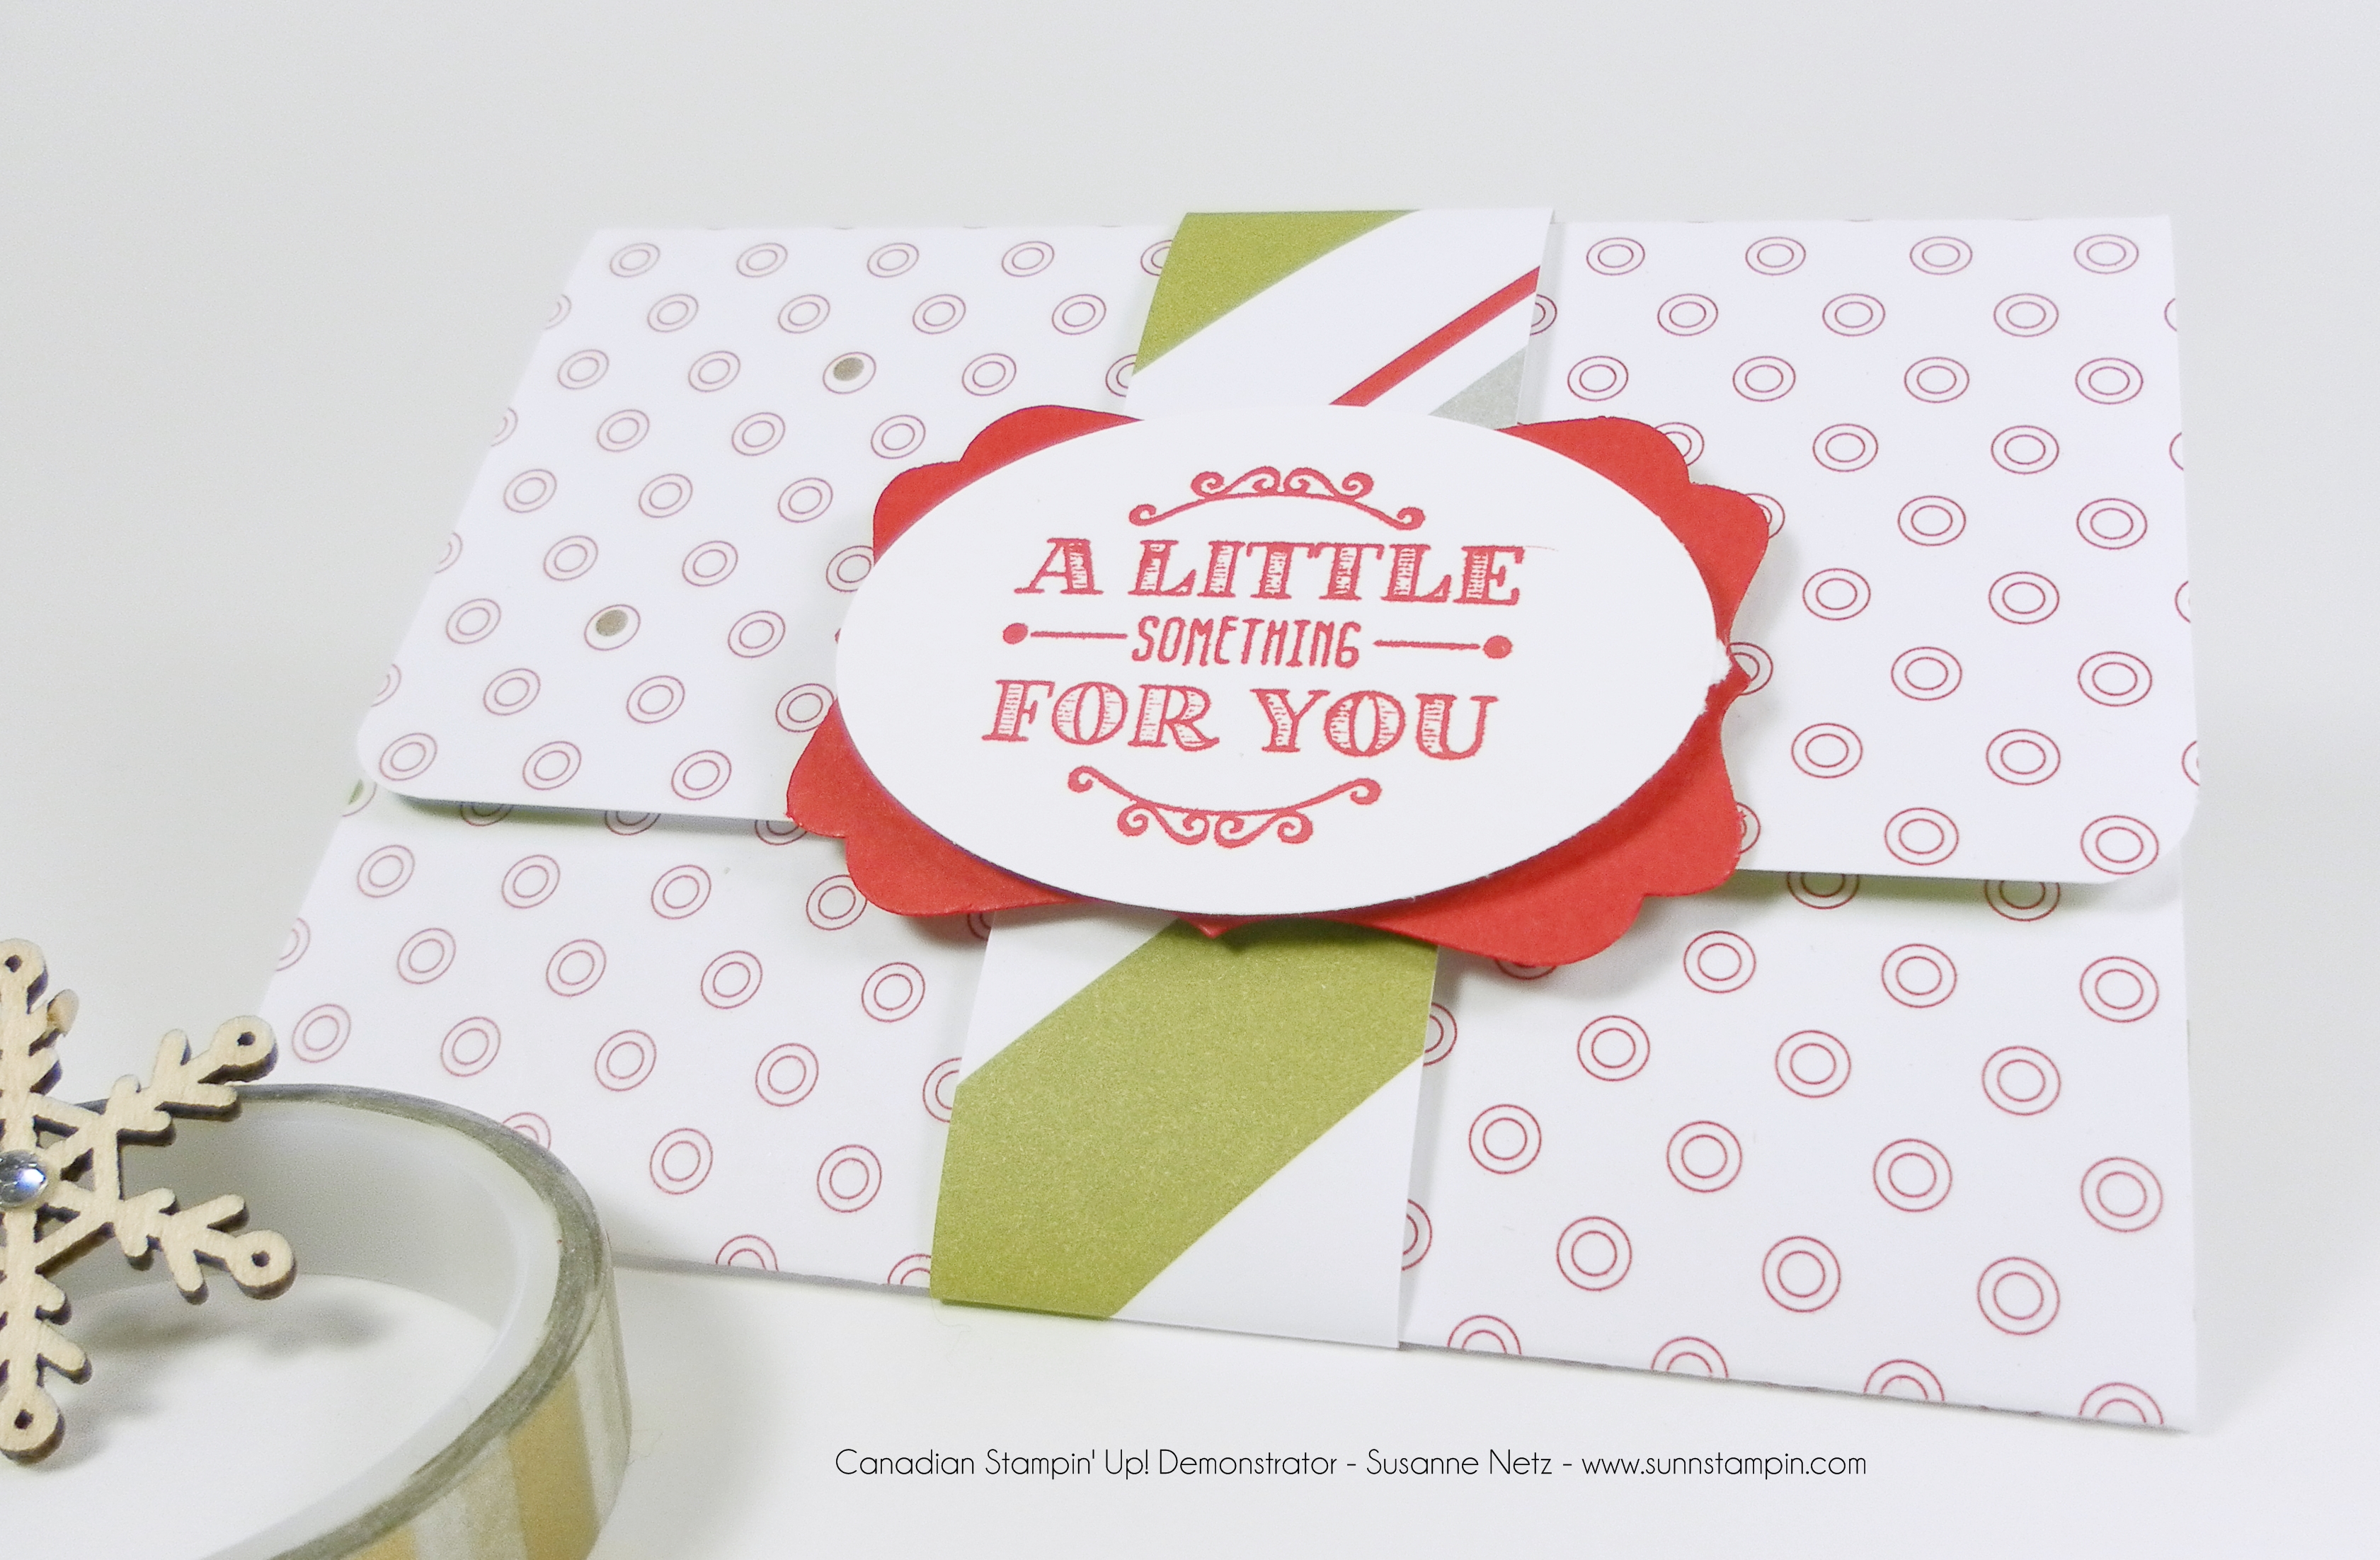
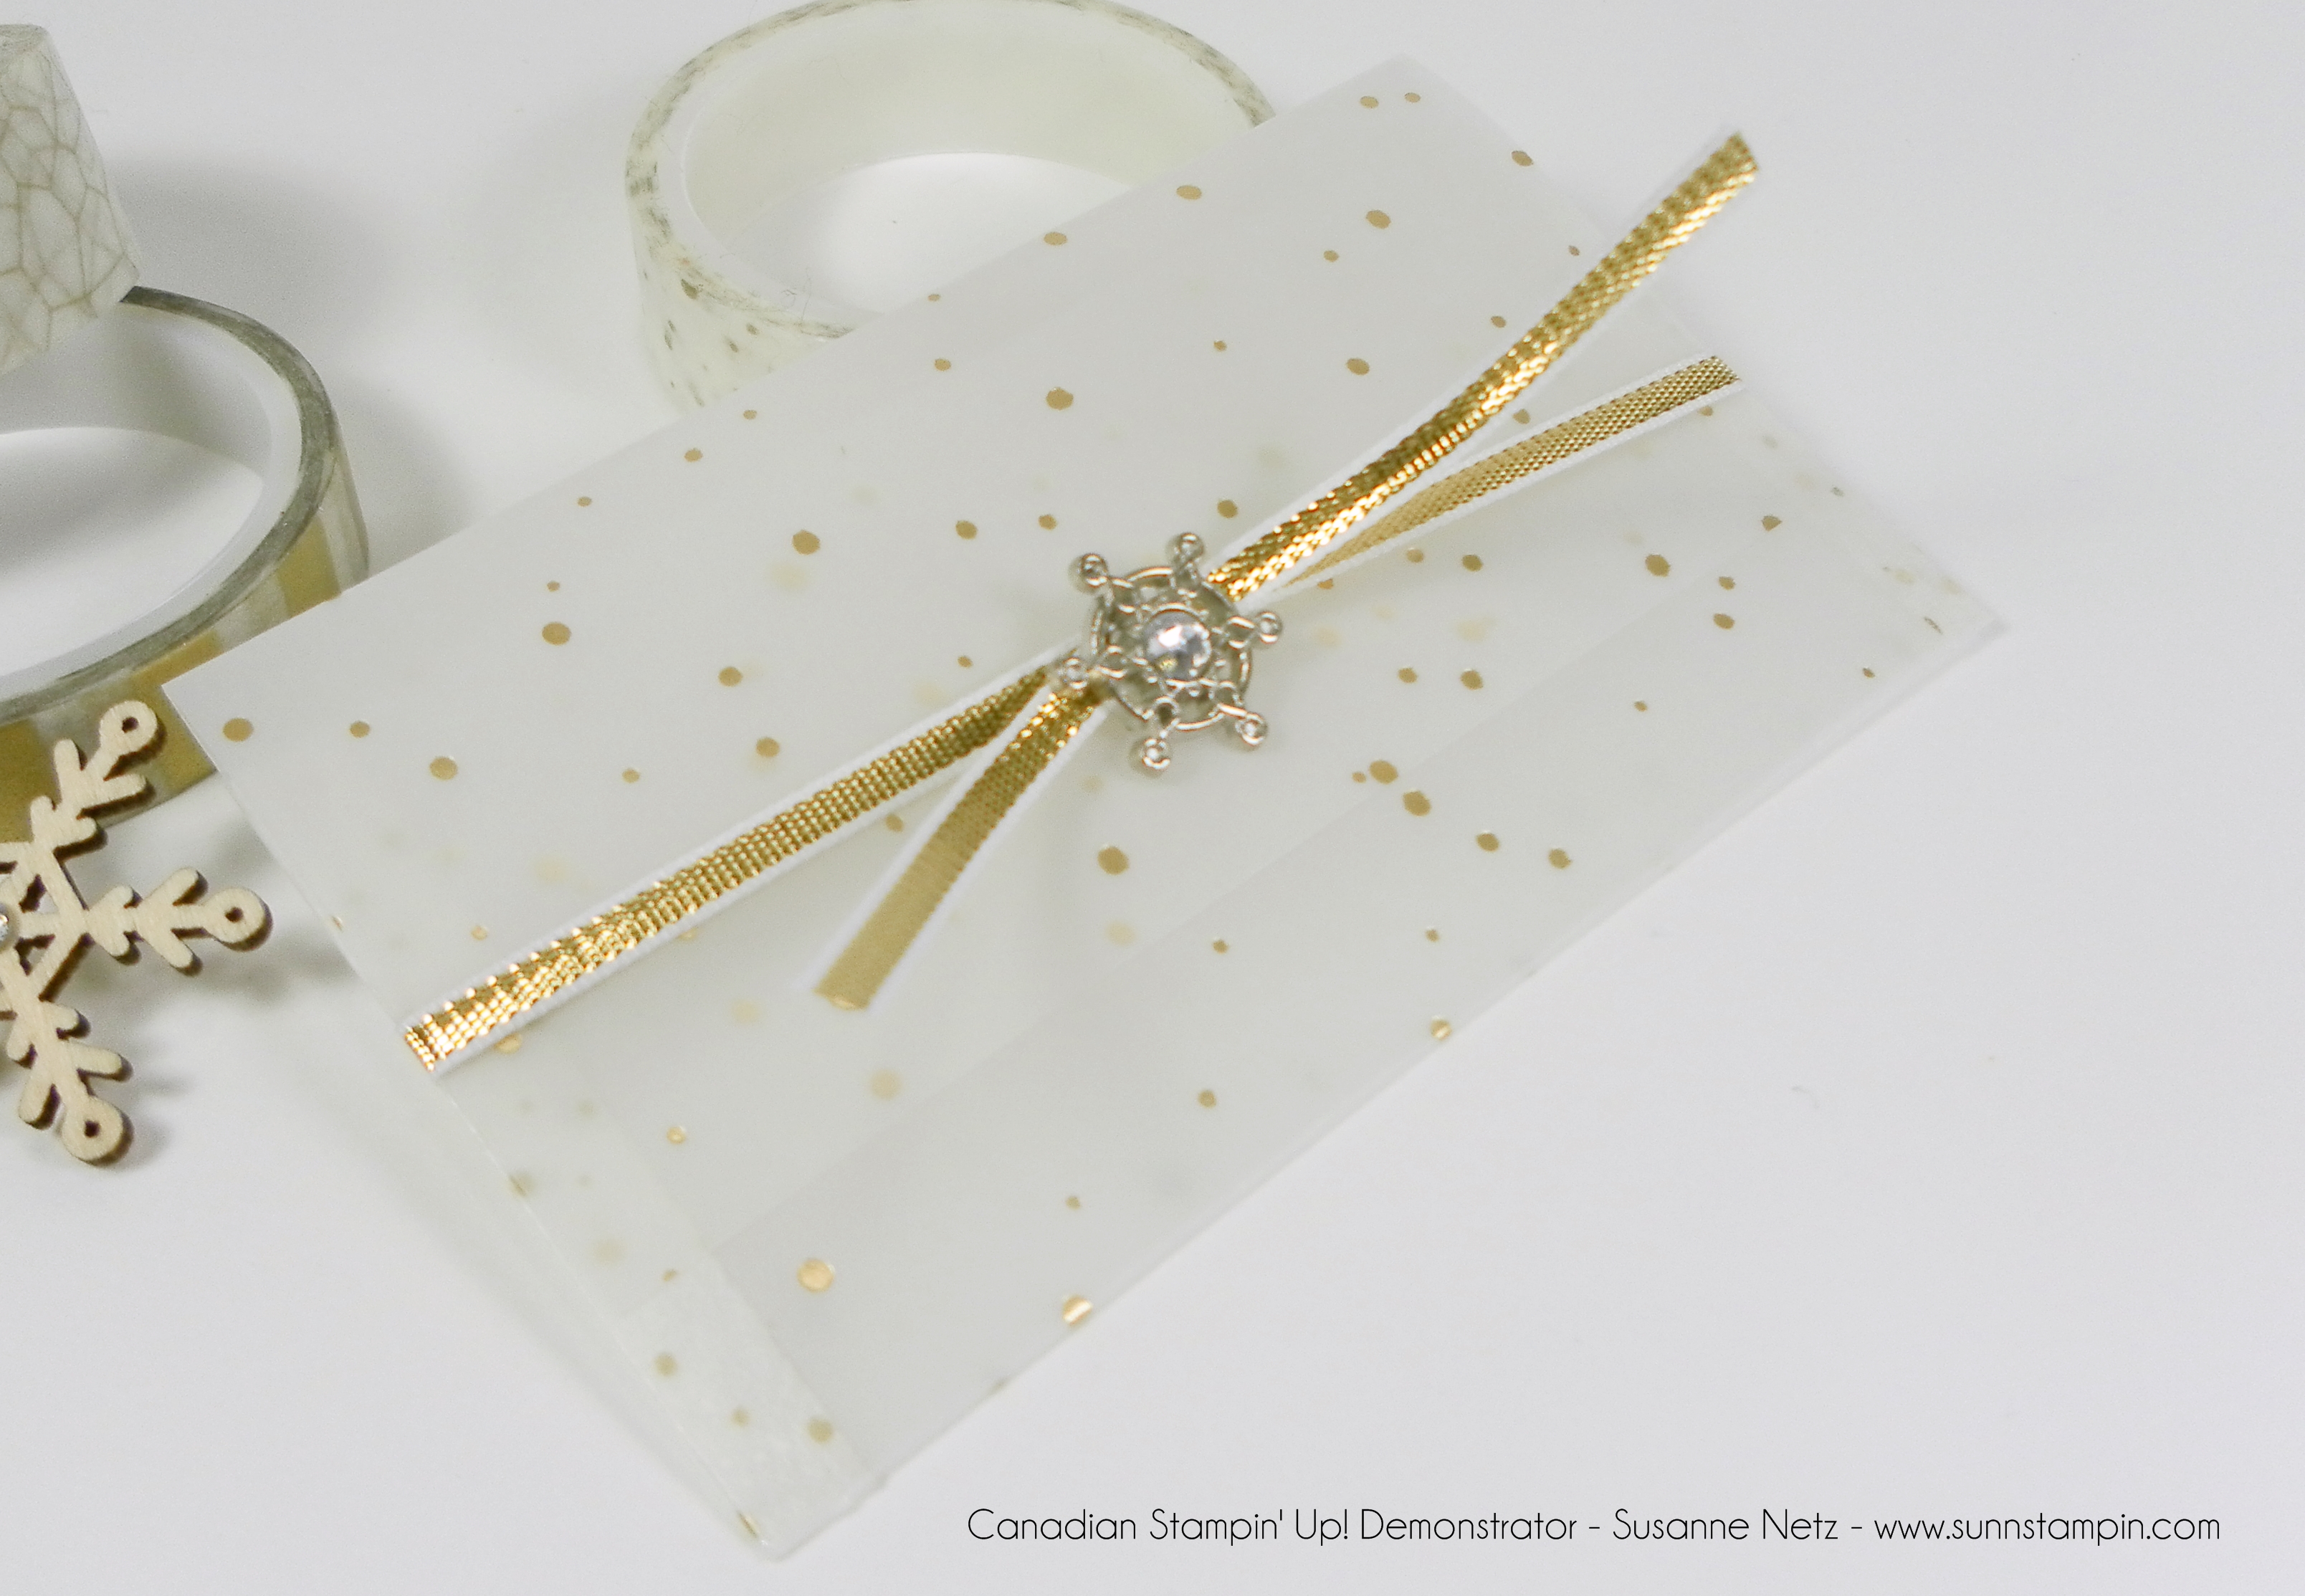
Happy Wednesday! These 2 gift card holders are constructed the same but show very differently as one is using patterned paper (DSP) and one is using card stock embellished with patterned paper. Check out the video and of course the details are below the pictures.
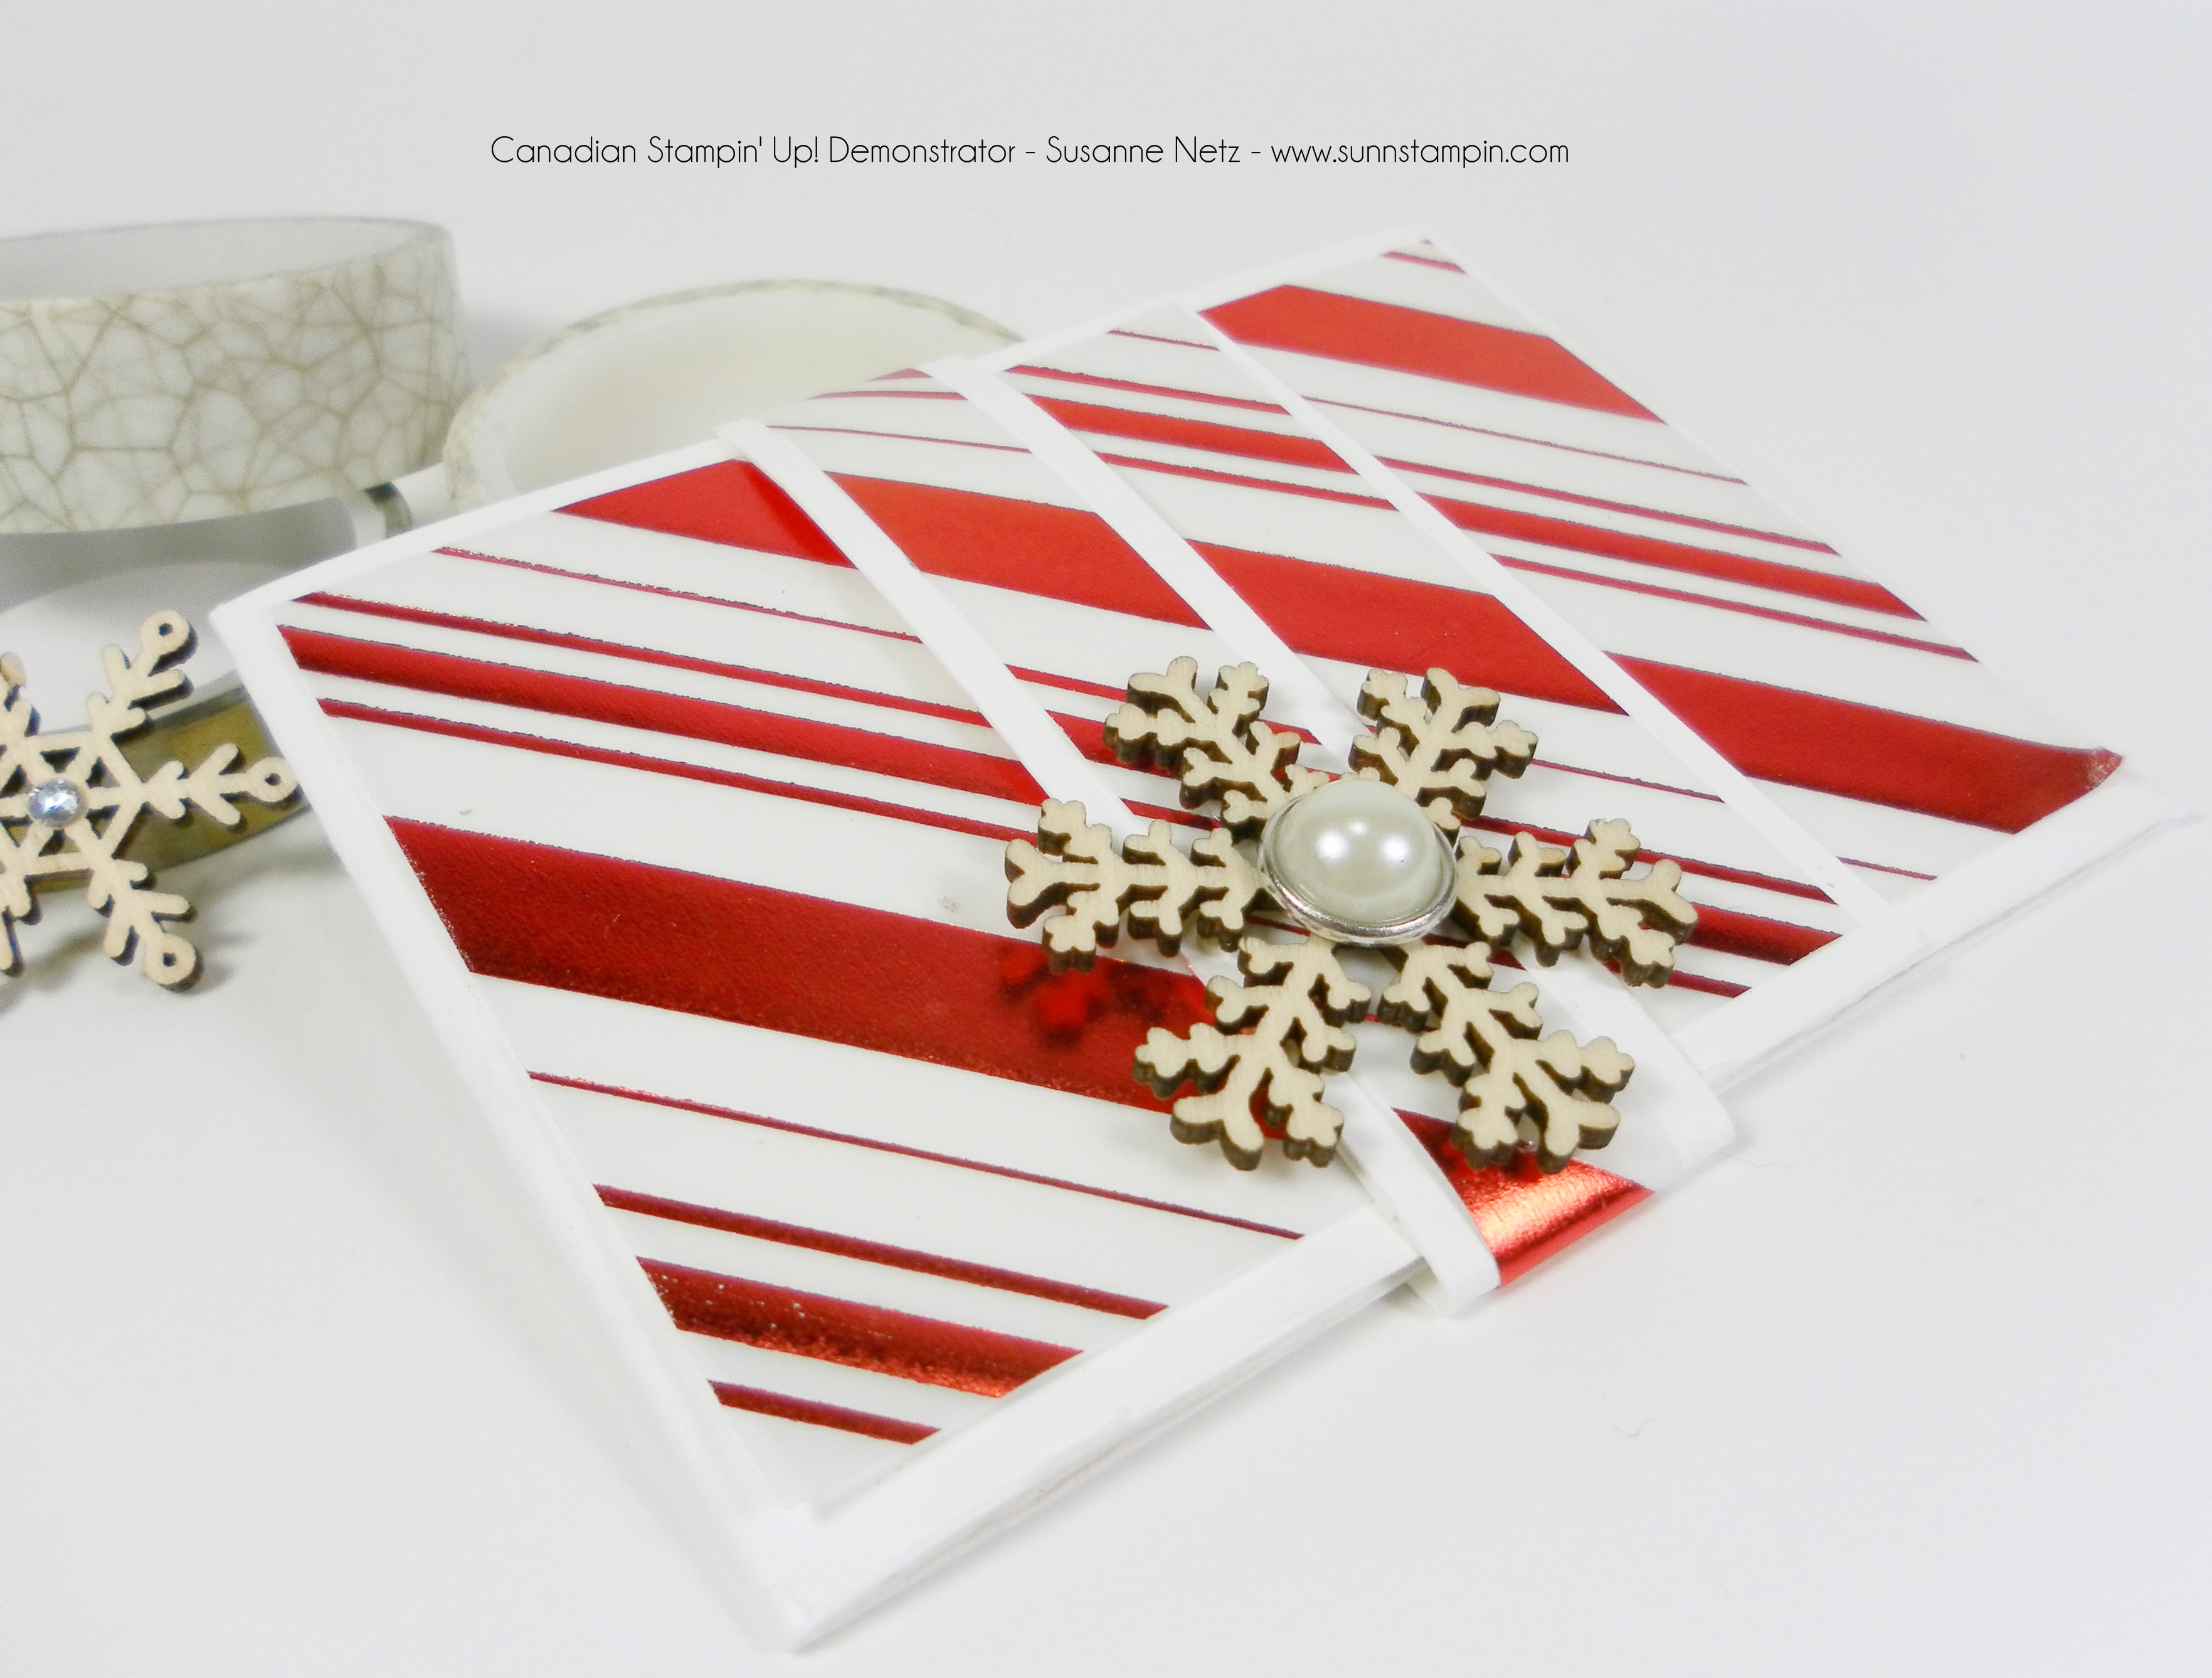
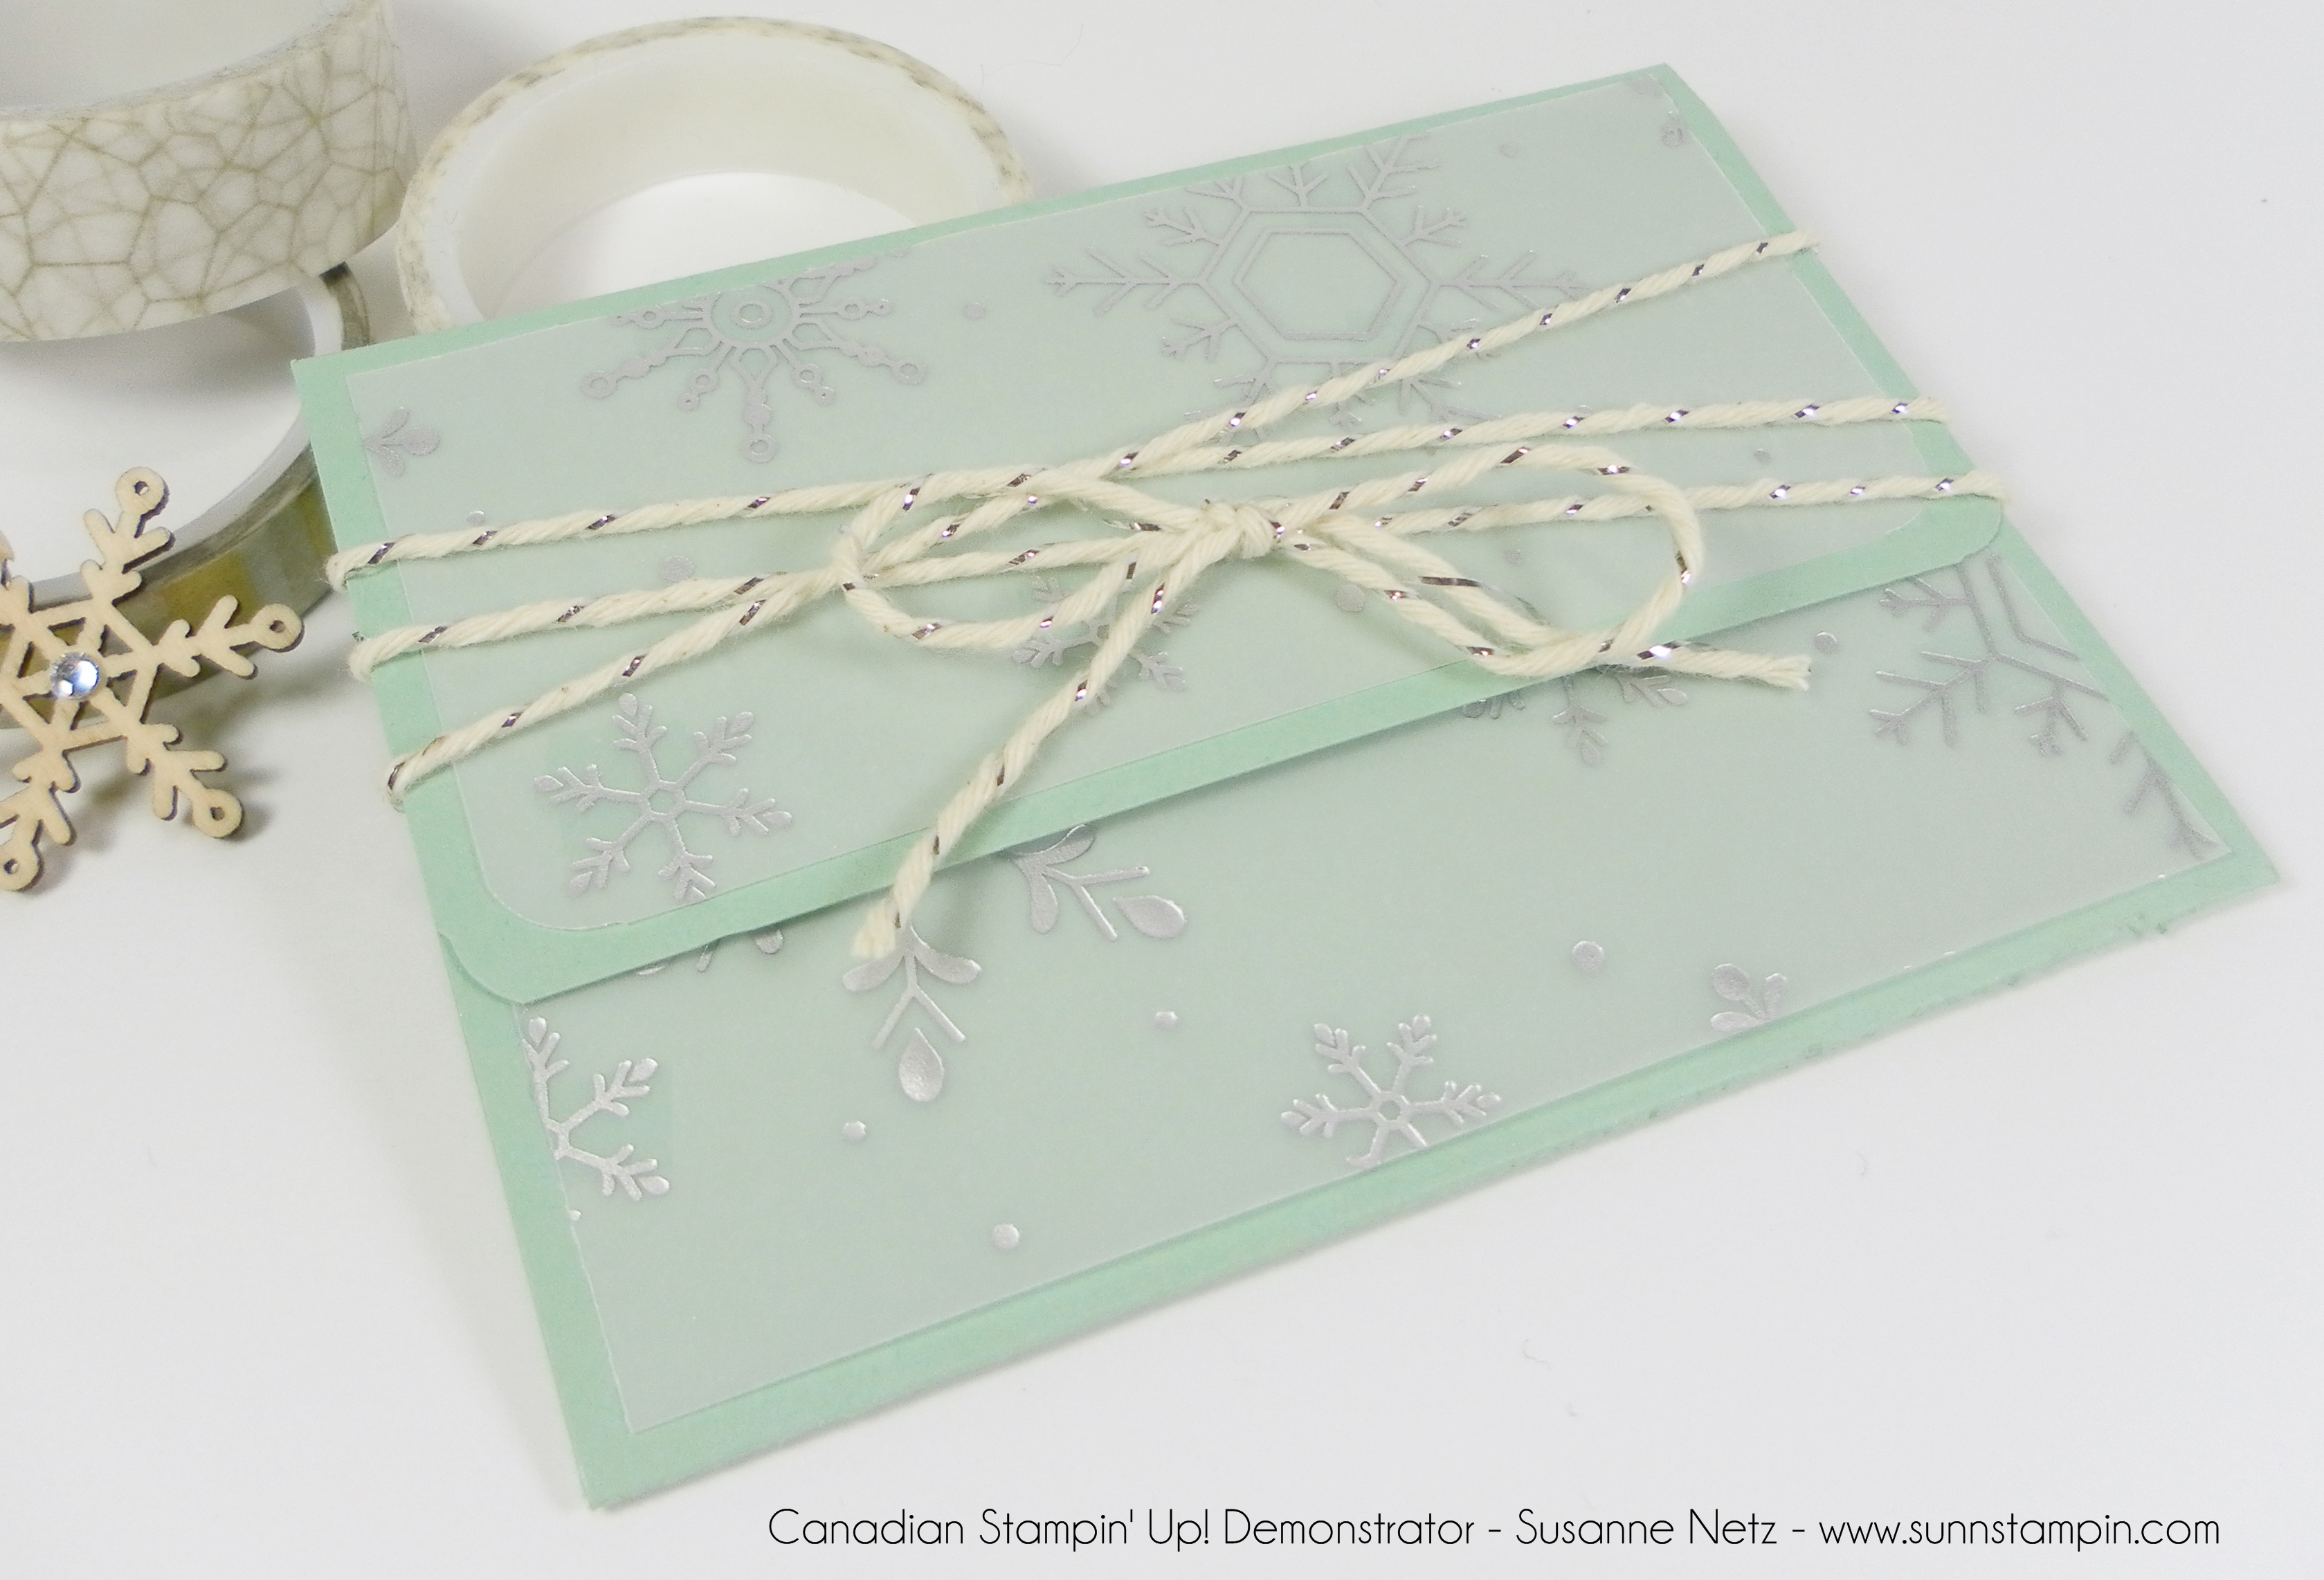
Vellum, vellum, vellum! Makes for a very pretty enclosure for those special gift cards! Check out the video and of course the details are below the pictures. Enjoy the show.
Hello my crafty friends. I have a mini series for you this week. I’m sharing how to make 2 gift card holders every day this week! So if you are one of those people who gives gift cards this series is for you. The 10 card holders I will be demonstrating this week are NOT my designs, but I did put my own spin on them. I hope you enjoy the fun way to give a gift card. 🙂 Enjoy the show. Details are under the pictures.
The Details:
Using the envelope punch board on a piece of card stock that is 5 by 5 inches punch and score at 2. Turn the paper a quarter and using your score guide line up with your previously scored score and punch an score. Repeat on all sides.
It’s Friday and Friday means that we get a 3D project! I’m pretty pleased with this little treat bag and I hope you like it too. It’s a very nice way to end my Christmas Crush series with something so cute and simple! Check it out.
The details:
Card stock 4 1/2 by 6 1/2
Scoring on the long side at 2, 3, 5, and 6 inches.
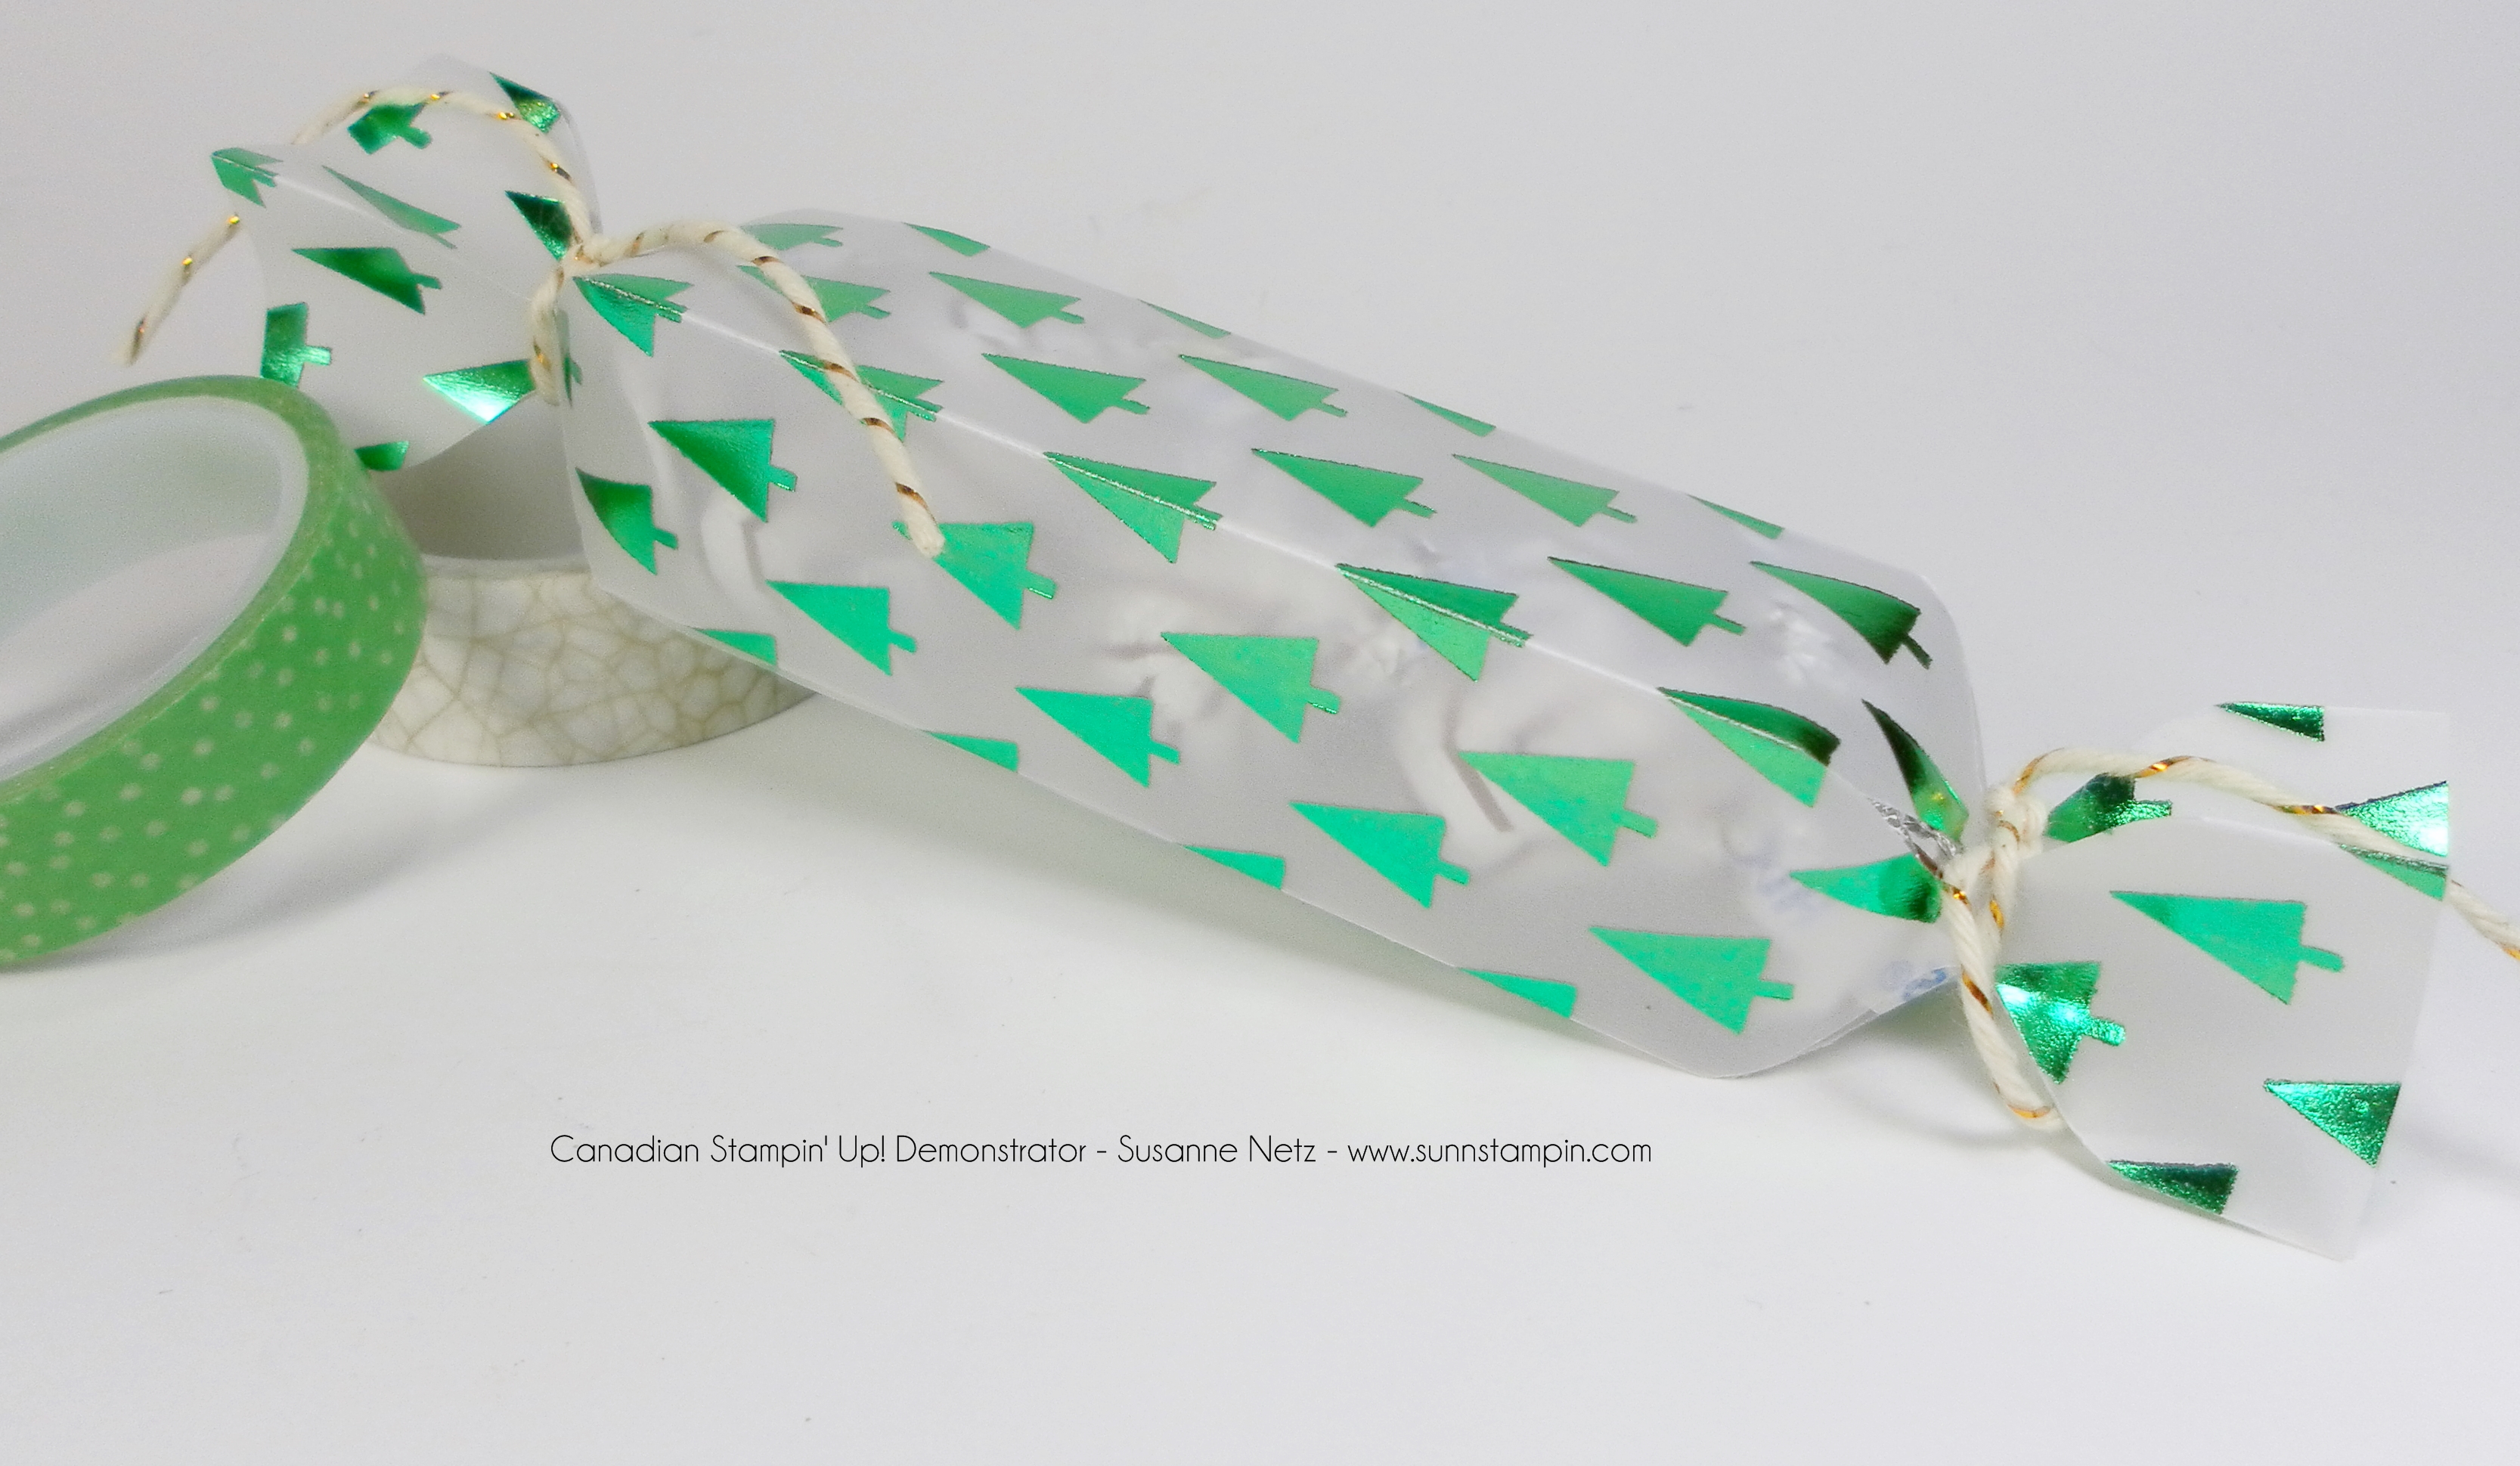
TGIF. I know many of you follow my blog for the boxes and 3D projects. I hope you stay tuned for December as I have a mini series regarding gift card holders. Let’s not jump ahead to December when we have an entire week of Christmas Crush to get through. Today’s project is a quick Christmas Cracker. Well, here in Canada that’s what we call them. Check today’s project out.
The details:
Cardstock 4 1/2 by 6 1/2
Scoring on the short side at 1, 2, 3, and 4 inches.
Fold.
Punch at 1 inch on the envelope punch board, fold a section down and repeat. Turn over and repeat on the other side. 5 punches on each side.
I will admit this project is a little fiddely. I wish I had time to do a do over. Although the project turned out great it wasn’t perfect. I do explain what I would have done differently in the video but I do like it.
The details
Card stock: 2 pieces 9 1/2 by 7 1/2
Scoring on the long side at 3, 8 1/2 inches.
Scoring on the short side of both pieces at 2, 4 3/4 and 6 1/4.
So it`s true, I`m not all about cards…it`s Friday and Friday gets a 3D project. Today is something that could be very useful as a gift wrapping…especially if you are heading to a friends house for dinner. I always try to bring a bottle of wine…and this year I have figured out how to wrap the bottle. I don`t know if you remember last year I tried to make a bottle wrap and came up with a triangle box instead. It did not fit the bottle. I was on the right track but now I really have figured it out, with the help of a mathematician I may add. Check it out.
Video here
The Details:
Cardstock 12 by 9 inches.
Scoring on the short side at 2 inches.
Scoring on the long side at 1 3/4, 3 1/2, 5 1/4, 7, 8 3/4 and 10 1/2 inches.


 Metallic-Edge Ribbon")


 Celllophane Bags")