Fabricate Friday – Sweet Purse

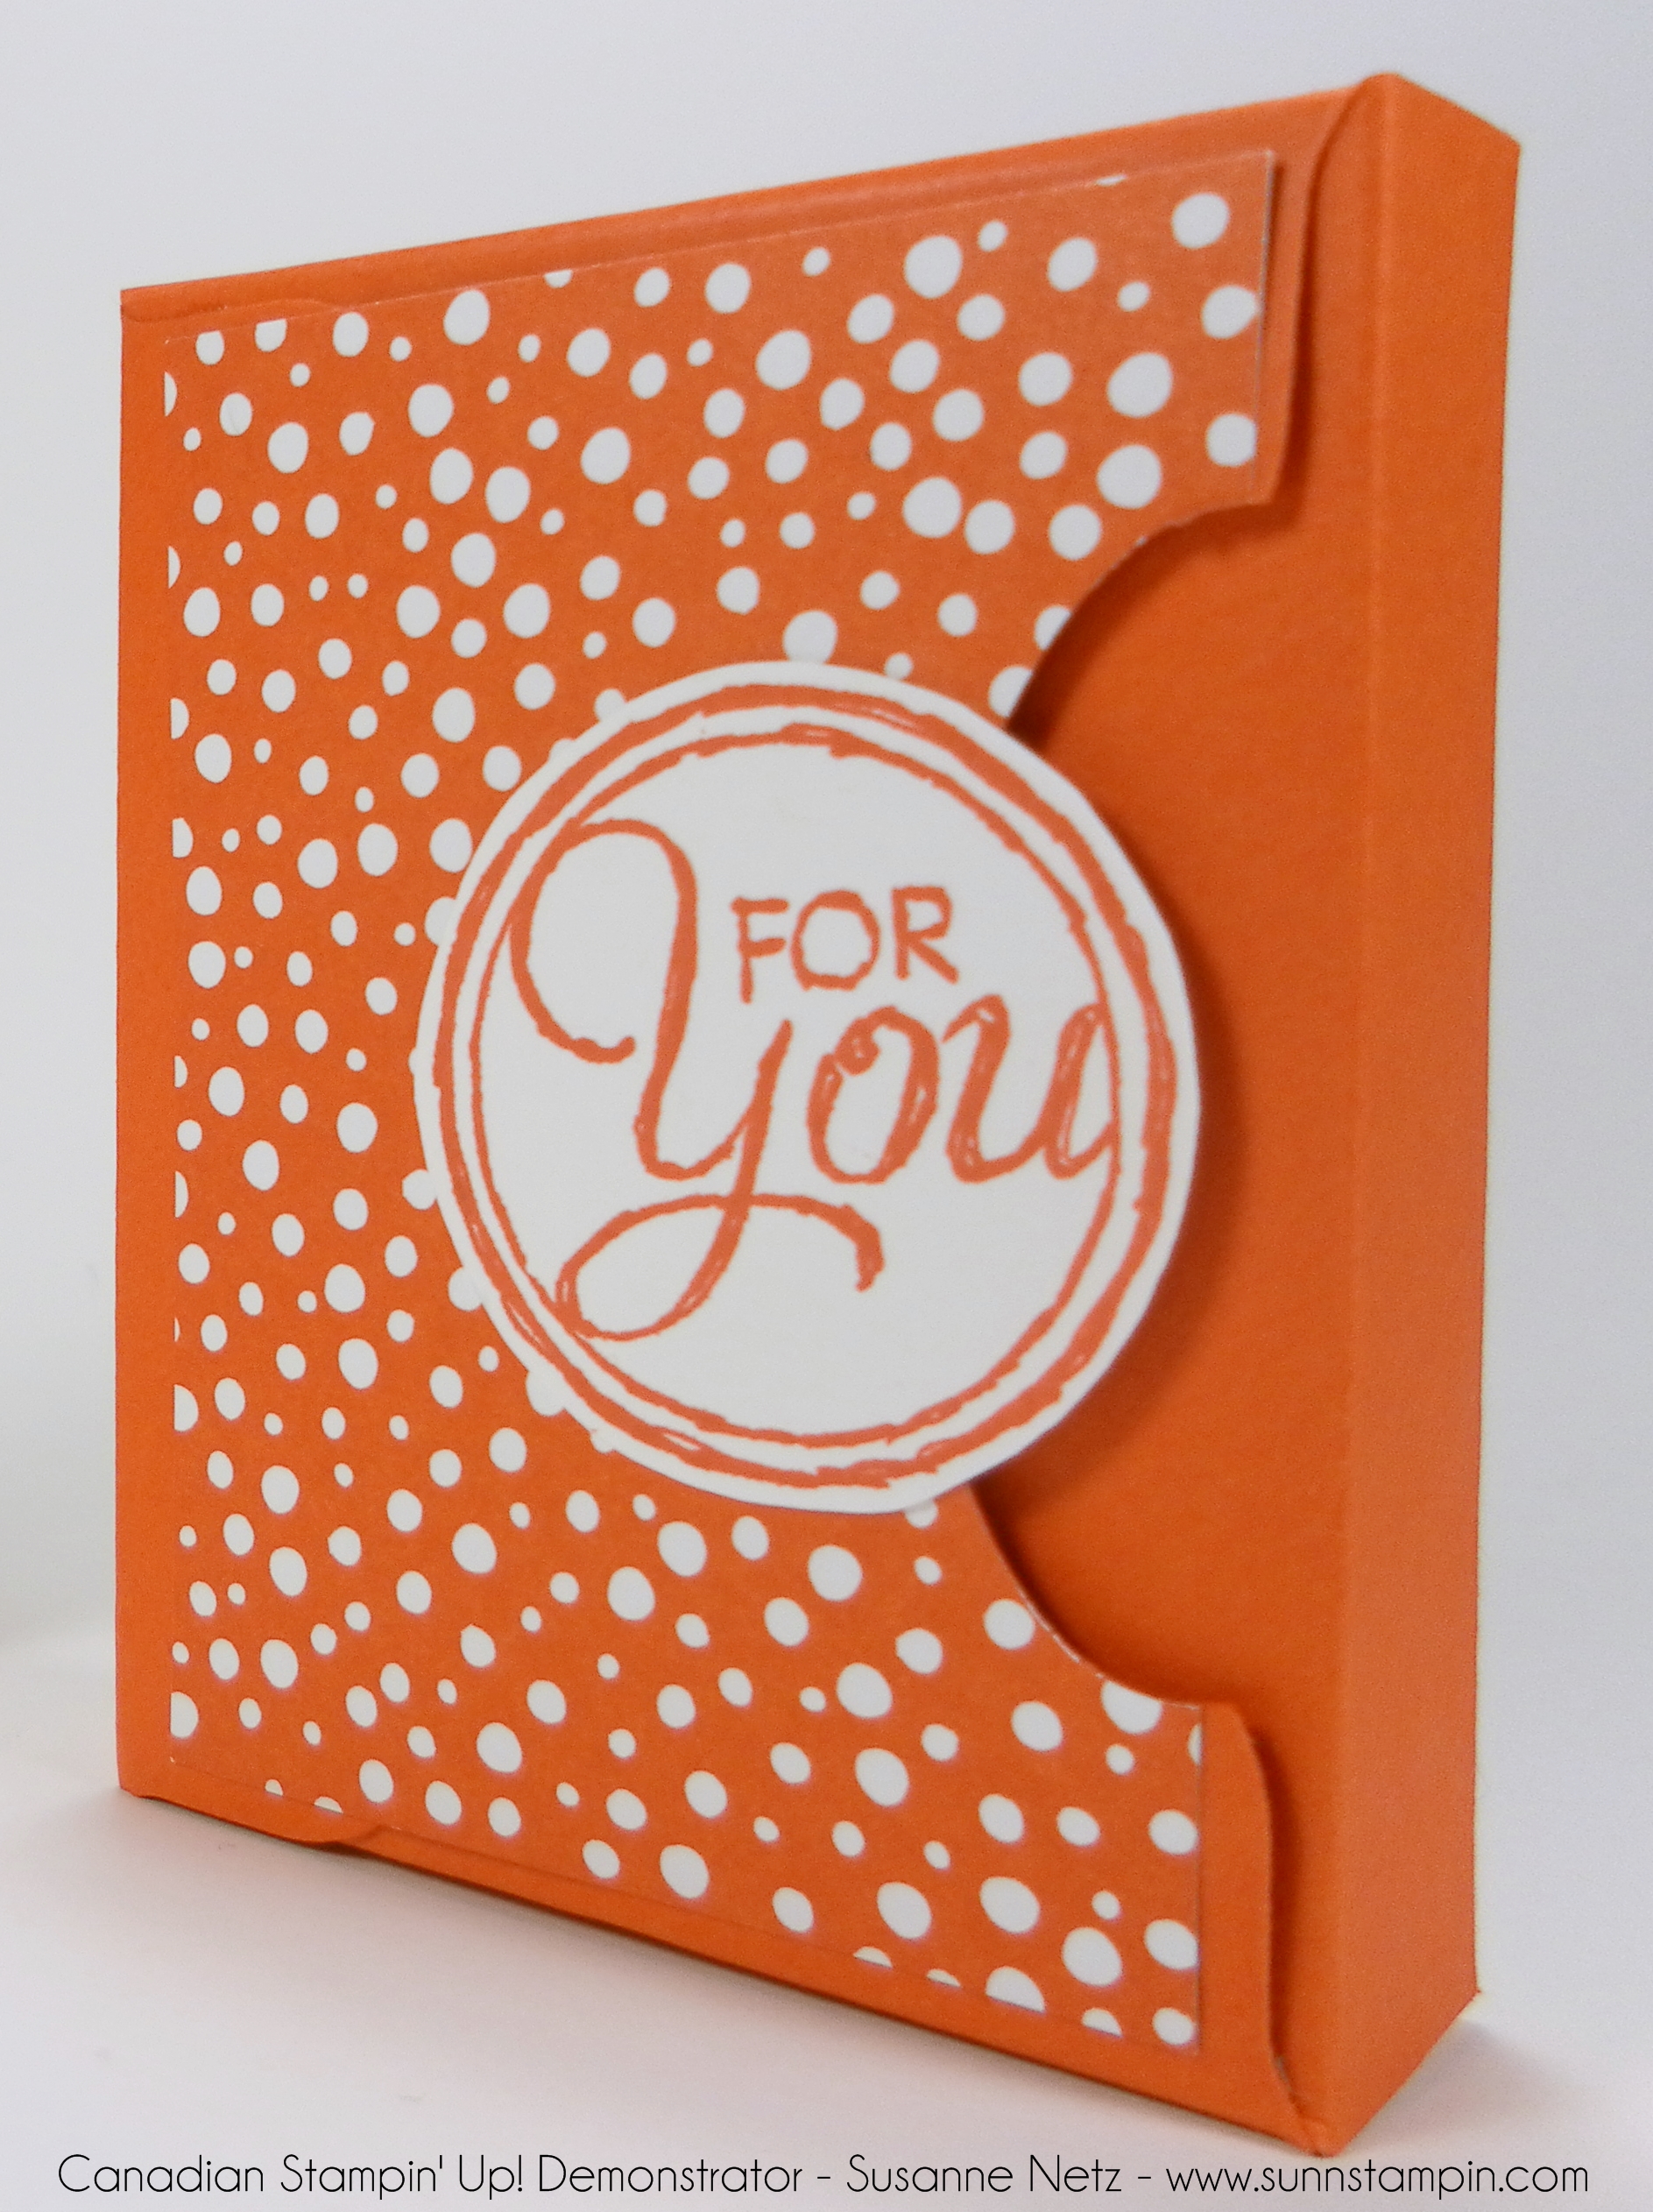
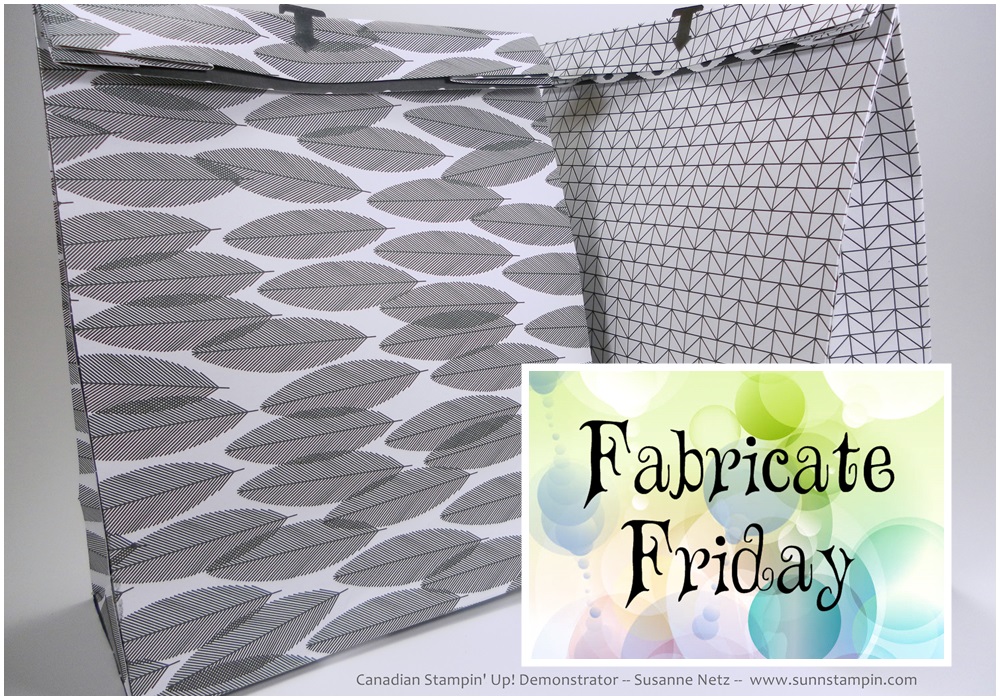
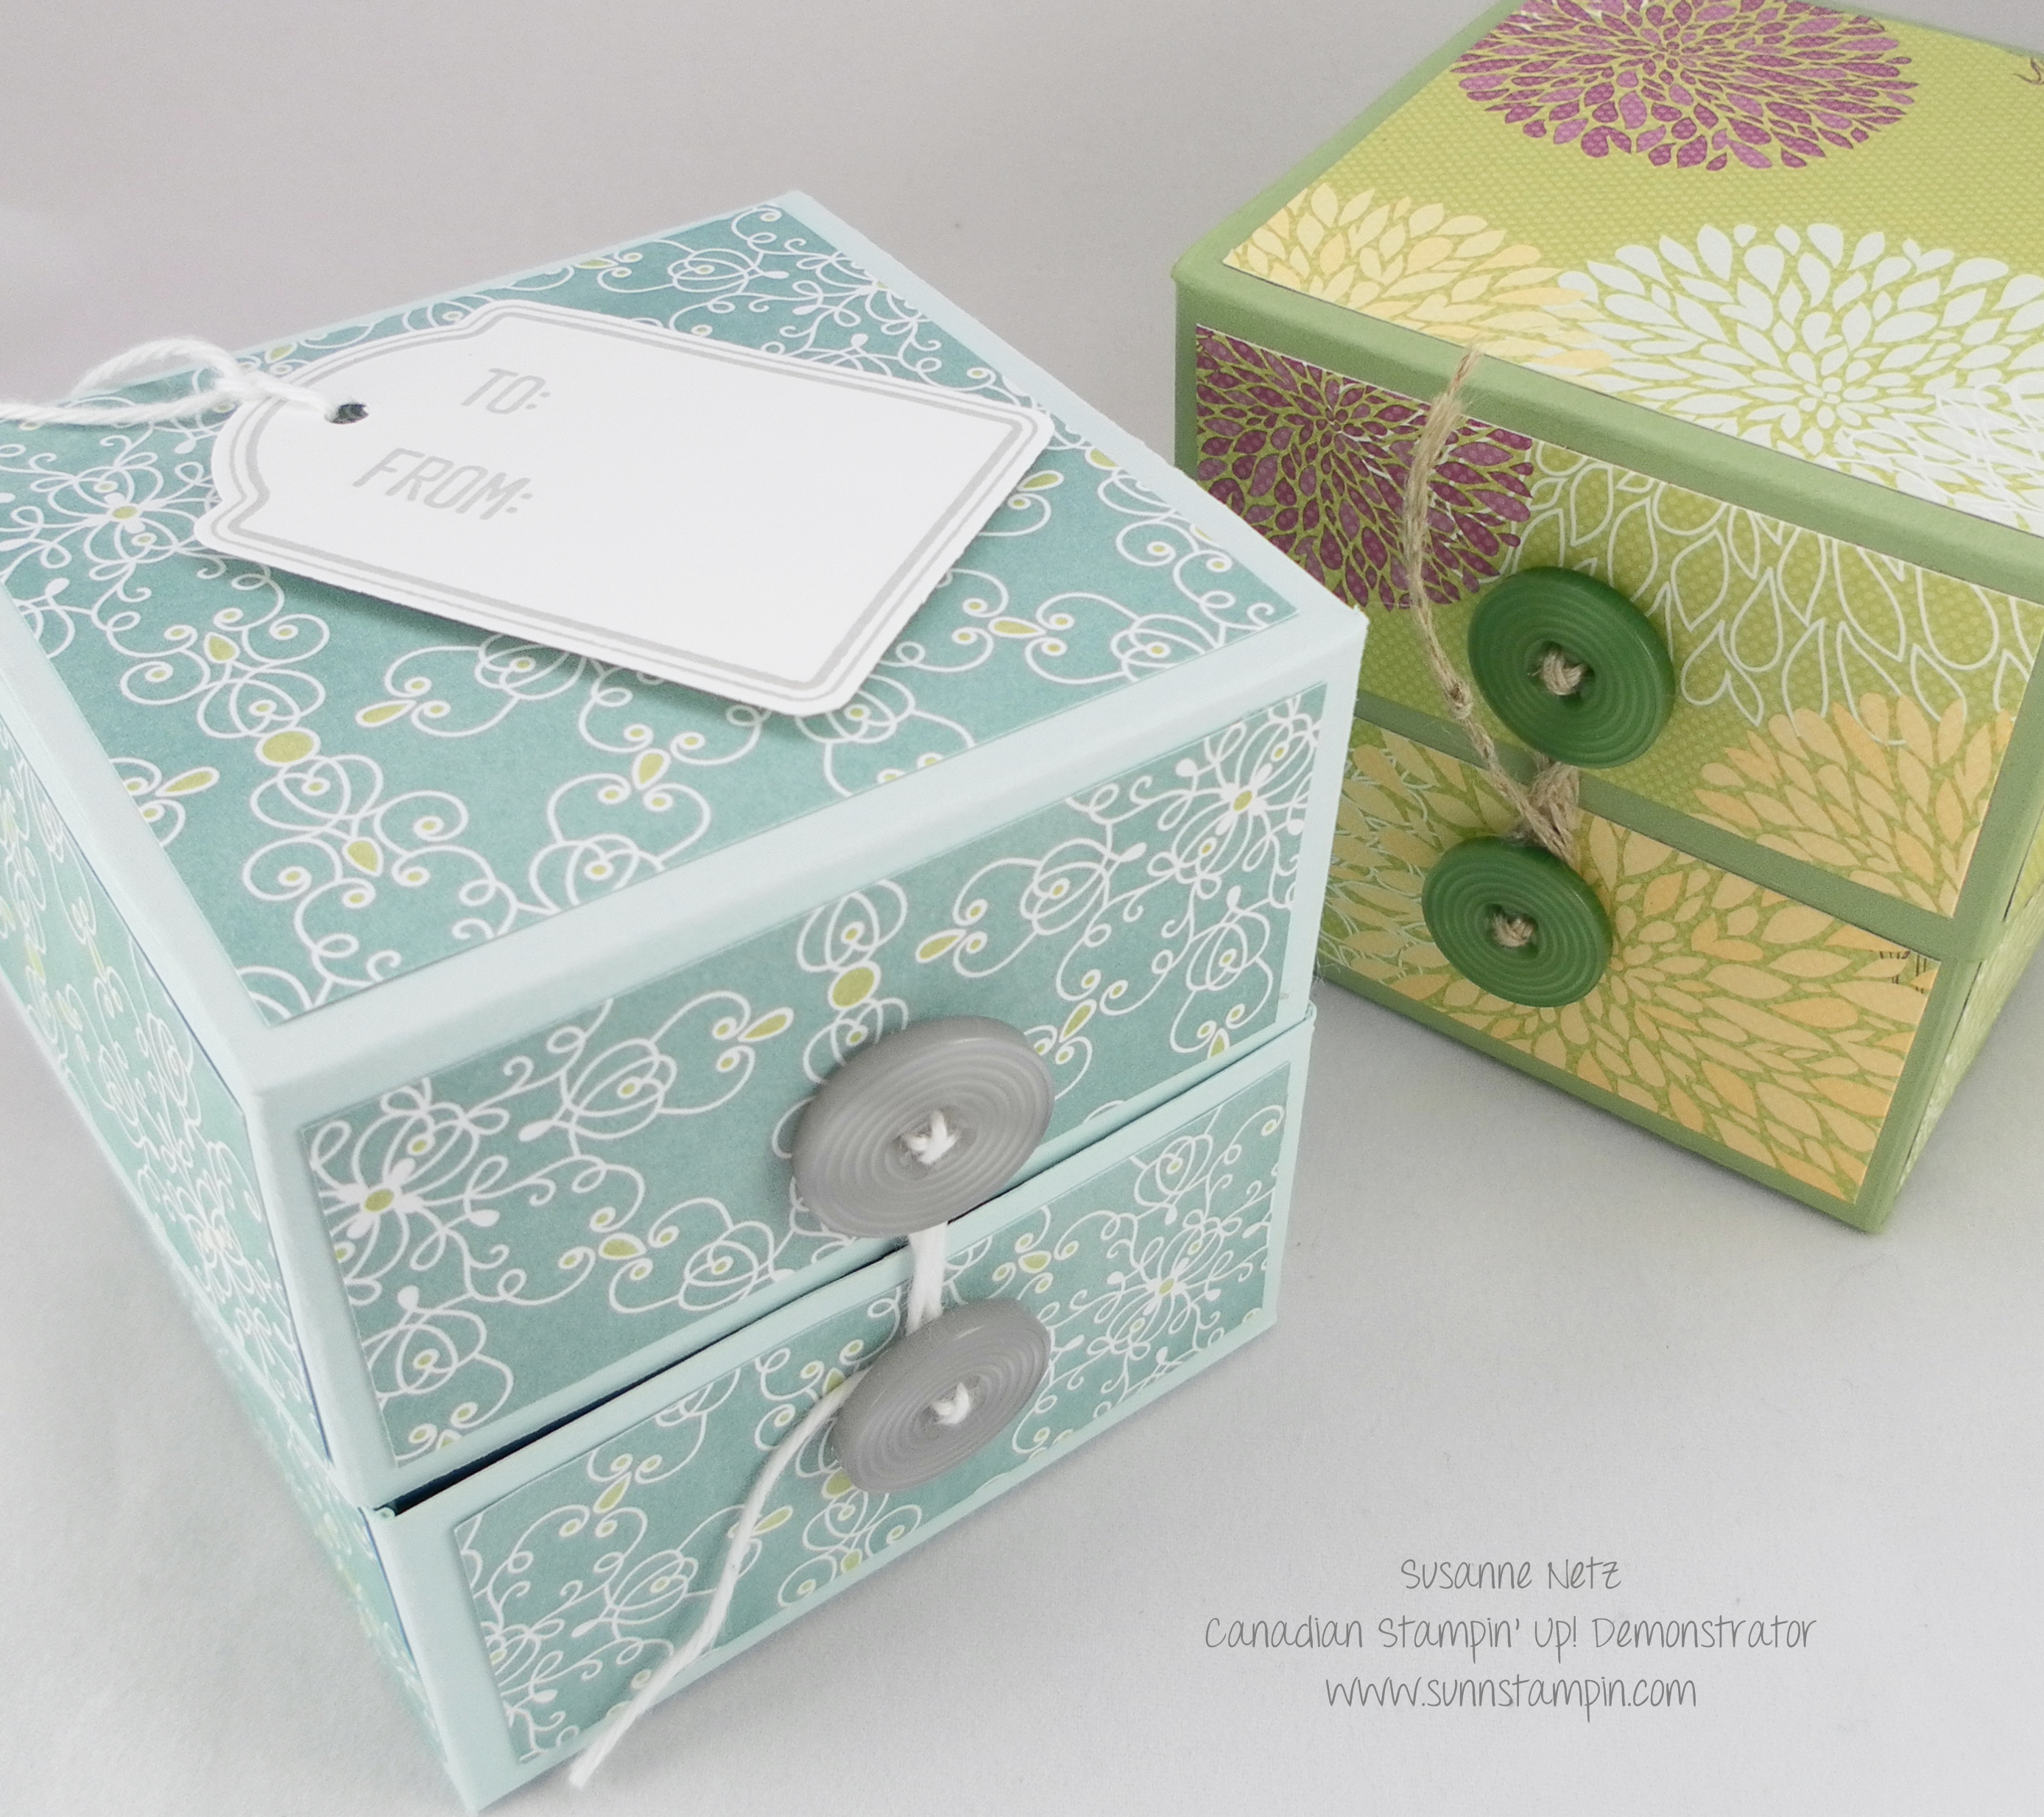
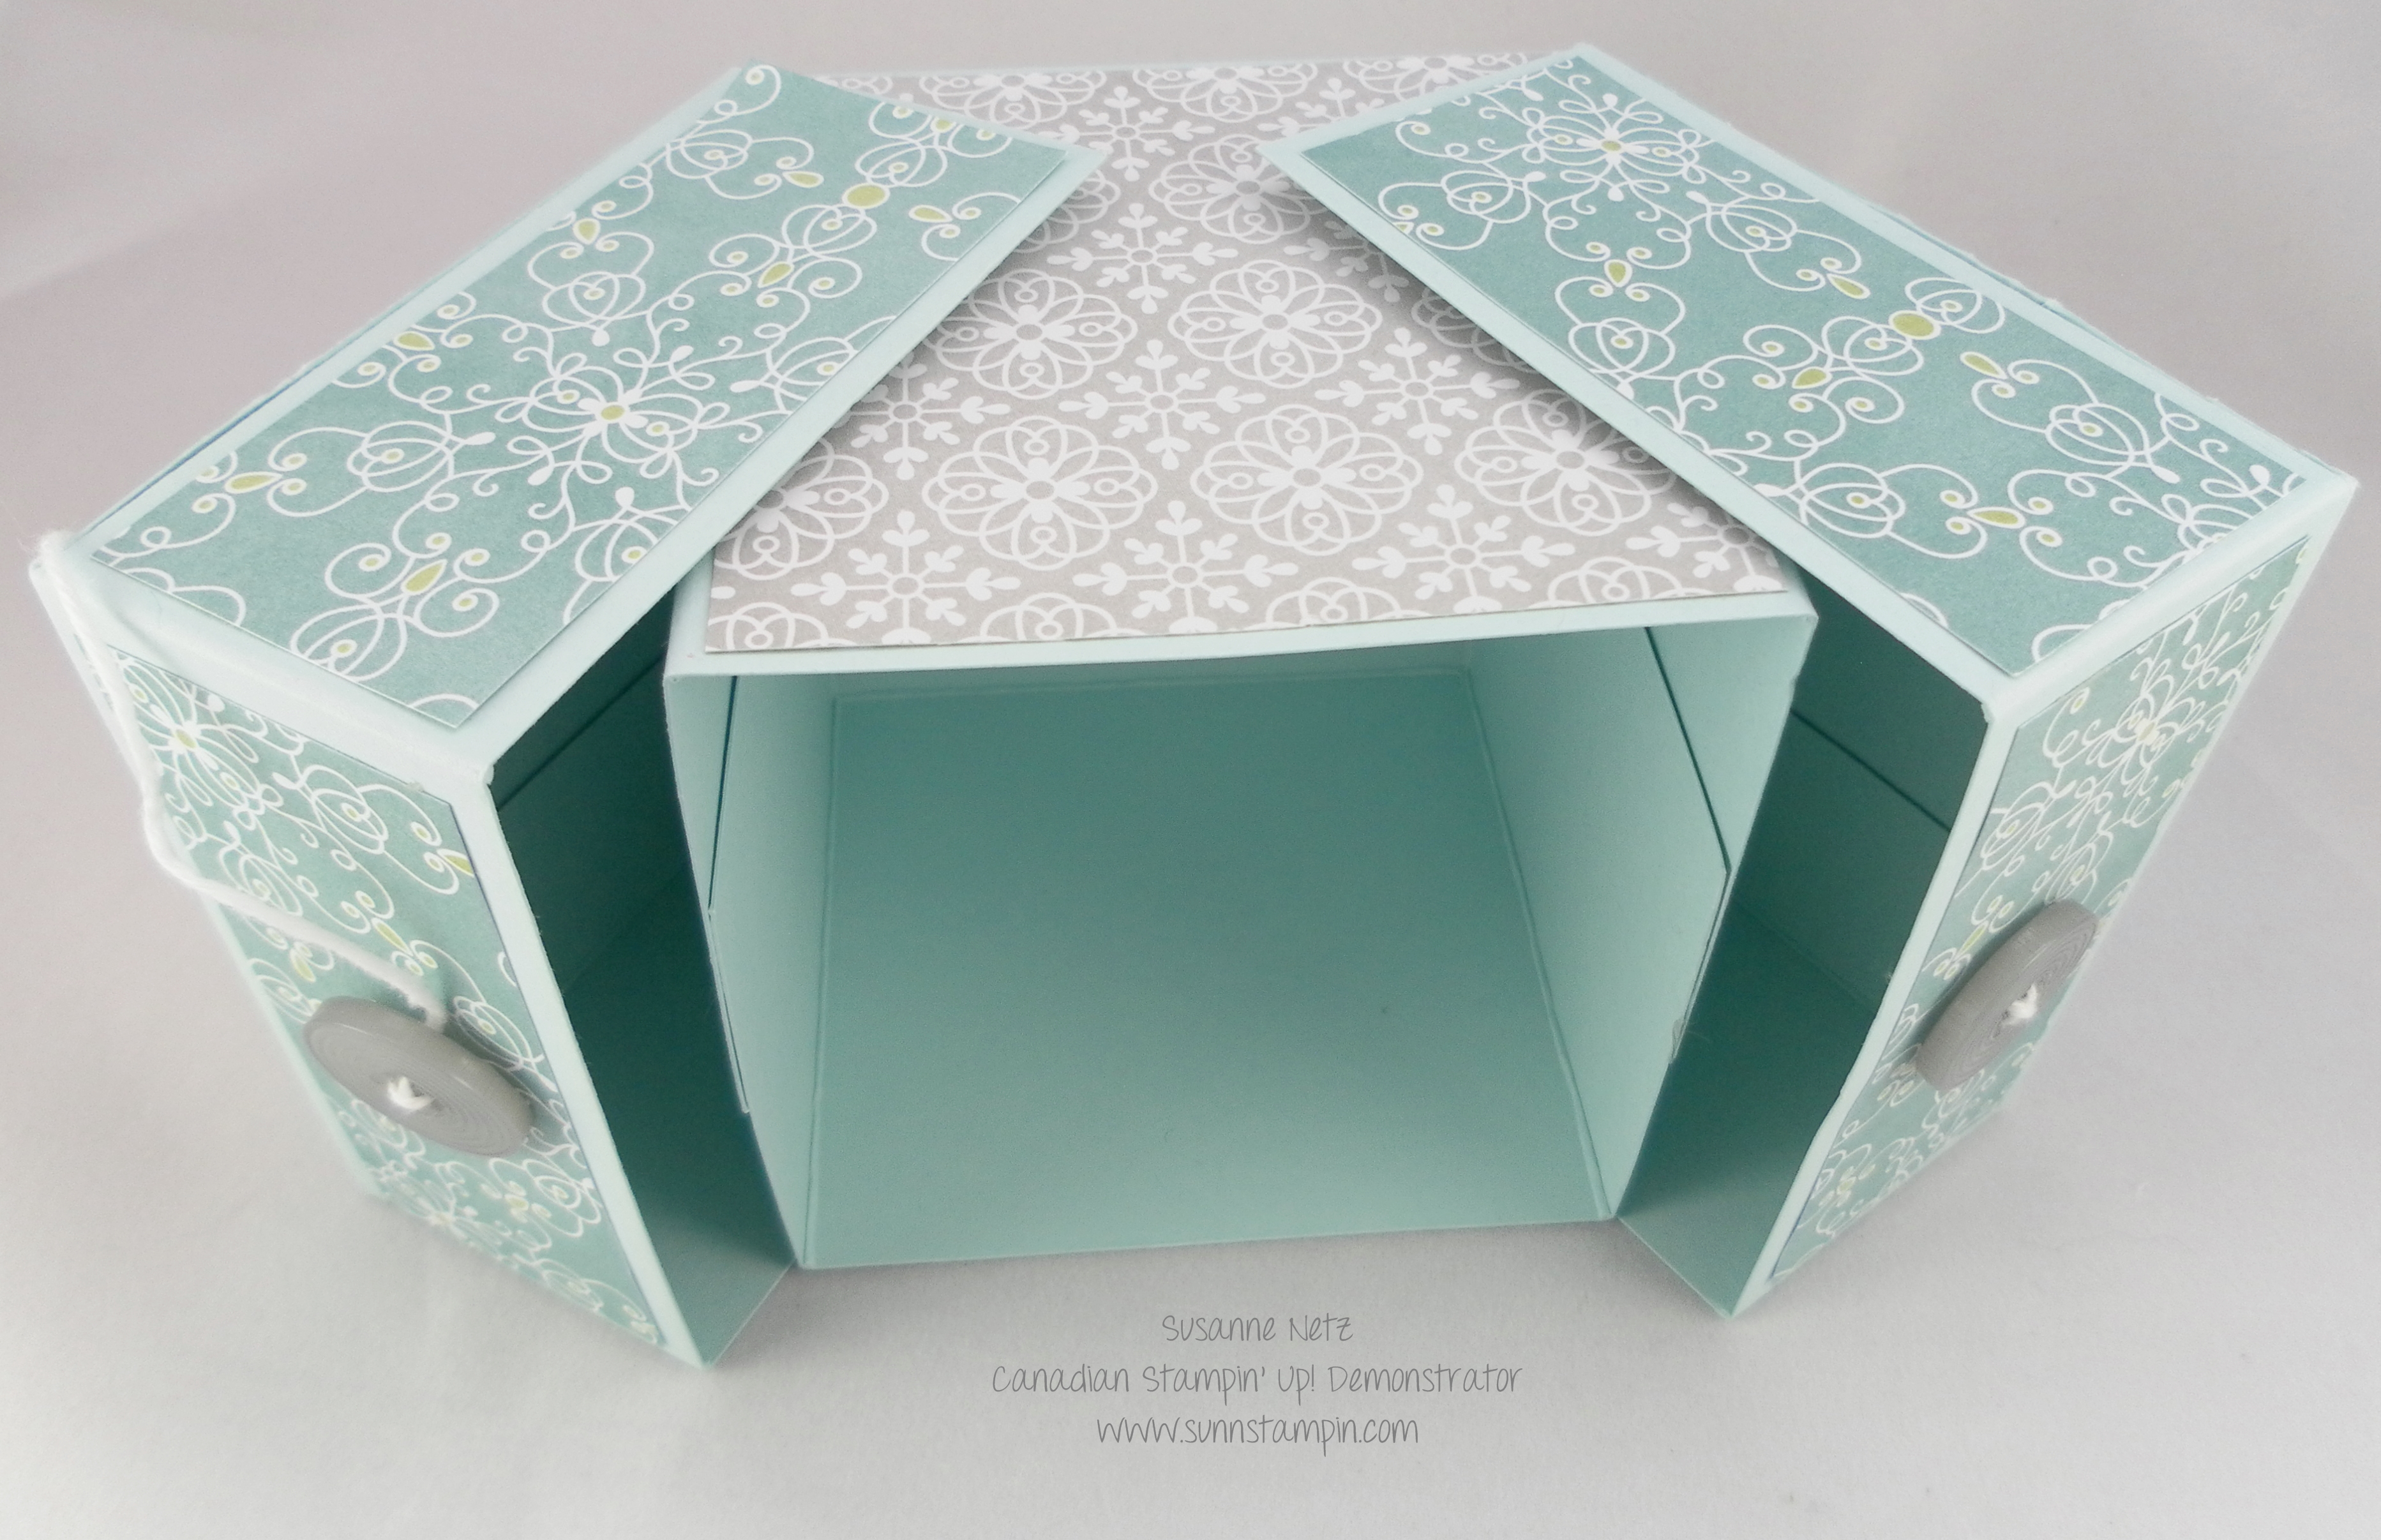
Hi there.  I have never attempted a project like this and I was really pleased as to how it turned out.  If you saw my inspiration basket for this you would laugh as it doesn’t look at all what I ended up with.  So, in the video I spoke of the neodymium magnets and you’ll have to locate them yourself, I found the big ones at Michaels but I do believe somewhere on the net you can find smaller ones.  Anyway, enjoy the show.

Stampin' Up! Gold Soiree Purse

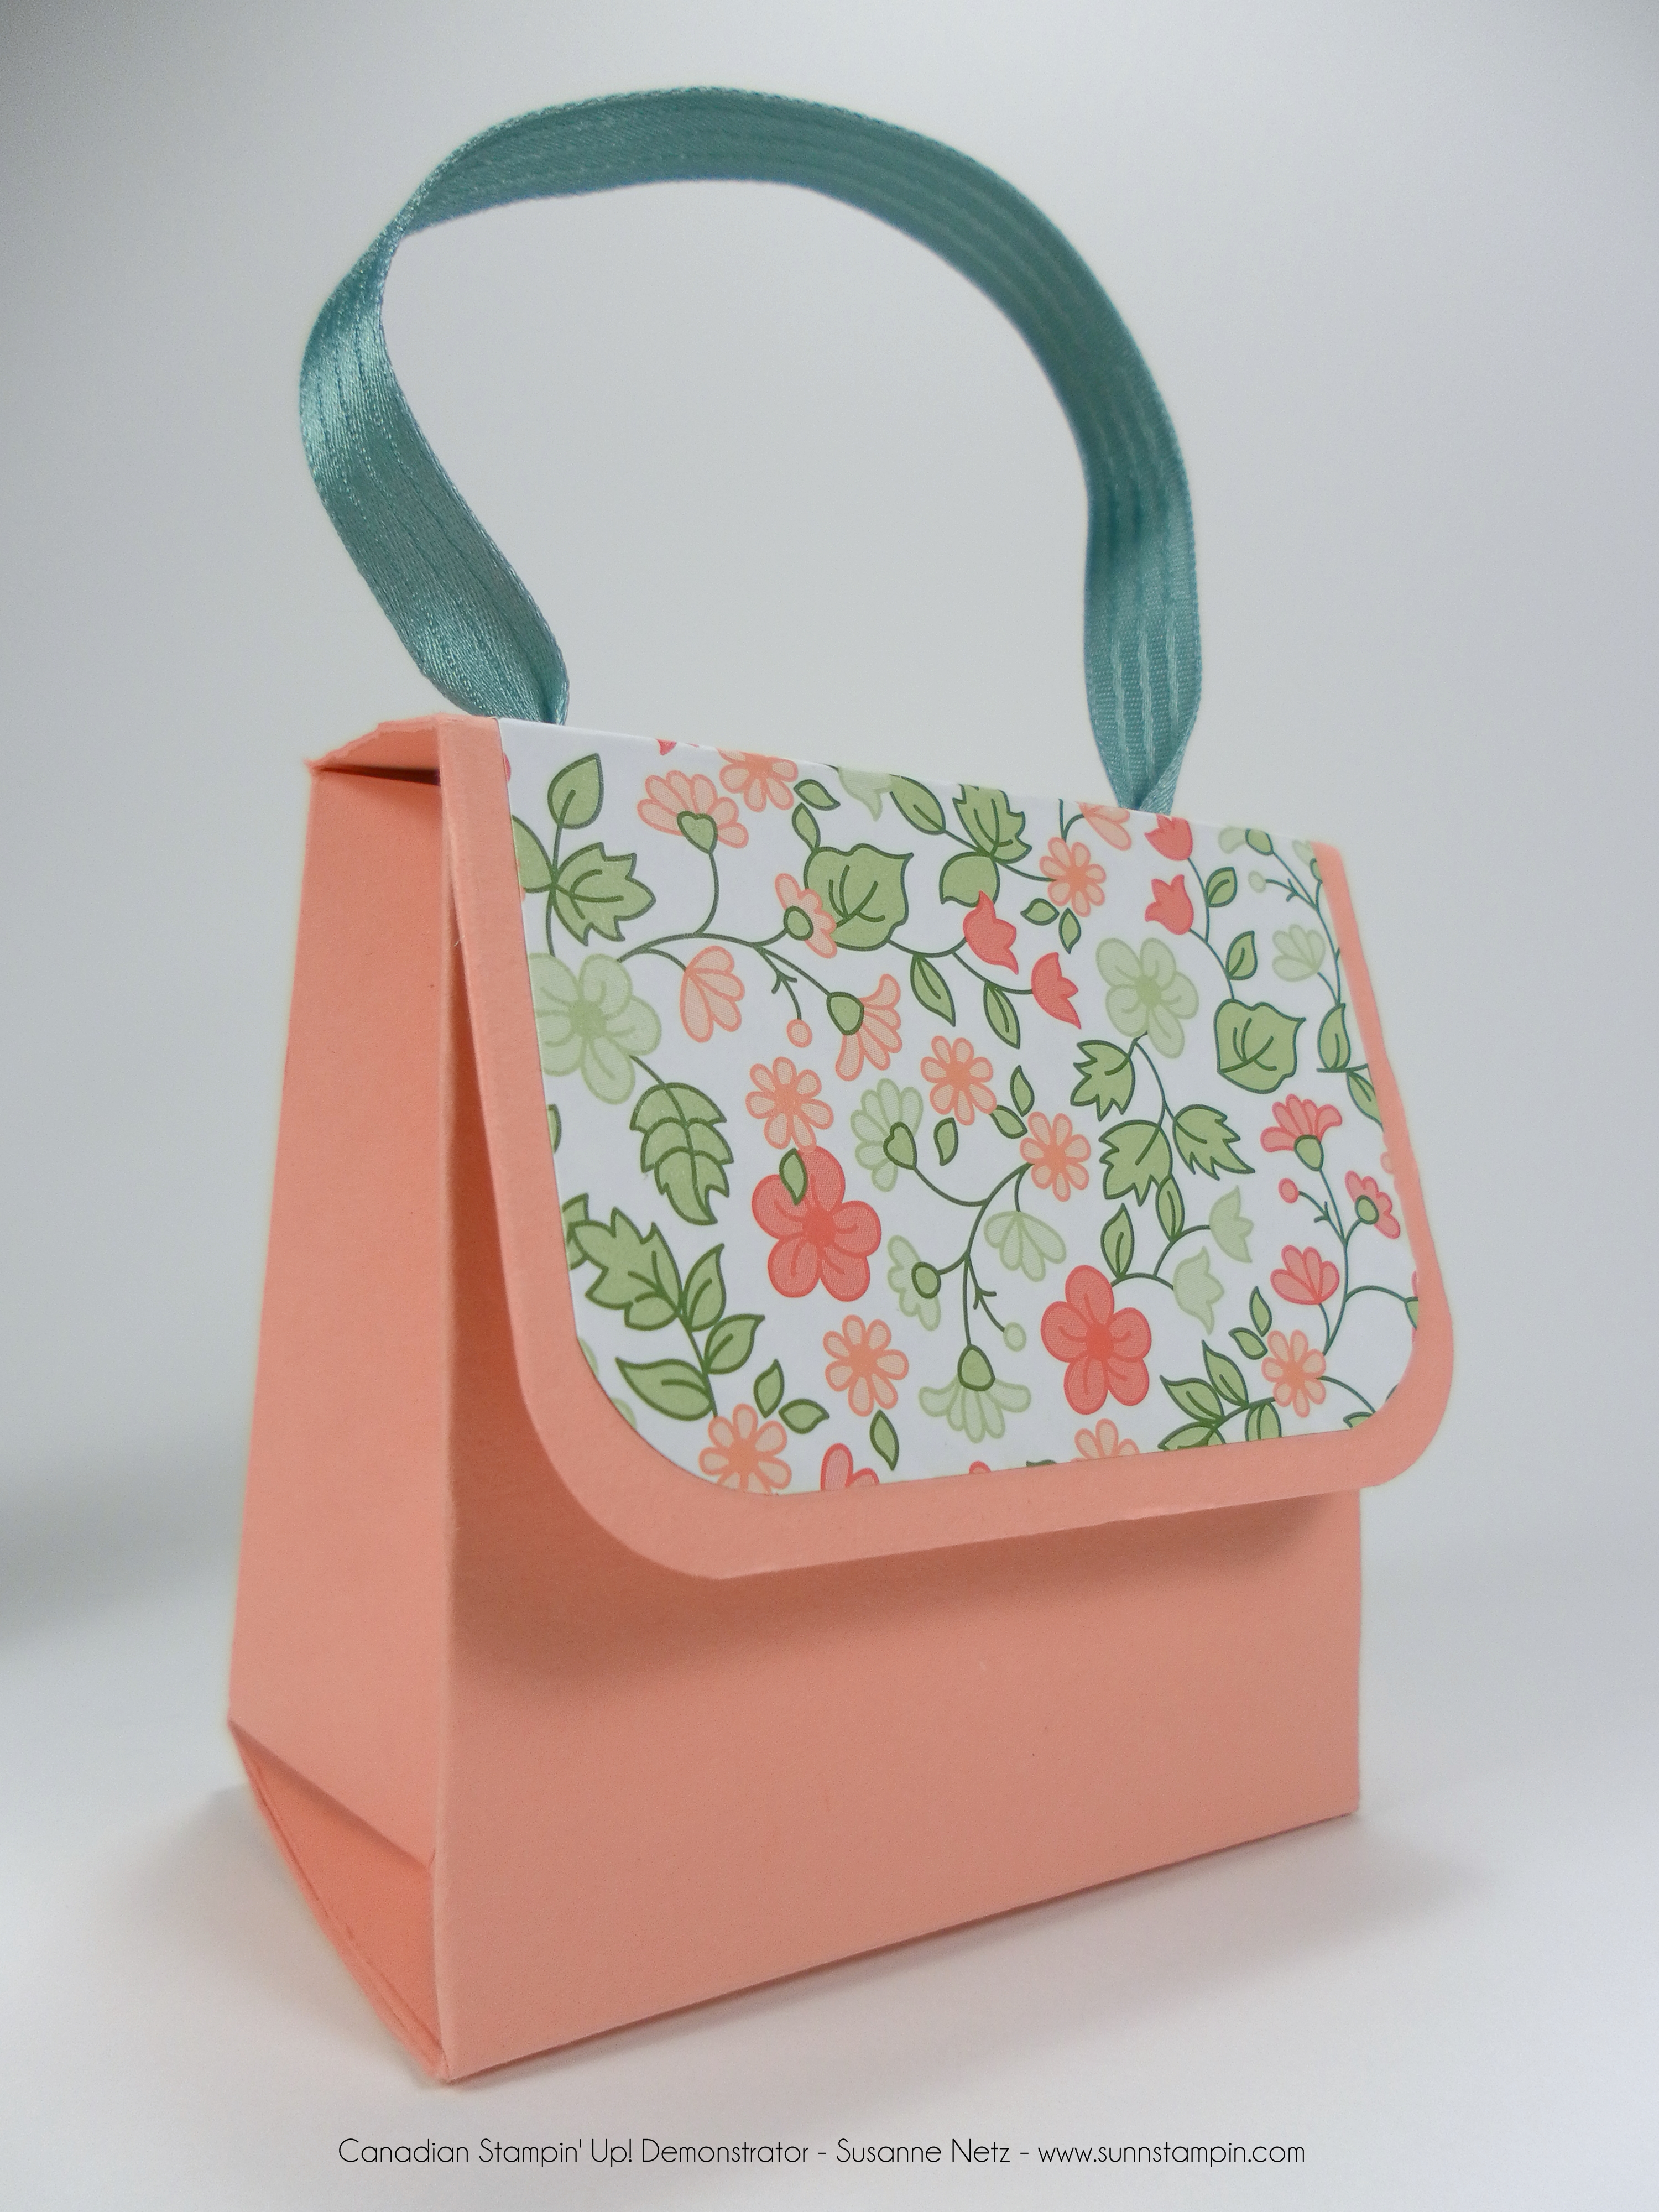
Card stock; 10 1/2 by 8

Long side scoring: 1, 2, 5, 6, 7, and 10 inches

Short side scoring: 2, 5, and 6 inches

DSP: 2 3/4 by 5 3/4

Product List

Fabricate Friday – Envelope Punch Board Box

Hello, hello.

Wishing you a happy Friday.  Here’s a quick project that I made.  Hope you like it.

Stampin' Up! Envelope Punch Board

Enjoy the show…

Card stock: 5 1/2 by 5 1/2

Punch and score on the 2 inch measure and move along to the 3 inch measure and punch then score.  Turn one quarter and follow the score lines to punch and score again.  Repeat on remaining sides.

DSP: 2 by 2 3/4


Product List

Fabricate Friday – Box Card

TGIF.  Here’s a unique creation for you.  🙂

Stampin' Up! By the Tide Box

Inner Box Card stock:  7 by 7 inches

Scoring: 2 inches on all 4 sides

Cover Card stock: 3 1/8 by 11

Scoring: 2, 5 1/8 (or 5 1/4 depending) 7 1/8 (or 7 1/4 depending) or 10 1/8 (or 10 1/4 depending)

DSP: 2 pieces 3 by 2 3/4

Whisper White: 2 3/4 by 2 1/2

Product List

Fabricate Friday – Tall Vinegar Box

Hello there.  Hope you are heading to a nice weekend outdoors.  It’s finally spring (except in Calgary ha ha).  So today I have a tall box to share with you today.  I did have an inspiration box and I do show you in the video.  I think I forgot to mention the dimensions of the card stock I used so scroll down past the video where you will find all the information needed.  Hope you like it.  Enjoy the show. Stampin' Up! Num Num Box

Card Stock:  10 by 10 3/4 inches

Long side scoring: 1 3/4, 8 1/4, and at 10 inches

Short side scoring: 1 3/4, 4 3/4, 6 1/2 and 9 1/2

DSP: 2 pieces at 2 3/4 by 6 1/4

Product List

Fabricate Friday – Votive Trio Box

Hi there.  Glad you stopped by.  I have a great box to share with you today and I am so very pleased at how it turned out.  I ended up giving it to my Mom for Easter (she’s the one who always comments on almost every post if you haven’t noticed).  Anyway, the info is after the picture, and then the list of supplies is after the video.  Enjoy the show.

Stampin' Up! Gold Soiree Trio Votive Box

  • Card stock: 9 1/4 by 5 3/4

Scoring: 1 3/4 on all sides

  • DSP sizing: 2 of 5 3/8 by 1 3/8
  • Inside separator insert DSP: 9 1/2 by 2

scoring: 1 1/2, 2 3/4, 4, 5 1/2, 6 3/4 and 8 inches.

  • Acetate Lid: 5 3/4 by 9

Scoring: 1 3/4 on all sides


Product List

Fabricate Friday – Ornate Tag Bag

Hi Everyone.  Here’s another little bag for you.  I’m still thinking Easter but it could be used for party favors or Christmas Tree ornaments.  Check it out.

Stampin' Up! Chalk Talk

DSP: 8.5 by 5.5

Scoring:

Long side: 2, 4, 6, 8

Short Side: 2

Product List

Fabricate Friday – Easter Basket

Oh my, it’s almost Easter.  It’s also a time where I find that many people head to the craft room to make pretty little boxes and bags for the young ones.  Here’s a cute project for you.  As always, there is a list below the video so you see what products I used.

Easter Basket Stampin' Up! Cheerful Critters

Card Stock: 9 by 8

Scoring:

Long Side 3.5, 5.5

Short Side: 2, 6

DSP: 3 3/4 by 3 1/4

Handle: 1 inch DSP 1/2 inch

Product List

Fabricate Friday – A Starbucks replicated bag

Oh, coffee…it’s a wonderful thing.  I call it my attitude adjustment in the morning.  I would be a serious grouch without it.  So I often buy pouches of the instant Starbucks coffee for myself and the salon (don’t knock it till you try it…it’s really good) and that is where I got the inspiration for this little gift bag.  Check out the video and if you need any of the supplies I used in this video please just scroll down after the video to the visual product link below and it will whisk you away to my online store where you can shop 24/7.

Starbucks replicated bag

Card stock: 9 by 9 square

  • Score one side :  half score at 1/2, Full score at 1, 4 1/2, second half score at 4 3/4, full score at 4 3/4, 51/4 and 8 1/2
  • Score the other side at 1 and 7 inches.

Notes:

  • I say a half score but I suggest scoring down to 6 inches or so.
  • That partial score is folded like an accordion.
  • Notch that accordion fold so you get a V shape when flat.

Watch the video for a tutorial. Enjoy the show.

Product List

Fabricate Friday – A Golden Soap Box

Hi friends,  I’m on a gold foil paper kick right now.  I am trying to use my paper products instead of hoarding them so this is the project that I choose to make for today.  Love the glitter and the shine.  Ha!  I’ve listed the products I used in this project below the video in case you wanted to grab yourself some stuff from my store.  🙂

Gold Soap Box

Card stock:  7 by 6 3/4

Scoring:

  • Short side (6 3/4 length at the top of your scoring tool): Score at 1/2, 1 1/2, 5 1/4, 6 1/4
  • Long side (7): Score at 1, 3 1/4, 4 1/4, 6 1/4

Check out the video for the tutorial.  The above measurements are the correct ones I promise.

Product List

Fabricate Friday – Yankee Candle Box

Oh my how I love this candle, it smells like heaven.  This is a project that I made to house said candle so it won’t rattle around in the box.  As always, if you need any of the supplies I used in today’s project just click on the visual link below the video and it will take you to my online store.

Yankee Candle Box

Base:

  • Card stock 9 by 9 inches
  • Score at 3 inches on all sides

Lid:

  • Card stock: 5 1/16 by 5 1/16
  • Score at 1 inch on all sides

Inner Holder:

  • Card stock: 4 15/16 by 4 15/16
  • Score at 1 inch on all sides
  • Use a circle framelit that fits your needs.

Product List

Fabricate Friday – Wee Pretty Paper Box

Hi Friends.

This is a cute project for all those paper crafters looking for wedding favor boxes or perhaps just a quick box for candies.  As always, if you need any of the supplies I used in this project click on the visual link below the video to get to my online store.

Wee Pretty paper box

Card stock: 8 3/4 by 6

Scoring; Short side 5/8, 2, on each side

long side: 1 3/8, 3 7/8. 5 1/4, and 7 3/4

Enjoy the show…

Product List

Fabricate Friday – Pauline’s Jam Jar Bag

Hi friends.

I thought I would share with you a project that my sister asked me to create to house 2 small jam jars.  As she lives in Calgary, I had to send them to her and it was really convenient that I was able to fold these bags flat.  Anyway, check out the video and as always if you like or want any of the products you see me use just click on the visual links below the video and it will take you to my online store.

Jam Jar Bag

You’ll need 2 pieces of DSP (pretty paper) sized 10 by 9 3/4.  The short side is basically the right way up (meaning if you have a pattern you’ll want it to run in the proper direction NOT the way I did it in my video).

  • Short side at the top score both pieces at 3 and 9 inches.
  • Turn so the long side (10 inches) is on the top of your score board and score both sides at 2 inches.

Check out the video for a how to tutorial (albeit slightly confusing but I’m sure you’ll figure it out). Enjoy the show.

Product List

Fabricate Friday – Bath Bomb Box

Hi Friends.

This project was a lot of fun to make.  Check out the video and as usual if you need any of the supplies to make this project please click on the product link below and it will take you to my online store.  Thanks again for tuning in and you have yourself a great weekend. 🙂

title page

For the base:

  • Card stock sizing 8.5 by 8.5
  • Score 2.5 on all sides

For the Lid:

  • Card stock sizing 5 1/16 by 5 1/16
  • Score at 3/4 on all sides
  • DSP (pretty paper) sizing 3 3/8 by 3 3/8
  • cut appropriate hole in the top for your project, I used the 3rd from the inside of my circle framelits.

Enjoy the show:

Product List

Fabricate Friday – EPB Blackboard Chalk Box

Stampin' Up! Envelope Punch Board Box

Well, this wee box could be given to your sweetie with some chocolates inside.  As I have said before the smallest boxes hold the best things. 🙂  This project is made using the new chalk board paper, chalk inks and my favorite stamp set (out of this new catalog – er well so far).  The measurements are after the video and a product list is following after that.  Enjoy the show.

Measurements

  • Cardstock: 6 by 6 inches
  • First punch at 2.5
  • Second punch at 4
  • turn and repeat for 3 times.

Product List

Fabricate Friday: Card Holder Box

Hi everyone.  It’s Friday and that means a box tutorial.  Today I’ve made a video using both the score board and the envelope punch board to make the same sized box to house your homemade cards in.  My client/customer Rose requested this size box because I hadn’t made one like this before.  The measurements are below the video and I hope you get inspired.  All products are listed at the end of this post.  Enjoy the show.

Score board Measurement

  • Card Stock  for base: 9 by 7 3/4

Scoring on all 4 sides at 1 1/2 inches.

  • Card Stock for Lid: 7 9/16 by 6 5/16

Scoring on all 4 sides at 3/4 of an inch.

Envelope Punch Board Measurement

  • Cardstock 10 5/8 by 10 5/8

First punch at 4 5/8 and second punch at 6 3/4.  Turn and follow score lines for the rest of the sides.  Round corners.


Product List

Fabricate Friday – Stampin’ Spot Box

A wee, dinky little box that would house something very small.  I often give little gifts to my customers who purchase Stampin’ Up! products through me.  Sometimes I get wee little squares of ink called Stampin’ Spots in my own paper pumpkin monthly.  Since I already have ink pads with refills, I sadly can’t use them.  However, I do like to share the wealth and pass them along.  Instead of just popping said ink in the bag full of goodies that my customers had purchased, I like to wrap the spots up in a cute little box.  It’s totally a simple build with a specific purpose in mind however, I can see a few choice candies in the box or a pair of earrings.  Anyway, check it out.

Stampin' Up! Stampin' Spot Box

Enjoy the show…

Cardstock: 5 ¼ by 4 1/2

Scoring:
Long side: ¾, 2 ¼, 3, 4 ½
Short Side: ¾, 3 ¾

DSP: 2 7/8 by 1 3/8


Product List

Save

Fabricate Friday – Big “EPB” Box

EPB?  Lol, it’s just the acronym for the amazing, the fun, and the brilliant “Envelope Punch Board”. You know that you can make envelopes with it, and I have shown you in the past a small fun dinky box, plus recently a DVD wrapping with it.  Today I am going to show you how to make a mammoth box with it.  Ha!  It turned out so well, and I am quite pleased at the decorating of it that I can promise you I have a smug smile on my face.  🙂  Check it out.

Stampin' Up! Envelope Punch Board Box

Enjoy the show.

Cardstock sizing: 12 by 12
Scoring:
Line up at the 4 inch mark, punch and score. Turn counter clock wise, line up the 4 inch mark punch and score. Turn counter clock wise, line up the 4 inch mark, punch and score. Flip the card and start again. Exactly the same, lining up the corner at the 4 inch mark, punch and score and do it on all sides.
Create the last 4 score lines to create the sides of the box by lining up a punched groove on the score guide line (kind of near the bottom right of the envelope punch board). Make the rest of the score lines that way.
DSP: 2 ½ by 4 7/8


Product List

Save

Fabricate Friday – Birthday Reminder Box

So, Christmas is over, it’s boxing day and more parties and gatherings are coming up.  Obviously if you are reading this blog you enjoy paper crafting and card making.  So you may have a bunch of cards hanging around and maybe have some storage boxes for said cards.  But do you have a perpetual calendar that reminds you of monthly birthdays to go along with your storage card box?  No?  This project is for you.  🙂  Check it out.

Stampin' Up! Birthday Reminder Box

Enjoy the show.

Cardstock Sizing:
Body of Box: 12 by 11
Inside pocket: 8 by 4
Lid: 10 1/16 by 7 1/16

Decorative Paper Sizing:
Top: 2 7/8 by 5 7/8
Front & Back (2): 1 ¾ by 5 7/8
Sides (2): 2 7/8 by 1 ¾

Scoring:
Body of Box:
Long side: 3, 9
Short Side: 5, 8

Inside Pocket:
Long side: 1, 7
Short side: ½

Lid:
Score 2 inches on all sides


Product List

Save

Video Friday – Clam shell box

I think this is my favorite build yet.  What a cute design and so interesting.  Love it.  It really kinda does open like a clam shell but I decorated it with Christmas paper so I am admittedly sure that it does not look like a clam shell.  Ha ha.  Happy Friday everyone.  I hope that your Christmas preparations are coming to a close and that you get an opportunity to share the spirit with your loved ones.  6 days left!!!

Stampin' Up! Clam shell box

Stampin' Up! Clam shell box

Enjoy the show.

Cardstock sizing: 11 7/8 by 8 ¾
Scoring:
Start on the short side: 2 7/8, 5 7/8
Long side: 1 ½, 4 1/2, 7 3/8, 10 3/8
Note: With the long side still on your score board, make a short score line to meet the first horizontal you come to (3 inch). You will make this short score line at 2 ½ and 9 3/8 flip the paper over and make the score again 2 ½ by 9 3/8.
DSP:
2 or 4 pieces at 2 ¾ by 2 ¾
6 pieces at 2 ¾ by 1 ¼
Note: Put dsp on before folding and gluing.


Product List

Save

Video Friday – Christmas Bag or Pouch

I’m trying my best to offer larger and larger paper craft items as not everyone has use for dinky boxes/bags.  After last week’s video tutorial with the rather massive triangle box, I thought I would try my hand at a larger bag.  I didn’t have a lot of ribbon to create it with so I used the last bit of satin ribbon I had to seal it together like a pouch.  Of course, as with all my projects, please adjust it to your needs.  Hope you like it, I really thought the tone on tone stamping was lush but I also liked the heat embossed one too.

Stampin' Up! Christmas Pouch

Enjoy the show….

Cardstock sizing: 2 pieces measuring 9 1/4 by 7 3/4

Scoring:
Long side: 2 ¾, 8 ¾
Short side: 1 ¾


Product List

Video Friday – Massive Triangle Box

I had wanted to try to make a bag or box that would fit a regular sized wine bottle but it does seem impossible with just one piece of 12 by 12 card stock so I accidentally came up with this rather large and imposing triangle box.  It is somewhat easy to make and I do say that when it comes together it is impressive.  A little weird and awkward to try to glue together but it does work.  I hope my instruction here is OK, and I apologize for the short comings of my video camera.  It likes to shut off at 20 minutes and this video is a few minutes past that.  However, I did manage to splice it together and have one long video for you to view.  Hope you like it.

Stampin' Up! Triangle box


Enjoy the show.

Body Cardstock sizing: 12 by 12
Scoring:
One side: 3 ¾ by 7 ½, 11 ¼ (make a tick mark at 1 7/8, and 9 3/8.
The other side: 3 ¼
DSP:
3 pieces of 8 ½ by 3 ½

Lid Cardstock sizing: 5 ¼ by 5 5/8
Scoring
Short side: 1 and 4 ¼
Long side: 1, 4 7/8 (make a short score to the first horizontal score line at 1 inch) at 2 7/8

Hand scoring on both body and lid:
Score with the use of a ruler from corner to the tic marks to make the triangle.


Product List

Save

Video Friday – Hot Chocolate Pouch

Hi there, it’s that time of year where we are gathering our items to be given and trying to wrap them in interesting ways.  This super cute pouch was specifically made for hot chocolate packages but I can see them being used for specialty teas, gift cards, perhaps event tickets such as concerts and movies.  The lists are endless with this simple yet kooky design.  I hope you enjoy the project.

Stampin' Up! Hot chocolate Pouch

Enjoy the show…

Cardstock sizing: 4 ¼ by 11
Scoring:
Long side: 2 ½, 7, 7 1/8, 7 ¼

DSP: 3 ½ by 4 1/16

Note:
At ¾ of an inch from the front, bottom fold- in the center 2 1/8 and mark a horizontal inch long pencil mark. Use a quarter and pencil in a half circle. Carefully using a craft knife cut the half circle and file away any rough paper.


Product List

Save

Save

Video Friday – Squashed Tubes for you

This project is designed to use one sheet from the designer series paper stacks.  The paper stacks are affordable at $8.50, pre cut to a size of 4 1/2 by 6 1/2 and there is 48 sheets per stack.  I love using them for cards, paper crafts and to decorate up a mini album page or to matt pictures.  Now, in saying that the sizing is perfect from your paper stack, you can cut any pretty paper to make this project, and that is what I did in the demo today.  You can see that the first picture below is from a paper stack but the ones I made in the video is from our new christmas paper cut down to size (I wanted to use the star framelits and thought the star paper would go nicely).  Anyway, here is the project called “squashed tubes” and I hope you like it.

SAMSUNG DIGITAL CAMERA

Enjoy the show.

DSP sizing: 4 ½ by 6 1/2

Note: In the video I did not correctly name the punch I used.  It’s called the Label Bracket punch.  Click the picture below to head to my online store for purchase! Shop 24-7!!!


Product List

Save

Video Friday – Stars Box

Ok, I have the perfect little box for Ikea tea lights.  Finally.  I fashioned this box after seeing the boxes I use all the time at the salon.  I really like the final result.  Hope you enjoy the project too.  🙂

Stampin' Up! Stars box

Cardstock sizing: 9 ¾ by 6 1/2
Scoring:
Long side: ½, 1 ¾, 8, 9 1/4
Short side: 1 ¼, 2 7/8, 4 1/8, 5 ¾

DSP: 6 by 1 3/8


Product List

Save

Video Friday – A day late – DVD Wrap

Hi there.  Happy Saturday to you.  I really don’t know where the original post for this video went…I noticed that it was not aired and I am really sorry that happened.  This little project is for those of you who are giving DVD’s or things that are shaped like DVD’s (like our clear mounted or photo polymer stamp sets) for a gift.  One of the nice things about this project is that it uses the envelope punch board.  It’s not just for envelopes you know.  😉

SAMSUNG DIGITAL CAMERA

Enjoy the show.

Card Stock: 10 3/4 by 10 3/4

  1. Line up at 4 1/2, punch and score then slide to 5 -punch and score.
  2. Rotate 180 degrees and repeat step 1.
  3. Flip over, line up at 4 1/2, punch and score then slide to 5 -punch and score.
  4. Rotate 180 degrees, line up at 4 1/2, punch and score then slide to 5 -punch and score.
  5. Line up score lines to the dial and score (no need to punch as it should already be done).
  6. Round all corners.
  7. Cut 2 bottom squares to be tabs.
  8. Cut away 2 top tabs.
  9. Place DVD sized object in package, secure the flaps with adhesive.
  10. Optional, cut a slit for the open flap to be inserted.

Product List