It’s video Friday again and I am very please to share with you a lovely little box that could easily hold a large piece of home made soap or really anything that you wanted. I love the new papers I used and just really had fun creating them (as you can see I made several). I hope you like this project and will come back next Friday for another Stampin’ Up demonstration tutorial.
Enjoy the show…
To make this Project:
Supplies:
Cardstock: 7 ½ by 8 1/2
Scoring:
Long side: 1 1/8, 3 7/8, 5, 7 3/4 inches
Short side 5/8, 1 ¾, 5 ¾, and 6 7/8 inches
DSP:
2 pieces at 3 ¾ by 2 ½ inches
2 pieces at 7/8 by 3 ¾ inches
2 pieces at 7/8 and 2 5/8 inches
It’s video Friday again and I just have to say this is a pretty cute project that I am sure will get lots of use if you choose to make it. I hope you do! So cute and fun. Don’t you just love the new Moonlight Designer Series Paper? It’s totally my favorite. Love it.
Enjoy the show…
To make this Project:
Supplies:
Cardstock: 11 by 10 1/2
Scoring:
Long side: 1, 3 1/2 , 6 & 8 1/2 inches
Short side 2 ½ and 8 inches
DSP:
3 pieces at 5 ¼ by 2 ¼
1 piece at 2 ¼ by 2 1/4
It’s video Friday and boy do I have a giant sized box for you today. Small boxes are great but it’s also nice to have a larger one every now and again to house larger items. I love how this project turned out (even if the video was working against me this time). I’m still new at this so please bear with me. 🙂
Also I just wanted to remind all my customers that I will be making an order the first week in July so if you have a “want list” you may want to shoot me an email at sunnstampin@gmail.com so I can place it for you. If your merchandise order is less than $100 it’s best to order through me as you will get shipping at a lower rate. If your order is more than $100 then your shipping will be the same as mine so you could order online through Stampin’ Up and get the products sent to your doorstep. I’d like to announce one more thing, Stampin’ Up is having a designer paper deal for the month of July (buy 3 and get one free), you’ll find the selection of papers on page 186 and 187 of the new catalog. Specialty papers or paper stacks do not apply sadly. If you need a catalog please let me know.
Enjoy the show…
To make this Project:
Supplies:
Card stock 12 by 12
Scoring:
Score at 2 7/8, 5 ¾, 8 5/8, and 11 ½ inches
Turn and score at 2 7/8, 8 5/8 and 11 ½ inches
DSP:
4 pieces at 5 ½ by 2 5/8 inches
1 piece at 2 5/8 by 2 5/8
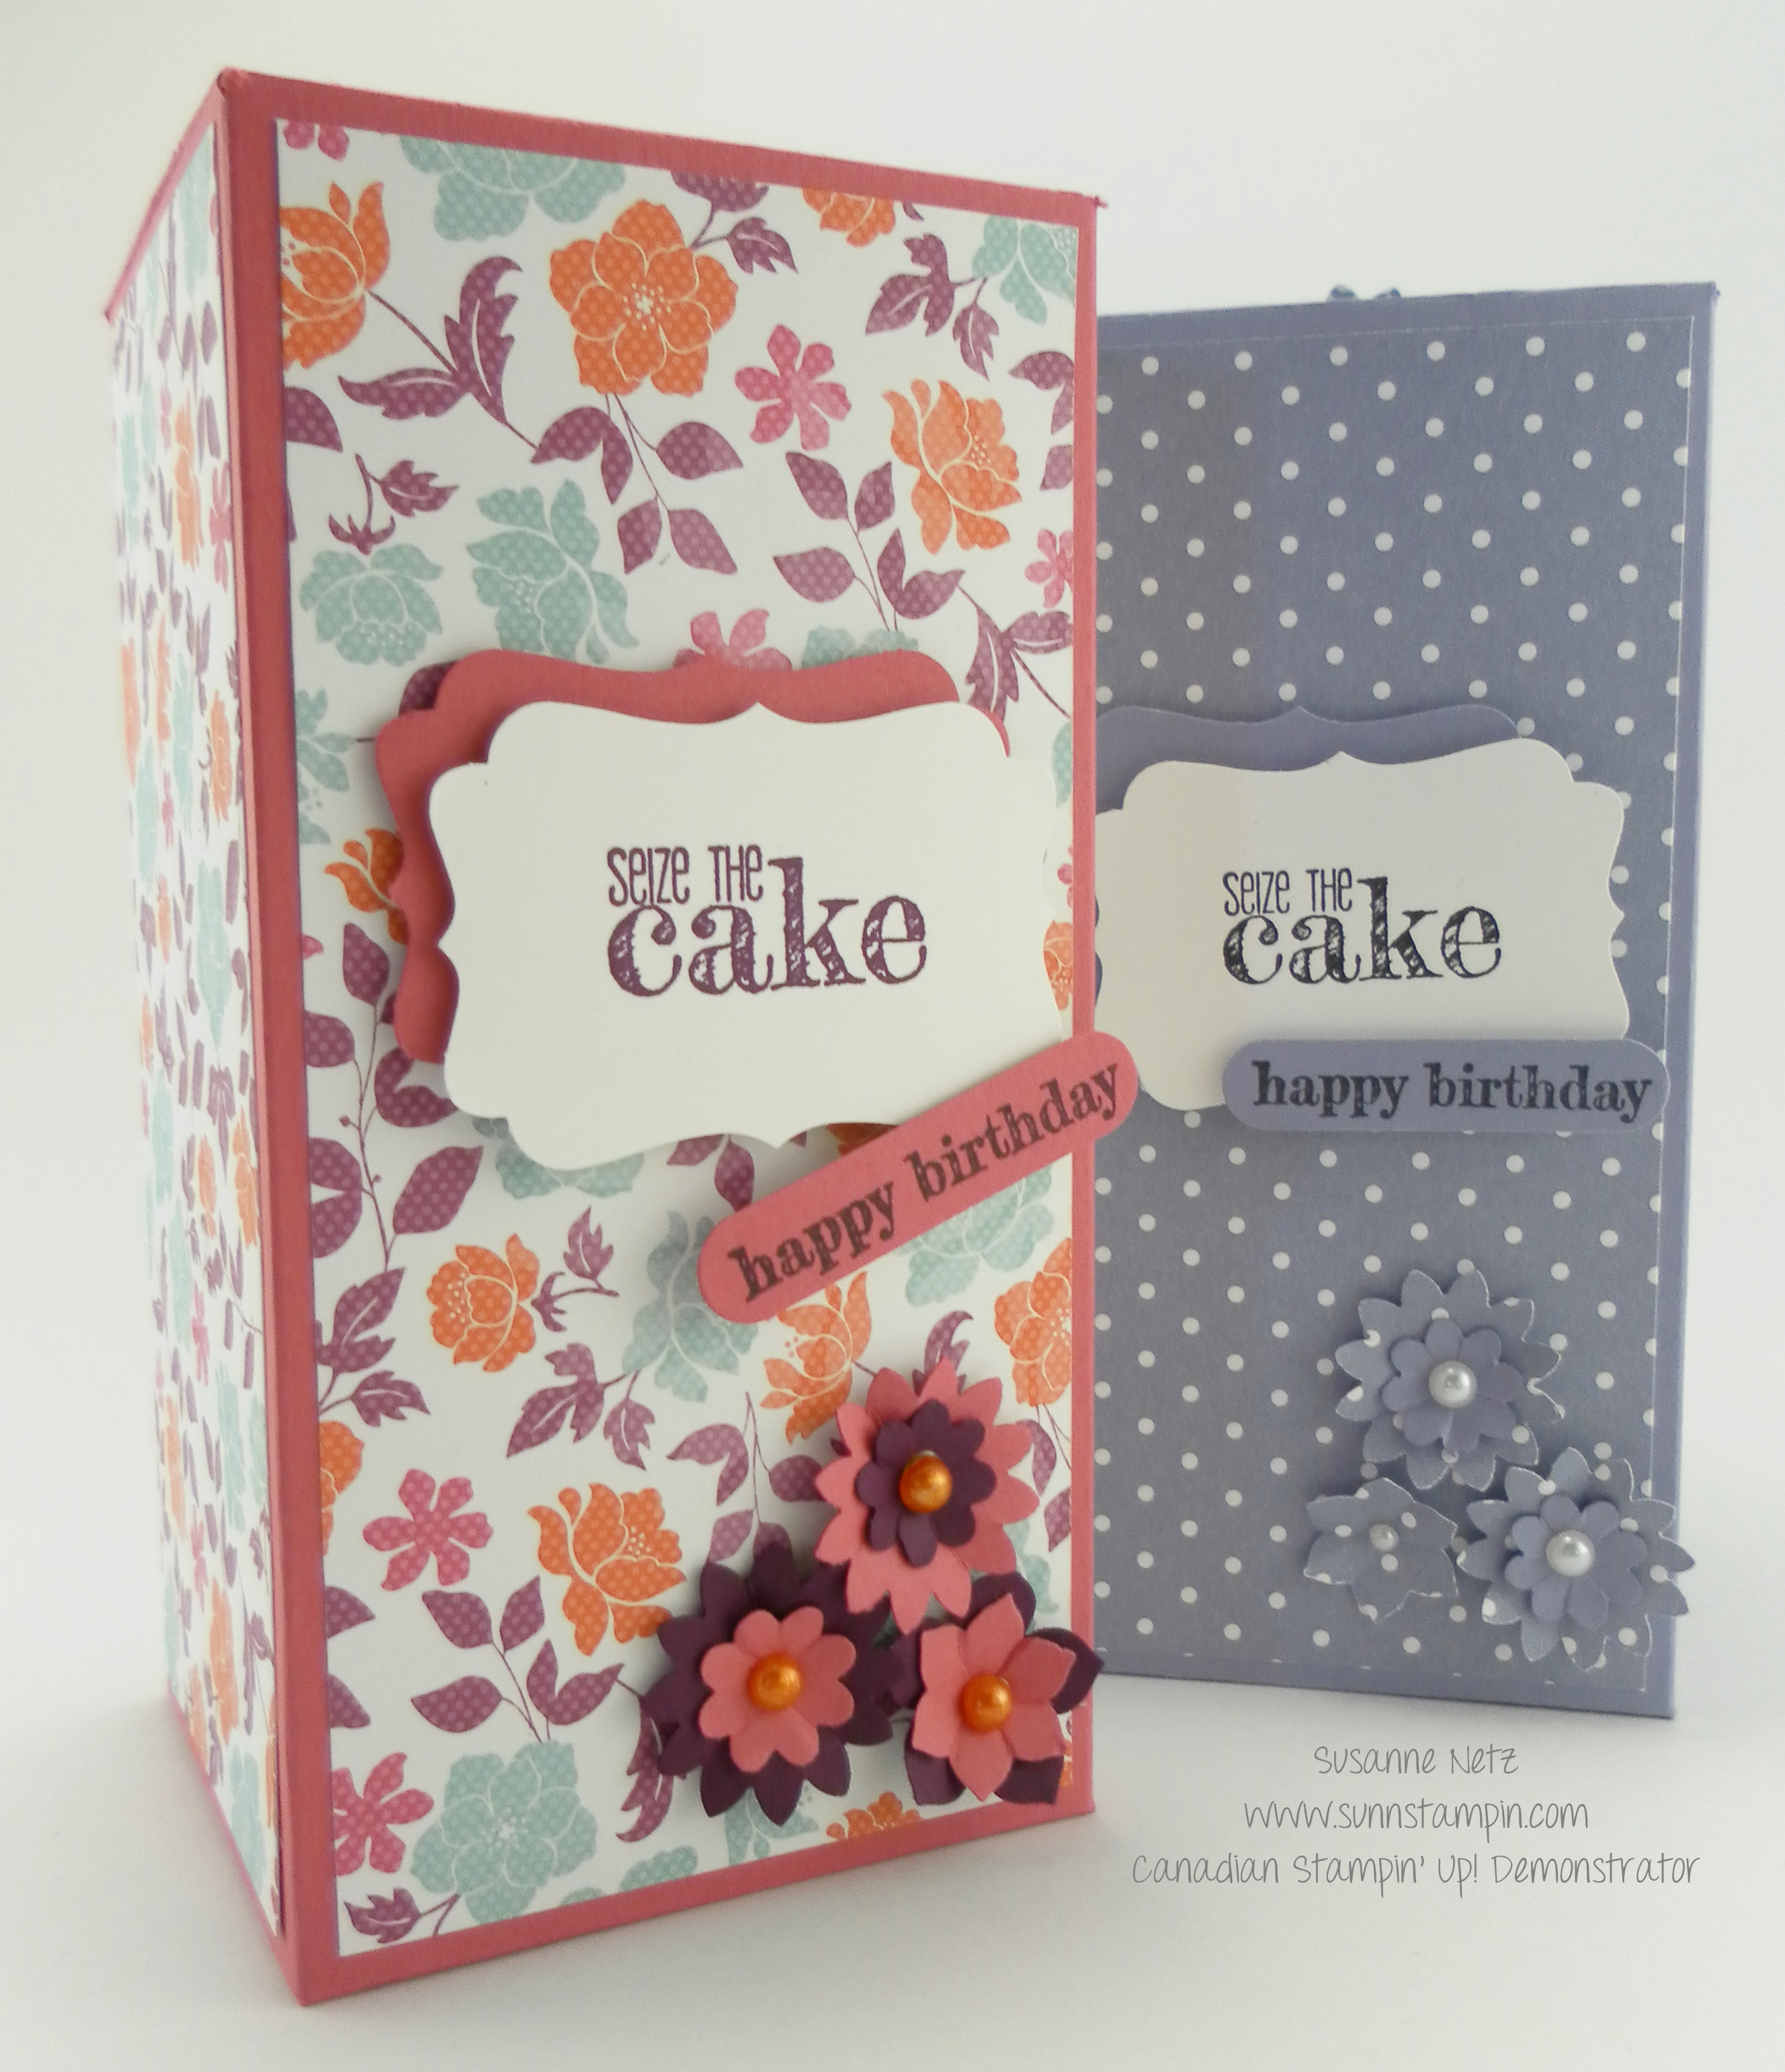
It’s video Friday again and I have another similar sized box that I did yesterday but it’s very different in construction. I really like lidded boxes and although last week I featured a flip lid box, I think I may like this one just a little more. Tell me which one you like best.
4.5 Lidded Box
To make this Project:
Supplies:
Box Lid: 7 9/16 by 4 13/16 inch cardstock
Box: 7.5 by 4 ¾ inch cardstock
DSP :
1 piece of 4 ¼ by 1 5/8 inch dsp for top
2 pieces of 4 ¼ by 1 ¼ inch dsp for front and back
2 pieces of 1 5/8 by 1 ¼ inch dsp for sides
It’s video Friday!!! This little box would be perfect for putting a little treat in for your loved one, or could be easily used for a party favor or to use as a small box for a special birthday present. I quite like the way it turned out. I hope you do too.
Here are the photos and the video is down below.
4.5 inch Rectangle Flip Lid Box
To make this Project:
Supplies:
Cardstock: (if you wanna use dsp instead you can as in the example I showed you. Just disregard the following DSP measurements) 12 by 4 inches
Scoring:
Score on long side: 1, 5 ½, 6 ½ and 11 inches
Score on short side: 1, & 3 inches
DSP:
Top: 4 ½ by 1 ¾
Front and back: 4 ½ by ¾ Sides: 1 ¾ by 3/4
It’s video Friday and I am going to demonstrate how to make a very simple box that can hold a wonderful treasure. This project was inspired by a little box that came from Italy and it has a 80 year old balsamic vinegar in it, hence the name “vinegar box”. I love the size and as I said in the video I have made 8 to give out to the attendees of my very first workshop. I am sure they will all be excited to see how it was made. A note here that the venetian romance designer series paper that I used to decorate the box will not be available for purchase after June 2, when the new catalog is relased. However, I have the catalog in my hand and there are some really beautiful new papers for sale. Gotta love Stampin’ Up! Out with the old gorgeous paper and in with the even more gorgeous paper. I can’t wait to show you…want a catalog? Email me at sunnstampin@gmail.com and we will work out the details!
Enjoy the show.
To make this Project:
Supplies:
1 8 ¼ by 8 ¼ inch cardstock
4 pieces of dsp measuring 3 by 1 ¾ inches
1 piece of dsp measuring 1 ¾ by 1 3/4
Scoring:
Score at ½ , 2 ½, 5 ¾ and 7 ¾ inch marks
Turn around and score at 2, 4, 6, 8 inch marks
Tools I Used:
Scoring Tool
Sticky Strip
Thank you for watching, see you next week with a new stamp set, 4 cards and another paper crafting adventure video.
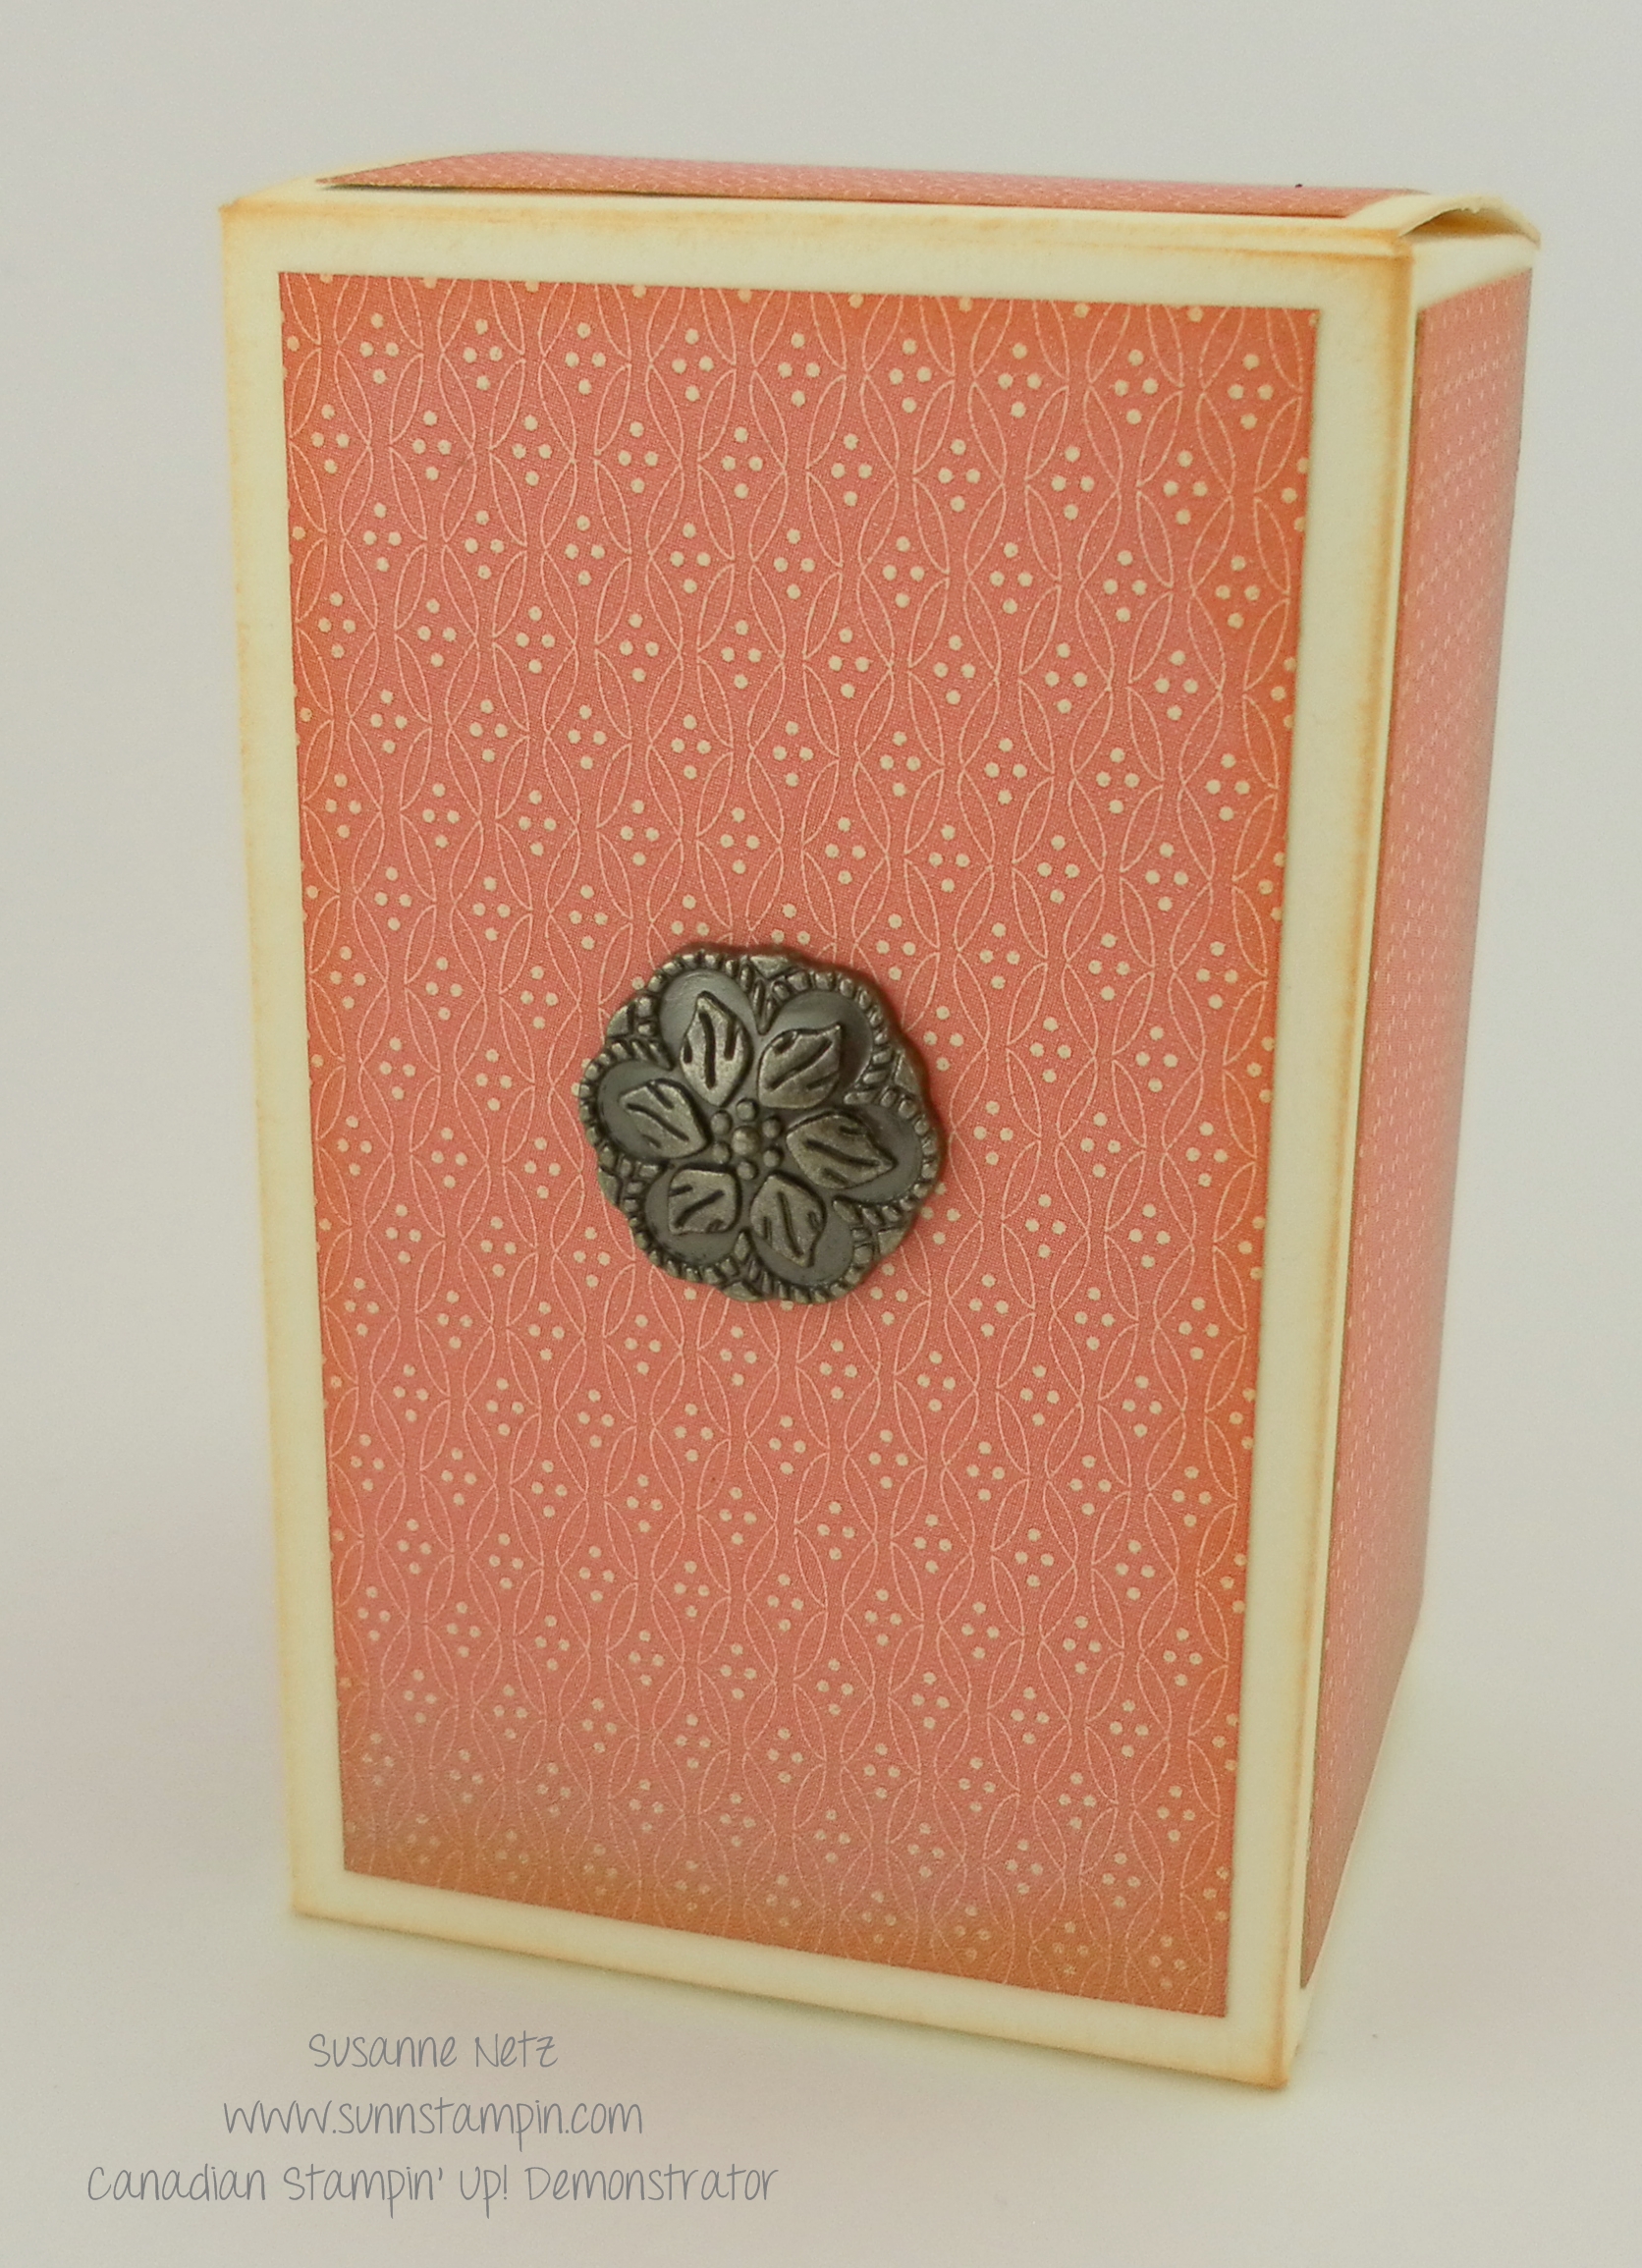
Oh my, I love this box…like so much. It’s really simple to make, it’s a nice large size so you can put any number of things inside. It is 7 inches long and 2 inches wide and deep. I’m so not giving this box away. No way. It’s mine. Also, the punch pack and stamp set called Lovely Little Labels are now retired. You may still be able to get them if they haven’t sold out (#126881 and # 126262). I love my little set and now you can see how cute it is on a project.
Enjoy the video, I hope you try it with a designer series paper you love and pretty up the box with a special embellishment.
To make this Project:
Supplies:
One 8 1/2 by 11 inch piece of card stock
DSP: 3 pieces of 6 3/4 by 1 3/4 inch designer series paper for the top, front and back.
DSP: 2 pieces of 1 3/4 by 1 3/4 for the sides.
Scoring:
Score on the long side at the 2 and 9 inch mark.
Score on the short side at the 2, 4, 6, and 8 inch mark.
TGIF! The week is done and it’s time to craft to your heart’s content. I am so excited to show you this week’s project as it features one of my favorite tools the ENVELOPE PUNCH BOARD. Not only is it under $25 it will make 66 different sizes of envelopes, has a corner rounder in it and a scoring tool (that could be used as a bone folder) AND it can make cute boxes like this one.
Enjoy the show my pretties.
To make this Project:
Supplies:
One 6 by 6 inch piece of card stock
DSP: 1 piece of 2 by 1 1/2 inch designer series paper for the top.
DSP: 2 pieces of 1 1/4 by 2 inch designer series paper for the front and back.
DSP: 2 pieces of 1 1/4 by 1 3/8 inch designer series paper for the sides.
Punch and Score:
Punch and score at the 1 1/2 and the 4 inch mark. Turn paper counter clock wise and use the scoring nob thing to line up and then punch and score again…do this 2 more times. Product List
Ok, so I admit, sometimes I get really distressed at all the things sitting on my desk. Yes, all these things are needed but really, can’t they be pretty? I enjoy taking the every day mundane things and making them look stunning. This project is an example of that. It was inspired by the mini glue dot box that one gets from Stampin’ Up! There is nothing wrong with the box other than it’s not pretty and I can see from my living room all the un-pretty things on my desk.
Don’t you just love the little Lotus Flower?
To make this Project:
Supplies:
One 8 3/4 by 6 1/2 inch piece of card stock
DSP: 2 pieces of 2 3/4 by 2 3/4 inch designer series paper for the top and bottom.
DSP: 4 pieces of 2 3/4 by 7/8 for the sides.
Scoring:
Score on the long side at the 1 1/8, 4, 5 1/8 and 8 inch mark.
Score on the short side at the 3/4, 1 3/4, 4 3/4, and 5 3/4* inch mark.
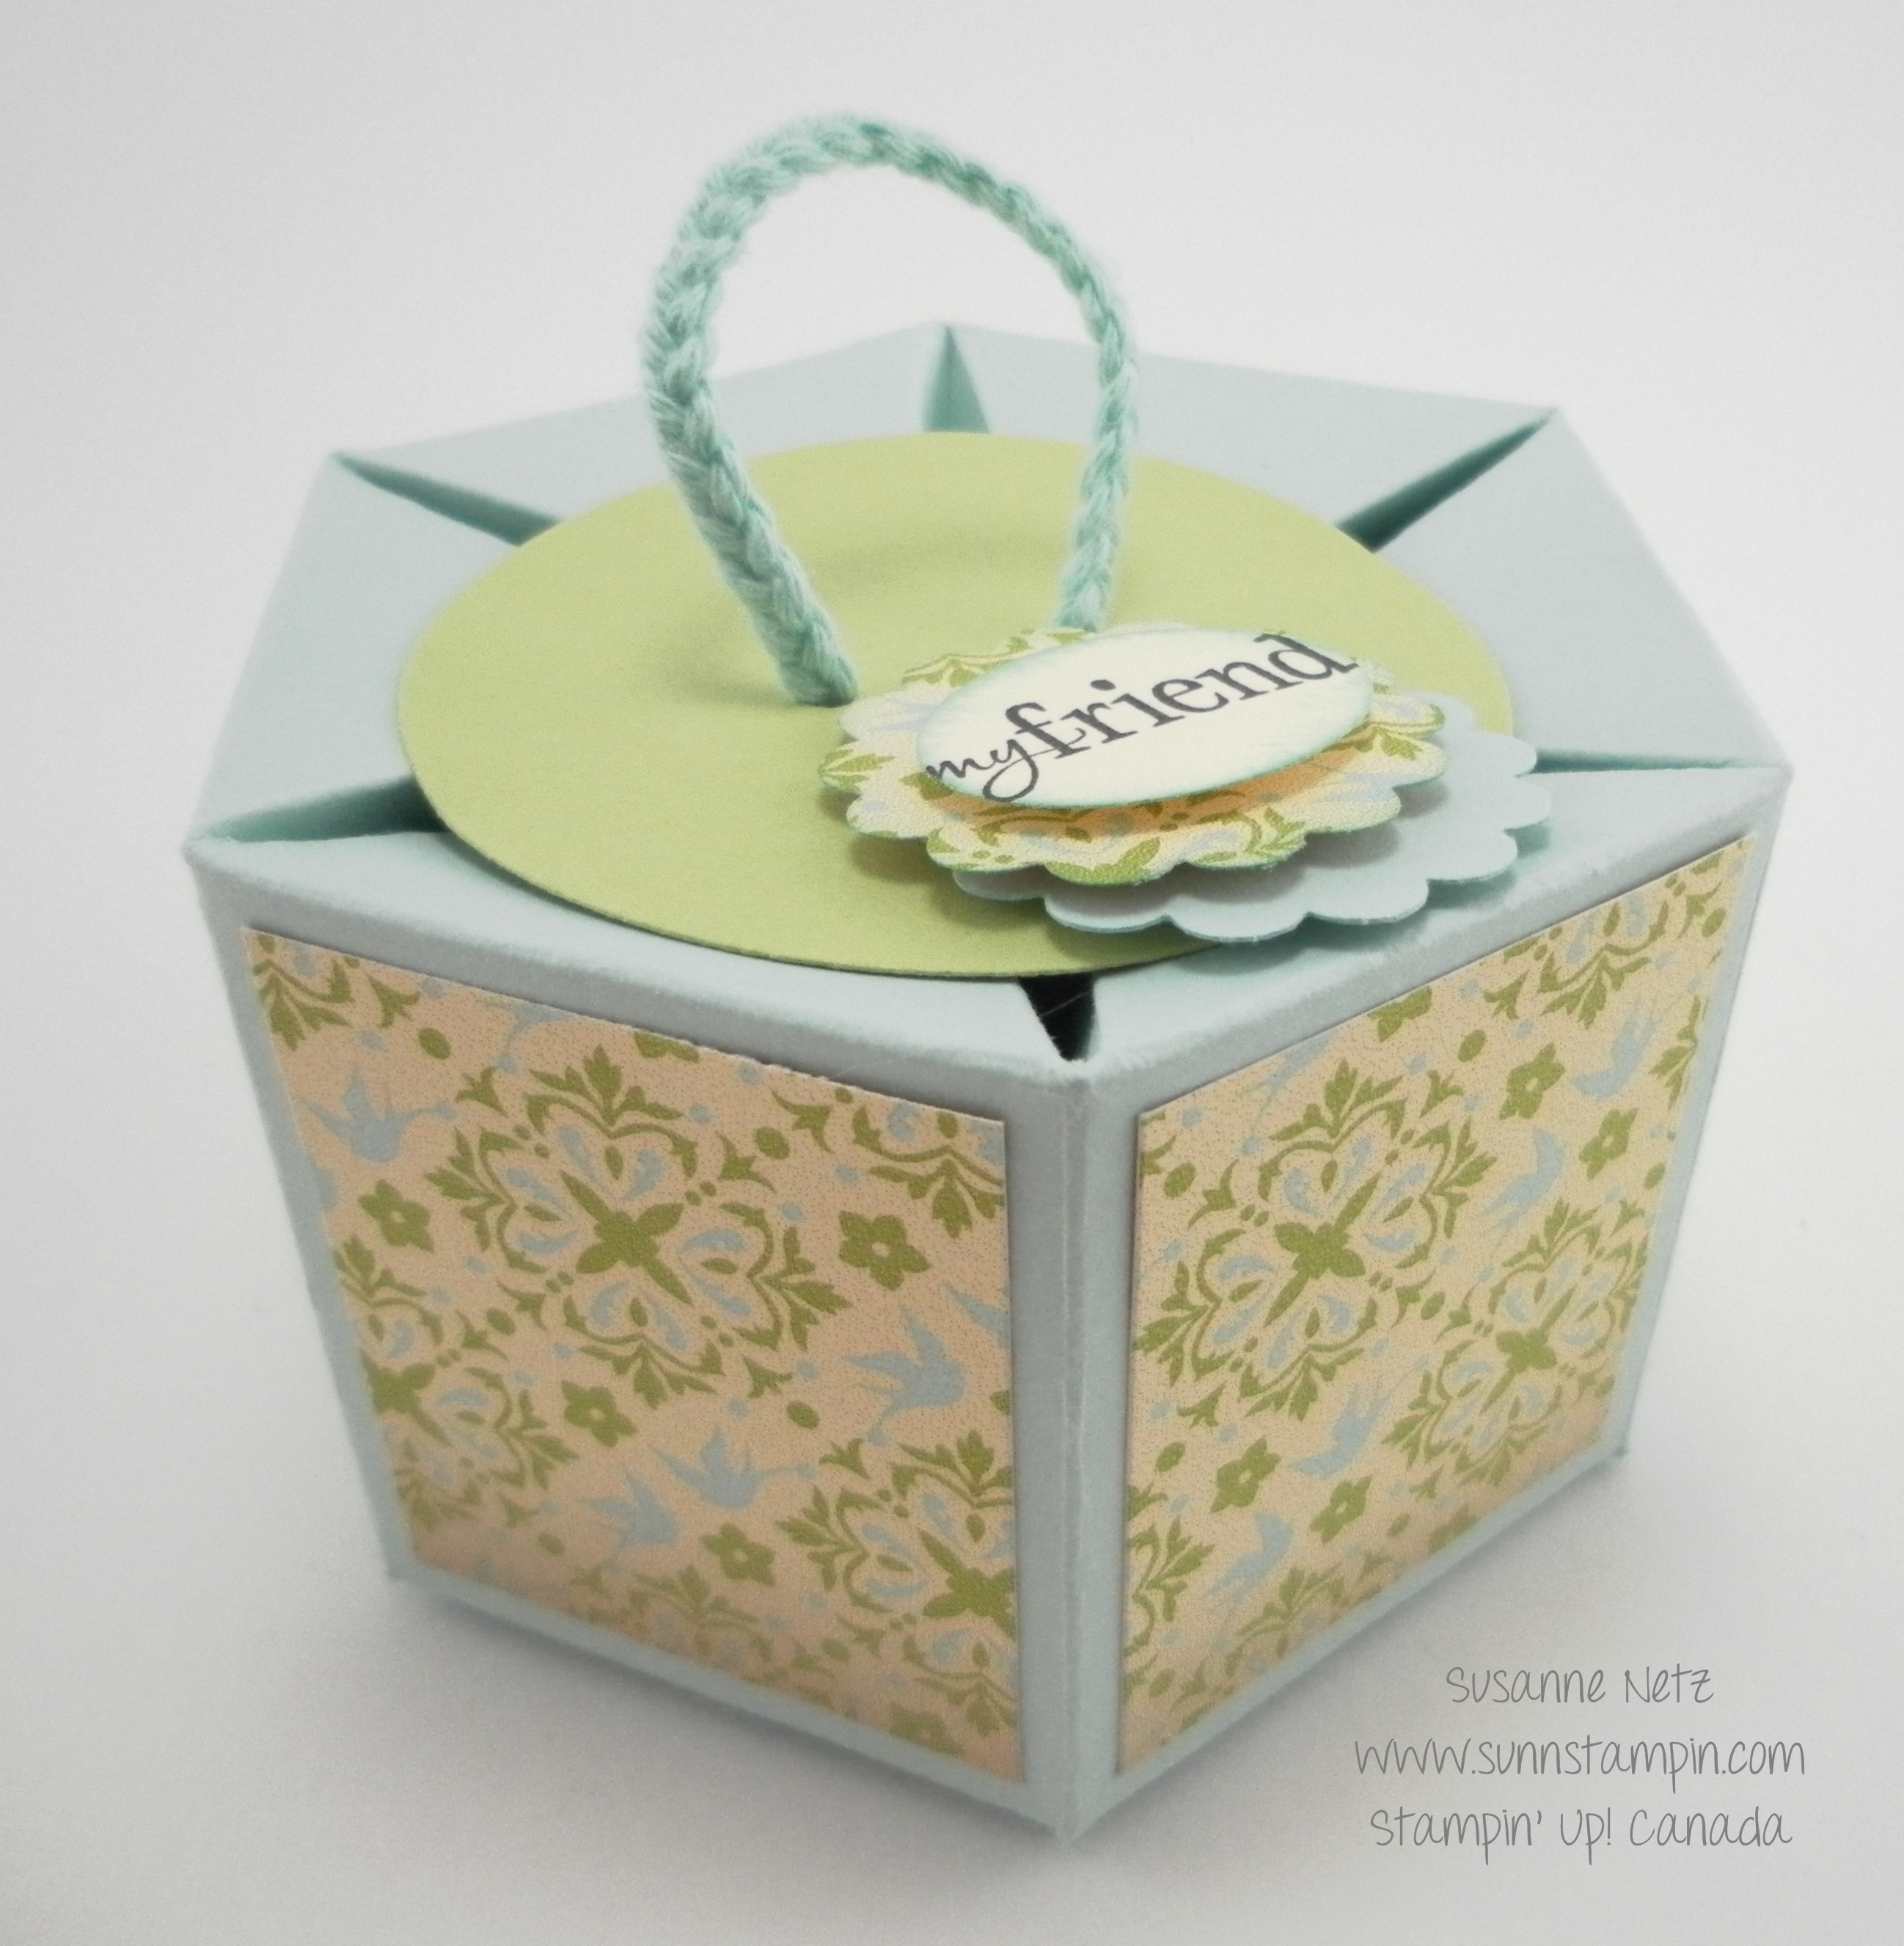
Hi, it’s video Friday and I have a wonderful project for you today but before I get into that I wanted to share with you a little bit of Stampin’ Up! excitement. The new 2015 catalog is now released for distribution and I have a few being shipped to me. I am only giving an advanced copy to those people who purchase from me this month. June 1 I will be adding a PDF file to this site so you can download it for free there.
Now get ready for some craftiness. This hexagon box was a bit more difficult than I had intentionally planned it to be but in the end it turned out really cute. As I said in the video, I did have a few takes of this project and ended up having to swap out part of the project for steps that I had did off camera. I really want my tutorials to be somewhat quick. For the first 3 people who comment (nicely) I will send a hexagon box. Free of charge! Gotta love freebie’s!
Enjoy the show….
To make this Project:
Supplies:
One 10 3/4 by 5 1/2 inch piece of card stock
DSP: 6 pieces of 1 1/2 by 1 3/4 inch designer series paper
Scoring:
Score on the short side at the 2, 4 and 5 1/4 inch mark.
Score on the long side at the 1 3/4, 3 1/2, 5 1/4. 7, 8 3/4 and 10 1/2 inch mark.
Score from the top to the small score line and press a “notch” at the 7/8, 2 5/8, 4 3/8, 6 1/8, 7 7/8 and 9 5/8 inch mark.
I love, love, love this sweet little box. I really enjoyed making this one and I have to tell you that some things don’t come together so well on film. I’m so pleased this one turned out sooooo well. I’m just a happy crafter right now.
Enjoy the show….
To make this Project:
Supplies:
One 10 1/2 by 8 1/2 piece of card stock
DSP: 5 pieces of 2 1/4 by 2 1/4 inch designer series paper
Hello and thanks for stopping by on video Friday. I’m working really hard on making these video tutorials informative and easy to follow. I am not a natural at these recordings, however I am trying to make them more entertaining as I go. I hope you’ll be patient with me. It’s not easy! This was one of the first “paper crafting projects” I ever created and now have numerous ones around my desk and I’ve made some of my crafty friends (you know who you are 😉 ). It’s really simple, it’s extremely useful and it will make your craft room a little more organized. I like quick projects like this. Feel free to comment, you know I love it. 🙂
You can also check out the other videos I have posted via my you tube channel HERE.
Well, it’s video Friday isn’t it? I sure hope I will get the hang of video taping myself. The purpose of these videos is to demonstrate the versatility of paper and how it could be a wonderful addition to your card making. I love building the projects and just adore decorating them. I do hope you try to make some of the projects I showcase and just because you may not have all of the tools doesn’t mean you can’t make them. The scoring tool for instance is just to make things easier however, it you have a ruler and something dull like a bone folder or a cheese knife you can do it too. As I mention in the video that the build or the “recipe” is the same for all sizes of the boxes I show you. However, what I didn’t say was their dimensions. They are added at the bottom of this post. Enjoy the video.
To make this Project:
Base of Box:
One 9 by 9 square piece of card stock
Scoring: Score at 3 inches on all sides
DSP: 4 pieces sized at 2 7/8 by 1 7/8
Box Lid:
One 5 1/16 by 5 1/16 square piece of card stock
Score at 1 inches on all sides
DSP: 1 piece 2 7/8 by 2 7/8 for the lid and 4 pieces of 2 7/8 by 7/8 for the sides
Tools I Used:
Simply Scored Scoring Tool #122334
Scalloped Oval Punch # 119856
Large Oval Punch #119855
Other Dimensions:
2×2 box with lid
6 x 6 card stock for base, scored at 2″ on all sides
4 1/16 by 4 1/16 card stock for lid score at 1 inch on all sides
DSP for base and lid sides : 8 pieces sized 1 7/8 x 7/8
DSP for Top: 1 piece 1 7/8 by 1 7/8
4×4 box with lid
12 x 12 card stock for base, scored at 4 inches on all sides
6 1/16 x 6 1/16 for lid, scored at 1 inches on all sides
DSP: For base 4 pieces of 3 7/8 x 2 7/8
For Lid: 4 pieces of 3 7/8 by 7/8
For Top: 1 piece of 3 7/8 by 3 7/8
1×1 box with lid
3×3 card stock for base, scored at 1 inch on all sides
2 1/16 x 2 1/16 DSP for lid, scored at 1/2 inch on all sides
Come back Monday and see a whole new stamp set featured and a new video on Friday. Subscribe to my blog so you don’t miss out! Until next time…